Adjusting Fixed Sights
We recently heard from a gentleman who was having trouble regulating the sights on his revolver. In short, things did not go well, and he was looking for solutions. I’m a huge fan of fixed sight revolvers, and frequently fight the battles necessary to get them shooting to the sights. In so doing, I’ve learned a few things.
Before you can solve any problem, figure out what it is, and how big it is. A gross adjustment on a fixed sight system might require more than just a simple movement of the front sight. It may need some machine work to the rear, or even a new front sight. Carefully determine the amount of error, at a couple of known distances, and with any ammunition you might be inclined to use. You’ll likely find variations in loads will give you an average you can use to arrive at the degree of correction you need. Be diligent in this phase, as it will weigh heavily on an adjustment that might be permanent.
To accurately figure the amount of correction needed, multiply the “error” by the sight radius, and divide this by the distance from the target, all in inches. A 2″ error at 15 yards from a 43/4″ SAA would read “2 X 5.75 / 540 = 0.021” indicating a front sight movement of 0.021″. Let’s say the error is to the left. This means the top of the front sight on this old Colt has to move left, which involves turning the barrel in (or clockwise).
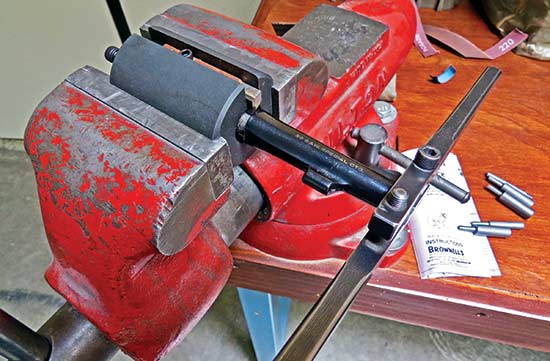
The Beast — Brownells’ “substantial” action wrench!
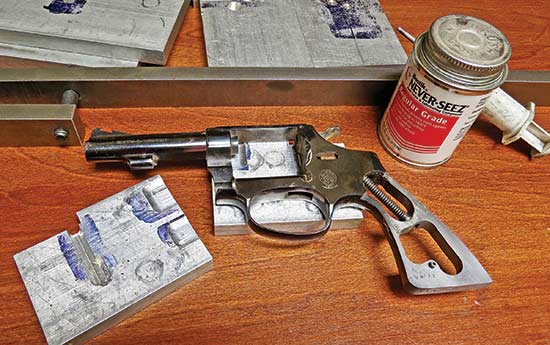
Aluminum support plates for S&W revolver frames have endless uses and
allow you to easily clamp the frame in a vise.
Lathe or Not?
After removing the barrel and cleaning the threads, applying a small amount of Never-Seize to threads and shoulder will likely allow the correction without heroics. It can be slow going, because it’s not easy to get any sort of precise measurement of your adjustments so be patient! Under no circumstances should you attempt the short-cut of “just tweaking the sight” a little. The sights are typically soldered in, and will break out if you try and force them to bend.
Let’s say the error was in the other direction so we have to “loosen” the barrel to move the sight. This can cause some problems, as you don’t want a barrel so loose it keeps trying to work its way out. In this case, a “set-back” is called for, involving removing material from the barrel’s shoulder so it can seat properly and index the front sight where it should be. This is best left to a qualified gunsmith and accomplished on a lathe.
For the stalwart soul who doesn’t have a lathe, but likes to do his own work, Brownells sells a fantastic “Setback” tool letting the user set back the shoulder accurately. A very well thought-out tool, it can be adjusted for depth, and eliminates the need for expensive fixturing. I tried one on an S&W barrel I was setting back, and it worked flawlessly. Remember though, every time you change something, you change everything. You’ll also have to re-set your barrel/cylinder gap, your forcing cone and depending on the type of revolver, the ejector rod and/or housing.
Brownells’ ingenious set-back tool — a lifesaver if you don’t have a lathe!
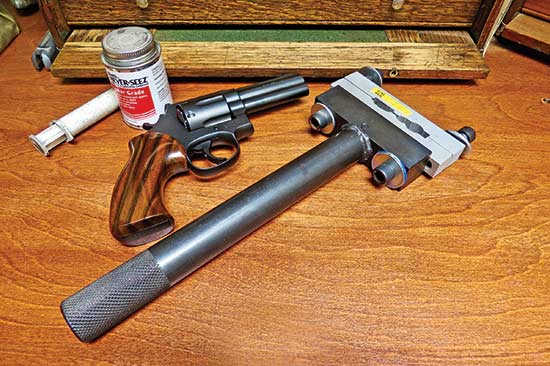
Holding It
Of critical importance to anyone attempting barrel removal/replacement on revolvers is properly supporting the frame during the process. I’ll never forget watching an older smith replace the barrel on an SAA when I was a kid. He held the barrel in wooden blocks with rosin in a vise, and jammed an oak board in the cylinder cutout and used it as a wrench. He had a surprised look on his face when the base pin wouldn’t seat in the recoil face, but no worries, he just held the frame’s front in a vise, and pried on it until the pin went in!
Fortunately, we’ve evolved, and the importance of supporting the frame offers us solutions in several styles. Our friends at Brownells make a versatile action wrench accepting inserts sized to support specific revolver frames. It’s tank-tough, and is also adaptable to rifle receivers, so it’s a tool no serious hobbyist or professional should be without. I also favor supporting the frames of revolvers between machined aluminum plates and turning the barrels. The plates can be mounted in a vise, or on an angle-plate for machining. They offer great support, and also good visibility of the sight plane when making small adjustments.
While single-action barrels typically require the use of a conventional barrel vise with sized blocks, DA barrels, like those on S&W revolvers, have ejector rod housings, under-lugs, or ribs allowing the use of a barrel wrench for turning. I find that when applicable, this gives me better control. Remember, the use of an anti-seize compound on threads and shoulders will allow for finer adjustments, made with less force and less stress on the components.
And a reminder — don’t try any of this unless you’ve thought it through and have the skills to do it.