Customize A $200 Gun? Of Course!

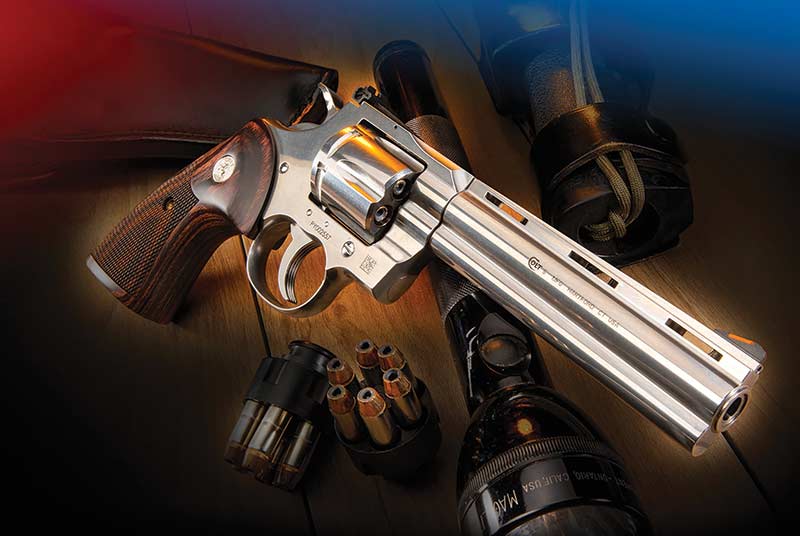
Ruger’s Wrangler offers some great value and fun for about $200 in the real world. This is how Roy’s gun began life.
I suspect Ruger had an inkling of the pending home run about to be hit when they released the price-point Wrangler SA .22 revolver. In one, well-thought-out swoop, Ruger opened the door to their .22 single action revolvers to a new cadre of shooters.
The Wrangler has steel parts where it matters, like the forged barrel, cylinder, pins, screws and the MIM action bits. The frame is a machined, cast aluminum alloy and the grip frame is a cast zinc alloy. The finish is Cerakote and Ruger substitutes rather nice plastic grips for wood. Yes, the cast grip frame might have a tiny pinhole or two sometimes and there’s no denying the casting lines, but the gun build is solid and has proven to be reliable. I’ve had a dozen or so through my hands — including the latest Birds-head grip frame offering — and all shoot reliable 2″ to 3″ 25-yard groups. They feel good in the hand, at about 30 oz. or so, and the “clicky” sounds and single-action feel are comforting and fun.
In short, they are delightfully entertaining, accurate enough to hunt small game or engage in informal target shooting, and make dandy trail, boat or truck guns. They’re also spot-on as first-revolvers for new or younger shooters. Remember that home run? Now you can see why.
Being made to a price-point, however, compromises are evident, although not terribly inconvenient in the real world. The action can be a bit rough until it smooths out with use, and a new gun can use some oil in the innards when you first get it. All of which means — not being able to leave such things alone — I soon had my first Wrangler in pieces on my gunsmithing bench. What I saw was a good design crying out for a bit of smoothing, polishing and tweaking. Why invest time, energy and even money in such an affordable gun? That’s easy, because there’s cheap (as in it doesn’t cost much) and cheaply made (as in bad design and workmanship). The Wrangler is firmly in the prior spot and deserves a steady hand at some improvements.
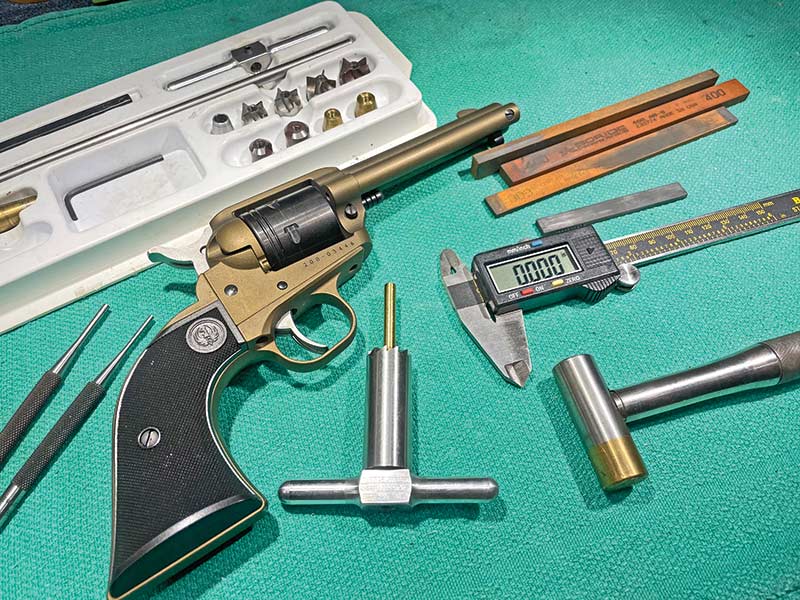
Basic gunsmithing tools are needed for a project like this. Caliper, stones,
punches, abrasive papers and special tools like the chamfer kit are handy.
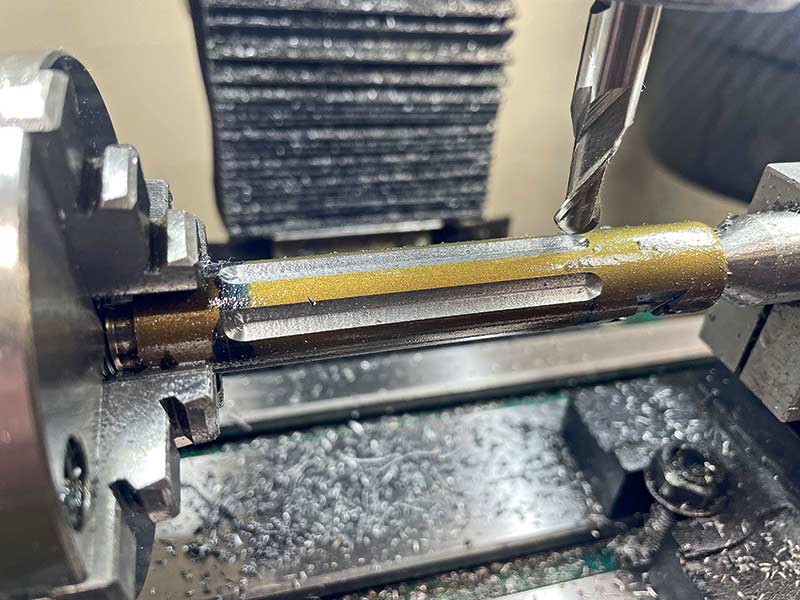
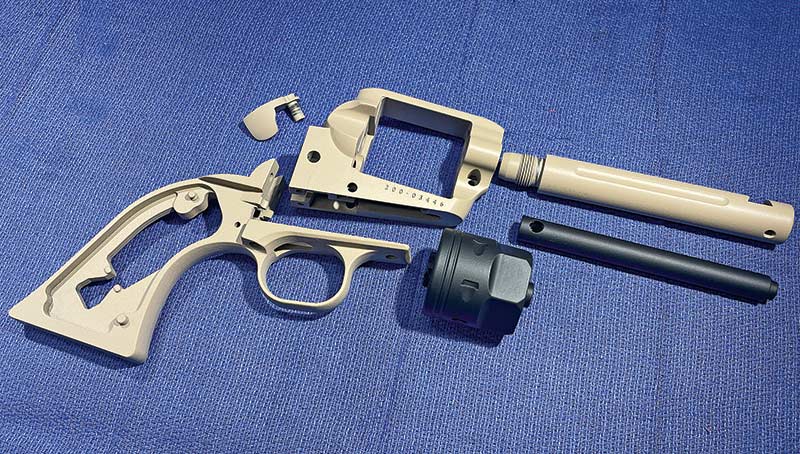
After detail stripping, Roy fluted the barrel as part of the fun.
You might need a milling machine for this step!
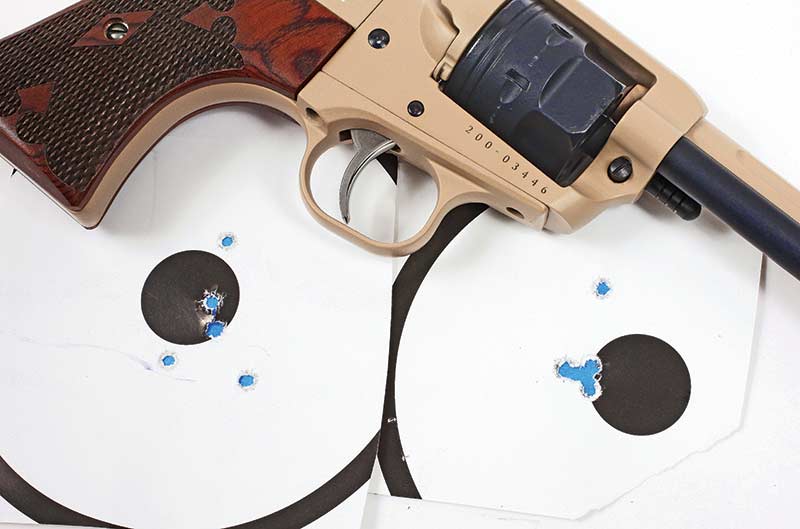
Group on left is about 2.25" and the other is a bit less than 1" — shot
after the mods. Well, there’s the pesky flyer, but let’s ignore that, eh?
Expanded Ideas
Some invest $1,000 or even $2,000 upgrading $350 Ruger 10/22 rifles into gilt-edged target guns and competition platforms. Yet nobody wrings their collective hands, tearing at their hair crying “But why! But why!” do they? I decided to make my Wrangler into “something better” just for the sheer fun of it. At least you could do some of this work too.
What began as a simple “I’ll just polish the bits up some and be done with it” soon morphed into an increasingly longer list of ideas. “Well, since I did the action, I may as well fix the hard-to-open loading gate, right?” Followed with, “Oh, heck, I may as well re-cut the muzzle chamfer and forcing cone too.” Those casting lines begged to be worked out, and a new dovetailed front sight beckoned. For some reason, the idea of cutting flats on the cylinder seemed to make perfect sense to me, as well as flutes in the barrel. Before I got control of myself, I added scallops to the recoil shield and re-shaped that pesky loading gate so my thumb could get under it more easily.
This meant the whole gun needed to be refinished, and Cerakote seemed natural — especially two-toned — of course. I also saw how the hammer and trigger sides were begging to be flattened on a diamond stone and polished to 320 grit. That trigger face wanted polishing as well. Sorry, couldn’t help it.
All this was accomplished because I’m one of those guys who has a milling machine and a lathe and “… way too many other tools” from what I hear. I’m also one of those fellows who “Mostly knows what they’re doing except for sometimes when I don’t.” Keep that in mind if you try any of this yourself. As Clint Eastwood said, “A man’s gotta’ know his limits.” I admit I sometimes forget mine.
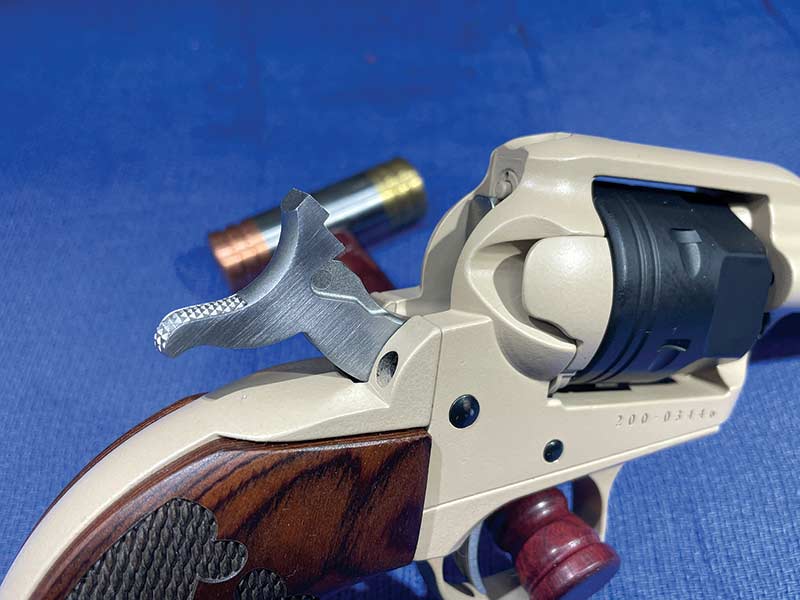
Flattening the hammer and trigger sides adds class and
re-shaping the loading gate makes things easier too.
Back from Cerakoting it was time to assemble things. Take your time here!
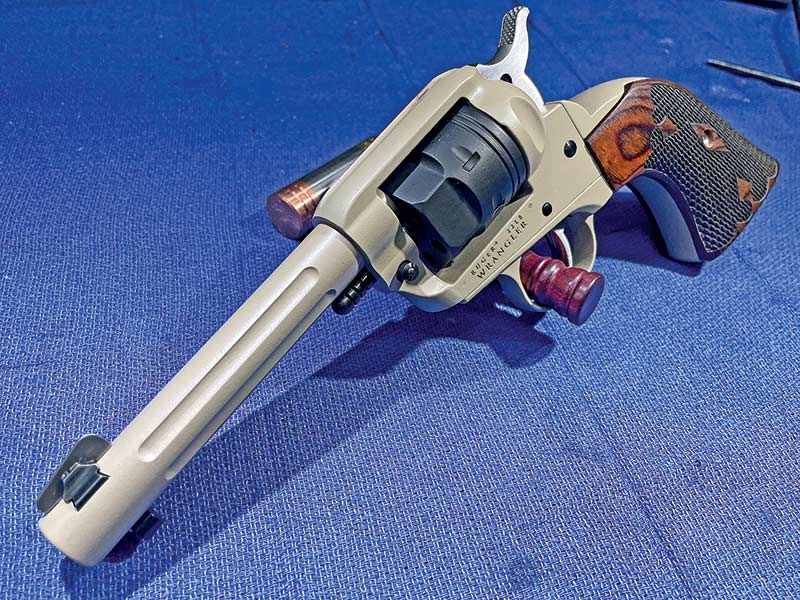
Note cylinder flats, barrel and frame flutes, new front sight and cool colors!
The Facts
The key here is use your magic phone to take good pics of things if you take the gun apart. Then very light polishing of bearing surfaces using a very hard gunsmithing stone (don’t remove metal), polishing the hammer spring guide rod, and unhooking one of the trigger spring legs (take the grip off, you’ll see it), will really make the action smoother. Don’t get crazy and don’t do it at all if you don’t know what you’re doing. All of this voids the warranty too, don’t forget.
Re-shaping the loading gate is Dremel-tool time (hand tools play a role in all of this too), working out the casting lines, polishing the hammer and trigger and even filling pin-holes with JB Weld (works great) all take time and some thinking. Squeezing the loading gate spring together a tiny bit will lighten that effort too. But go easy there.
If you have the tools and skills, you can take on the muzzle and forcing cone work, barrel and recoil shield flutes and other such things. If not, my friend Dusty Housel at HS-Custom can do all this for you. I’ve been working with Dusty for years and he’s a hugely talented ’smith. Don’t tell, but I help him sometimes too.
The result is something more than seemed possible at first. The action is silky, accuracy went from 3″ to 1.5″ or so, the loading gate is a pleasure to use, the sights are much better, and the entire package is what I’d readily call “swell.” If you want your own you’ll need to chat with Dusty since this would be custom work so every job depends on what the shooter wants. I found this project to be rewarding to do and the end result is great fun to have.
Look to our newest DIY Gunsmithing special edition available at FMGPublications.com if you want to see lots of photos, and a step-by-step on how I did these mods.
For more info: HS-Custom.com, Ph: (620) 704-1646
Subscribe To American Handgunner

Get More Revolver Content Every Week!
Sign up for the Wheelgun Wednesday newsletter here: