Free-Spinning Cylinder
Conversion Gone Awry
When Everything That Can Go Wrong Does
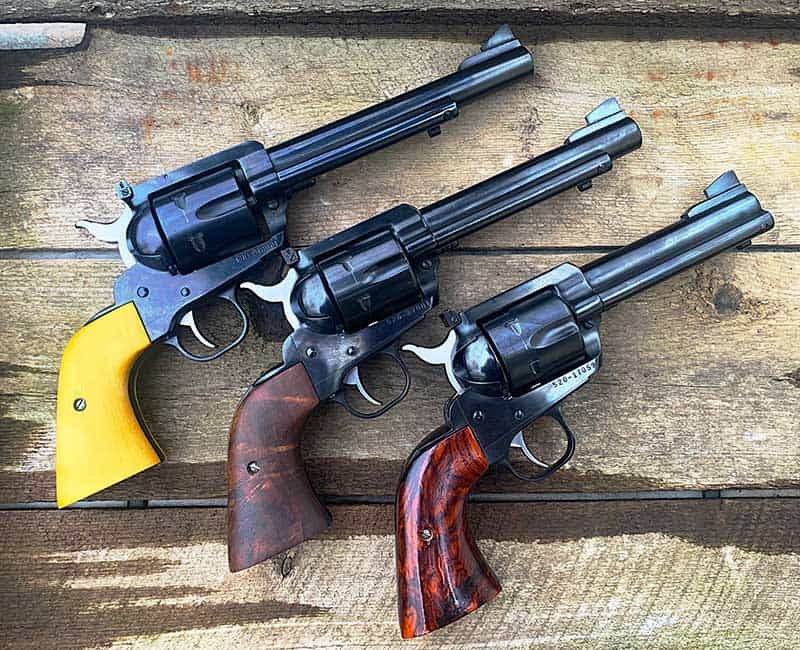
Three Ruger Blackhawk mid-frames in need of free spinning.
I had three mid-frame Ruger Blackhawks in need of free-spinning cylinder conversions. Supposedly, it was a simple task. When everything goes right, these conversions are a breeze. But like anything, they can turn on you quickly, leading to trouble, high jinks, and frustration. Sometimes, everything that can go wrong does — as was the case in this tale of three guns, two easy jobs and the nightmare from hell.
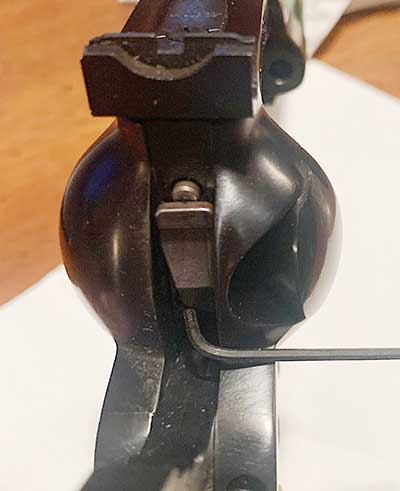
Access to the Allen screw is through the hammer channel.
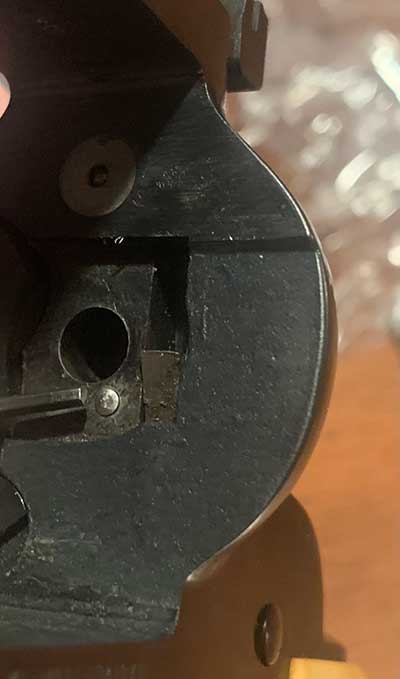
Here’s the plunger protruding from the other side.
Free-Spin, Free Time?
As stated, free-spinning cylinder conversions are an easy enough job. All you need is a 1/16“Allen wrench.
To start, make sure your mid-frame Blackhawk is unloaded and remove the cylinder. Close your loading gate and cock the hammer. Look down the hammer channel below the transfer bar, and you’ll see a 1/16” Allen screw. Using the short end of the Allen wrench, start taking the Allen screw out with the barrel pointing up so the screw will fall out of the channel and not into the trigger/hammer guts.
Once the screw is removed, go to the opposite side of the cylinder frame and push out the plunger/spring with the barrel still up. Your cylinder is now free spinning, making it easier to load and unload in case you turn the chamber past your loading index point, allowing you to reverse spin the cylinder to where you want the chamber to load it.
It’s basic and easy if everything goes as planned …
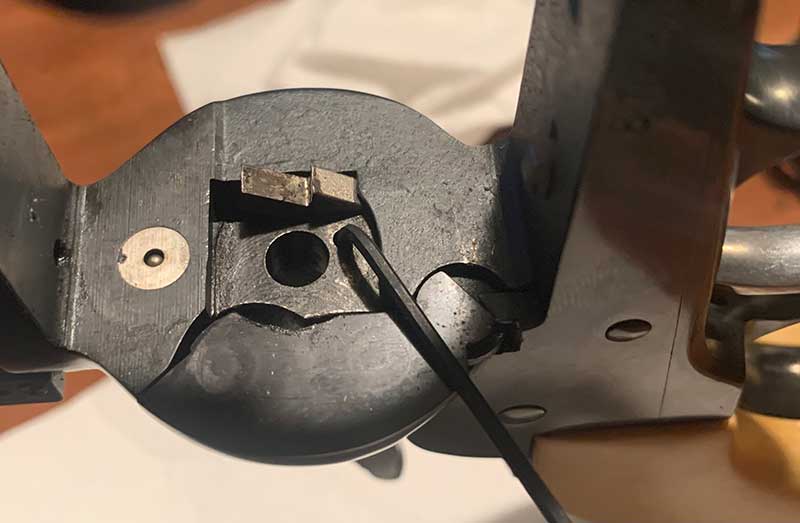
When the Allen screw is removed, you can push the plunger and spring out.
Lost In Space
Son of a gun if it didn’t happen! The tiny Allen screw dropped off the Allen wrench into the deep, dark recesses of the guts of the second gun. No amount of shaking would dislodge the tiny nit freed by the big nitwit. I tried working the action with the gun held upside down to no avail. Then, the action seized. The Allen screw cast its wicked spell.
Now, I had to take the grip frame off and pull the innards out to retrieve the tiny Allen screw. Grabbing my screwdriver set, I disassembled the gun and located the culprit. Forgetting how to reassemble the trigger/transfer bar and hammer/pawl units and make them fit and mesh together as one unit, I turned to my cell phone and went to YouTube for a refresher course. Getting this all sorted out took longer than the anticipated time frame.
I needed to get a pork roast, sauerkraut and taters in the oven for dinner. I finally got the parts together (with no leftovers) and tried to insert the trigger pin. As you know, the gate detent spring must be depressed to insert the pin, and the same spring locks the pin in place by a notch. Here’s a tip — insert the unnotched end of the pin first. As you pass the spring and put the pin through all the parts, the notch will “catch” the spring, locking it in place.
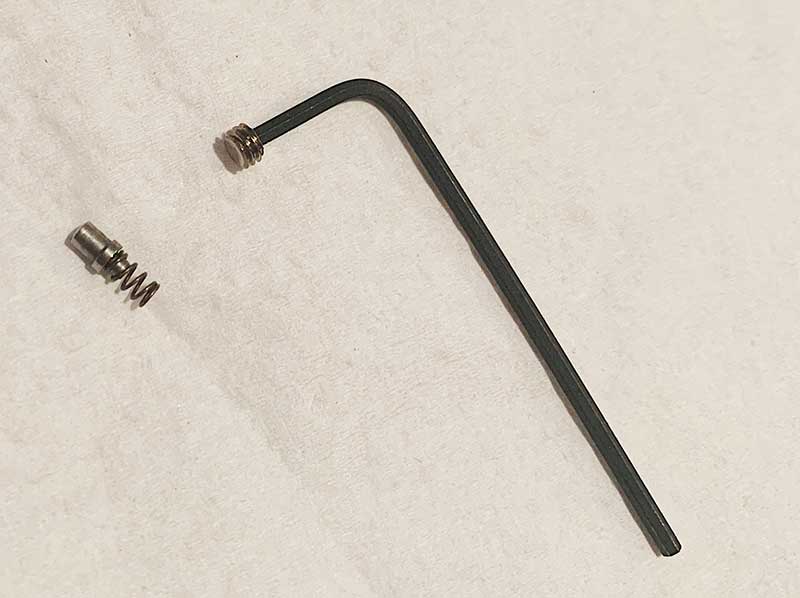
Small parts indeed. Be careful!
Loose Screw
During the 15 minutes of trying to insert the trigger pin, there may have been some pounding, pushing, swearing and frustrated bellowing going on. It was probably during this stage one of the gripe frame screws managed to go AWOL. There’s nothing more frustrating than getting everything together and then realizing you’re missing a part to complete the project.
I grabbed the flashlight and started the crime scene search pattern for the screw. My search pattern went wider and wider to no avail. Time to call in the big guns — my wife. If she can’t find it, no one can. I assisted by getting my garage light out to really light the place up. Our carpet is not the best pattern for finding lost screws. It has lots of dark brown and black checks in the pattern making things disappear.
After 20 minutes, the little bugger was still missing. Where the hell did it go? Time’s a wasting, and I need to get the pork roast in the oven. The search was called off.
I tried to forget about it, but it was gnawing at me. Bad! I figured I’d make a phone call and have a $10 replacement screw sent to me from Ruger.

The Patron Saint of Lost Things, Saint Anthony, or as Tank calls him, “Tony.”
Saint Anthony
Saint Anthony of Padua is the Patron Saint of Lost Things. If you’re so inclined, this is who you pray to. I’m sure Saint “Tony” has a huge following of guys who enjoy working/tinkering on guns — it seems we’re prone to losing parts.
After a scrumptious dinner, followed by a little TV, I headed to the shower … still dejected. Little did I know my wife had been praying to Saint Tony about that screw the whole time. As she turned off the lights and headed upstairs, she made one last plea. When she looked down, she saw something. You guessed it — there was the screw!
This isn’t the first time she’s found “parts” for me either. Most wives have this special knack. I know who the real saint is in my house, and all I need to do is ask her to help me find something. I’m lucky, indeed.