Carving Leather
This three step series demystifies it.
But it still takes talent!
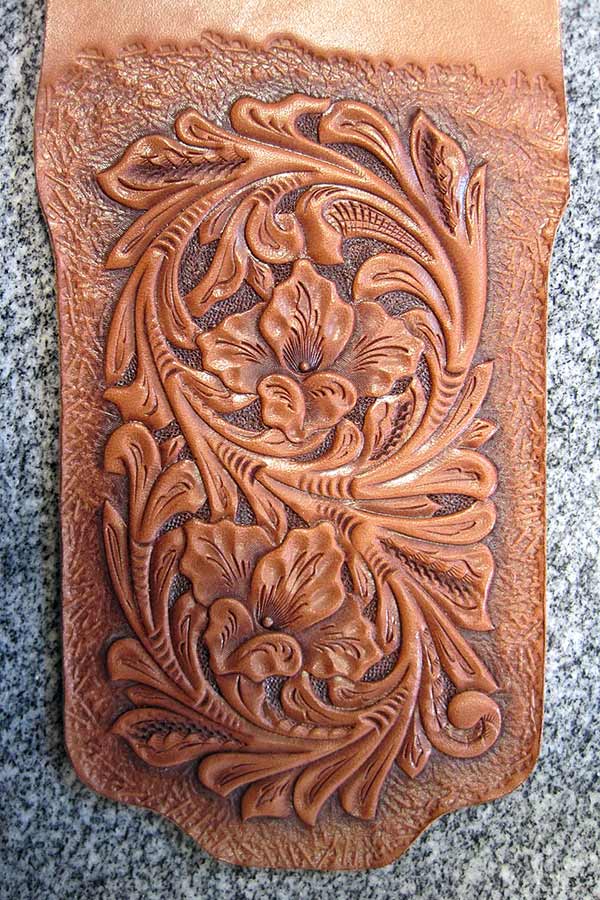
Finished Carved Leather
Editor’s Note: Karla has been featured in our pages many times and is, without a doubt, one of the finest leather artists in the known world — and likely on other planets too. You’ll see how even this seemingly modest bit of work takes time, patience and trainloads of talent. But the final result is classic Karla — seemingly simple, until you really look. I felt taking this on-line would allow us to have the space to show all the photos and to see them in the “better light” of your computer or iPad screen. Please drop me a note at [email protected] if you’d like to see more “how to” things like this. Roy Huntington, Editor, American Handgunner Magazine
Since His Editorship, Roy, asked me to share some trade secrets about how I carve leather, I figured a relatively simple piece done in clear steps might be the easiest way. So let’s get right to it.
Part 1:
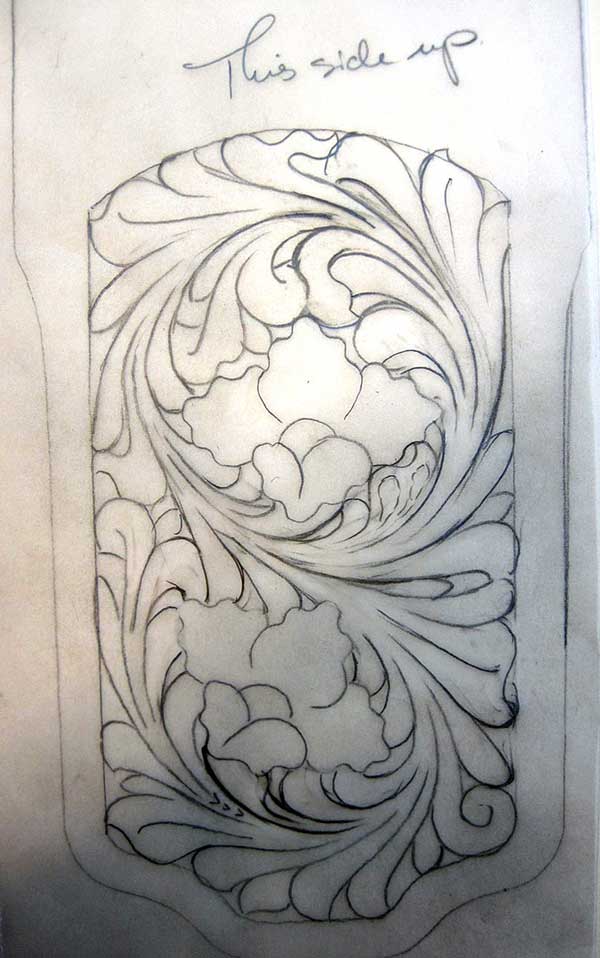
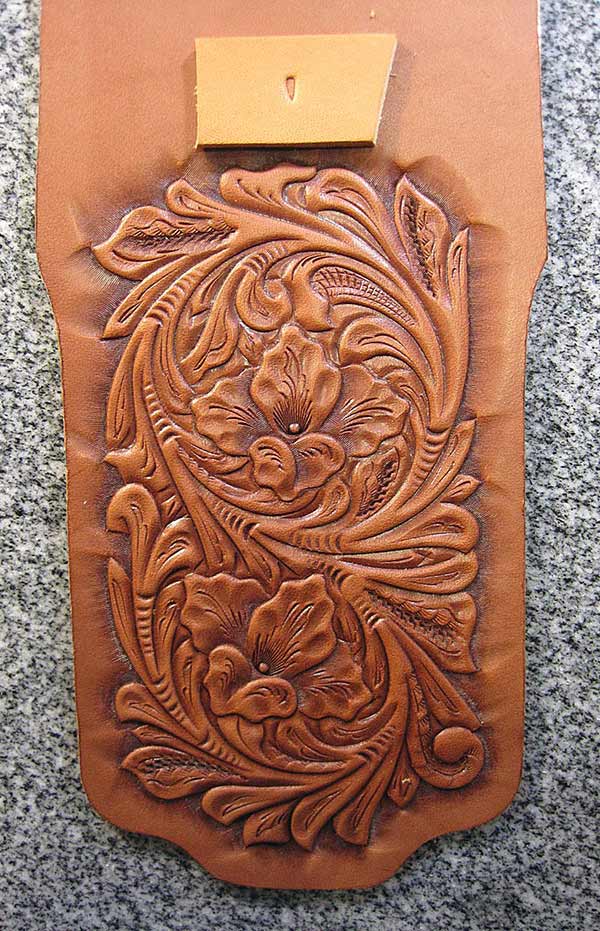
The tracing. I don’t do anything free hand because someone, somewhere, is gonna’ want another. This also allows me to use the pattern to jump off to things which are similar in shape. They are rendered on tracing paper and are carefully filed. Generally, I use up a pound of eraser to an ounce of pencil on these. The “This side up” notice is so I don’t do the mirror image by accident. I can be stupid when I want to be!
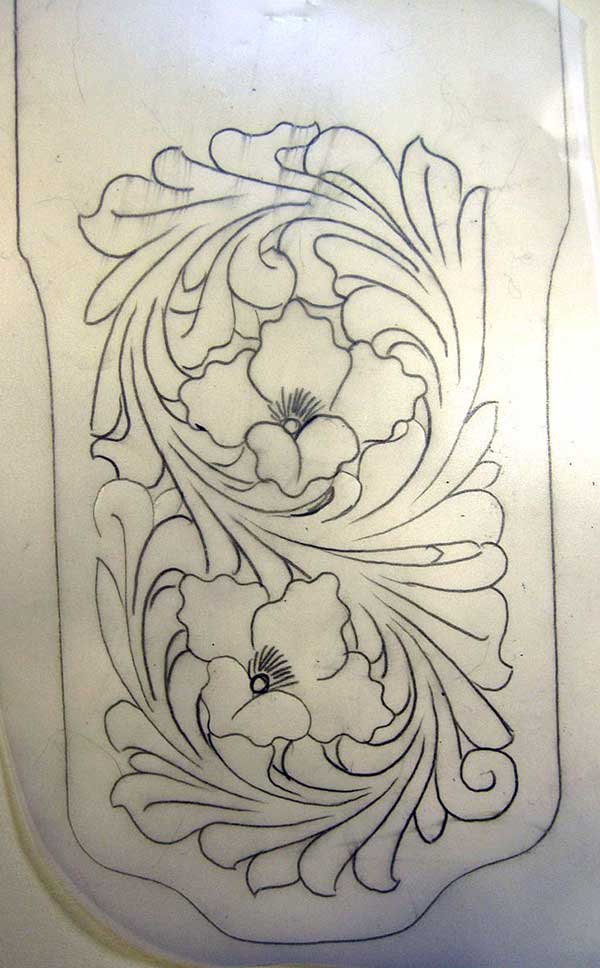
Take the same tracing and transfer it to Mylar tracing film.

Place Mylar on leather. The leather, at this point, is cased and has sweated out a bit. The most important thing in carving or stamping — water content in the leather — makes or breaks the piece. Too much and the images are squashy and blurred. Too little and you don’t get a proper impression. At the Goldilocks point where things are just right, all the tooling goes the way it should and you end up with that color change called “burnish” which is most desirable.
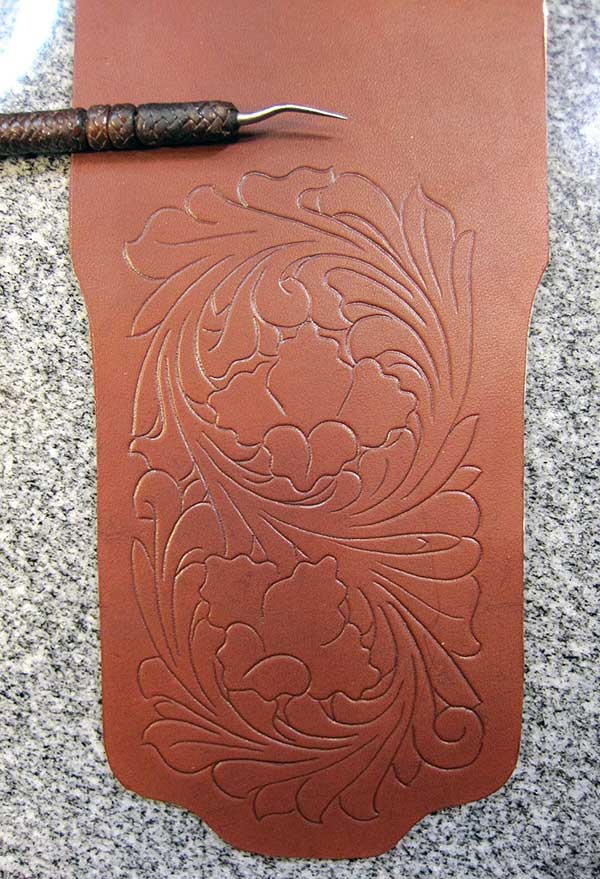
Transfer complete. That tool up top is the stylus. I made it from one of those nasty little implements of destruction dentists like sticking in your face and covered it with some knot work back when I was trying to learn more about that and had more time. Just use the tool to carefully imprint your drawing into the leather.

Cut all the lines with a swivel knife. That’s a fairly heavy knife from a guy named Chuck Smith and has a 3/8″ ceramic blade in it. The curvy bit on the end is called a yoke. With forefinger in the yoke and everything else on the barrel, you can pivot and twist that thing like crazy, which is why it’s called a swivel knife. Go slow here so you don’t mess things up.

Part 2
Camouflage tool. I have shown the true impressions of the tool at the top on a piece of scrap. Center image is the full tool, with the impressions at the sides being the tool held slightly angled, which is the normal way it’s used. It’s first in order because the moisture content of the leather is perfect at this point for it and because it’s a rather sloppy tool. It leaks over into other areas it’s not supposed to be in. if you do it now, the tools following it help to clean things up. Sorta’ like painters tidying up the stuff trimmers do, who tidy up the sheet rock guys, who tidy up the framers.
Where you put the cam is mostly into the center veins of leaves and up stem lines and to put decoration into the scrolls. You see it at times in flowers to give the petals some texture but this particular flower doesn’t call for that.

Pear Shader. That’s the real impression on the left on the light sample bit of leather, and how it is walked into a longer line on the right. This tool gives the convolutions and deep contours in the flowers and leaves.
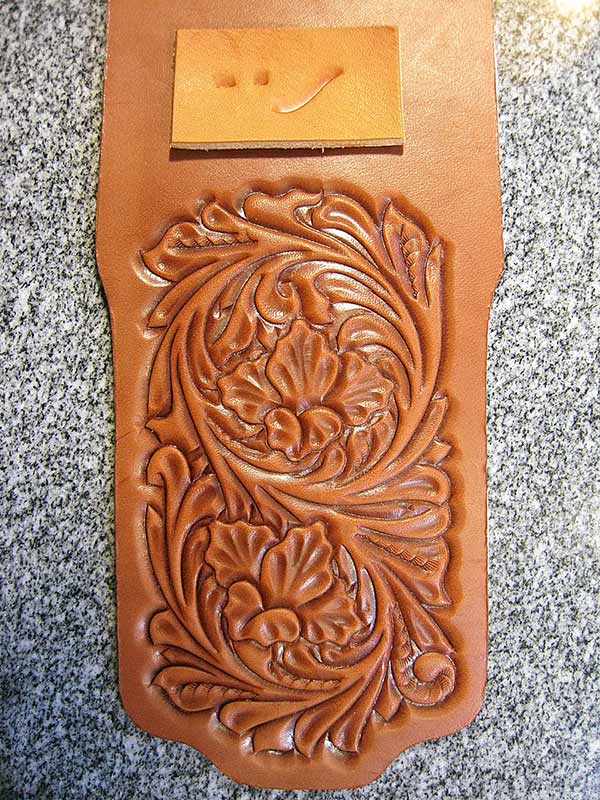
Beveler. Two sizes, left and center were used. The impression on the right is “walking” the tool. The idea is you string along the tool so the impressions all sort of mind-meld. You generally move the tool about 1/3 or so of its length so you really stack up impressions fast. You use the biggest tool you can get around or into a curve. All the tight areas use smaller tools so the finer the work, the smaller the tool and the more impressions. I stopped counting on one of the flowers after I got to 350 strokes. Since every single line is treated with the beveler, you can see where this is a whole ton-bunch of strokes. You spend a lot of time beveling! If you do it right, you get a smooth line lifting the work up into bold detail. Done wrong you get chop. Ick! Note the leather is slowly drying during all this.

Leaf liner. Lots of people don’t do this step, but I like it. It gives depth to the center line in a leaf and also really makes the flower petals pop. I also like it because it matts down all the way around the perimeter of the work so everything really stands proud. As a matting tool, it leaves some gaps in the areas at points and in valleys so it’s not perfect at this, but can be made so by following through with another tool later. The finer tool wasn’t done at this point because the moisture content was a hair high for it so I went to other texture tools.

Veiner. Full impression. It’s a leaner though, it goes on the opposite side of the cam on leaves. It is also used in flowers, sometimes in scrolls if you don’t like the cam there and to give a stop to certain lines within the tooling. This one sorta’ depends on the style of the work. It’s also one of the ones fun in historical work. There’s a lot of older California style holster work where the veiner was used to do the same job as the pear-shader. I’m fascinated by this sort of thing and really enjoy trying to see what those old guys were doing. Some of it is extraordinarily beautiful!
Sunburst. This is a larger one than found in the standard catalogues. I think it was made back in the 20’s by either McMillen or Eberle, but can’t be sure. Anyway, it takes two strikes to make the seed pods happen in the flowers.

Part 3
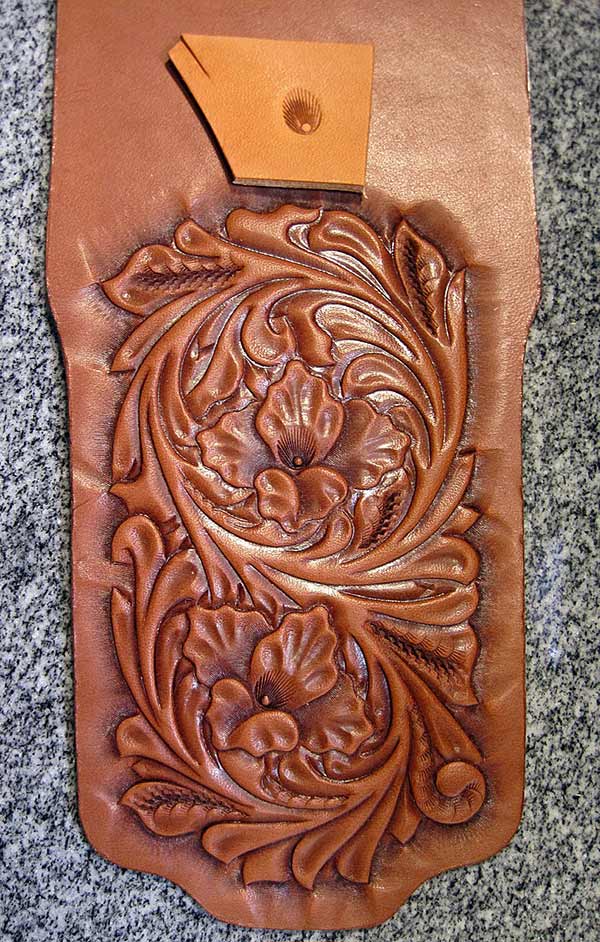
Mulesfoot. Some folks use it and others avoid it like the plague. I like it a lot because, used properly, it draws the eye down the stem work and adds a bit of texture. It’s a tricky tool to use because you start off with a full, deep impression and then lean the tool into progressively smaller and less deep impressions. You also gotta’ keep the thing aligned so all those impressions nest within themselves. It’s a bear to get right, and a honey when it happens properly
Decorative Cuts. I swapped over to a different knife here. An old Midas ring yoke with a steel blade, ¼” wide. These cuts are done completely freehand and are done not just to add interest to the work. Their purpose is to draw the eye down the stem work and through the leaves. If you think of the floral design as a paragraph, the stem work is the words, the leaves and scrolls, commas, semi-colons and like that and the flowers the periods. The decorative cuts are the flow of the words so you go through the paragraph pausing at the commas and stopping momentarily at the flowers or periods. If all the words or lines make sense, the entire paragraph makes sense.
Decorative cuts will vary a lot depending on the era of the work, the guy who does them and the style of the flowers and other elements. This is my default modern style.
Fine point matter or backgrounder. This is used around the perimeter to tidy up the valleys and peaks the leaf liner left.

Matting tool. This is one a pal made for me. I call it a “hawk-stomp” because it sorta’ looks like chicken tracks all over themselves. With the leaf liner and fine pointed matter, you can really see the floral work jump out of the leather. Matting tools come in all sorts of textures, but all do the same function which is to give you more depth than you actually perceive. The leather here is 3/32″ deep with the carving only going 3/64″ deep. When you think of how 3D this actually looks, you realize the smoke and mirrors magic of it is to fool the eye into thinking there’s more there than there is. When you design a pattern, you have to sorta’ keep it in the back of your head some lines will be tooled so they look like they are in front of other lines so you’ll get the proper perspective. This also gives you the ability to emphasize or deemphasize elements within the tooling.
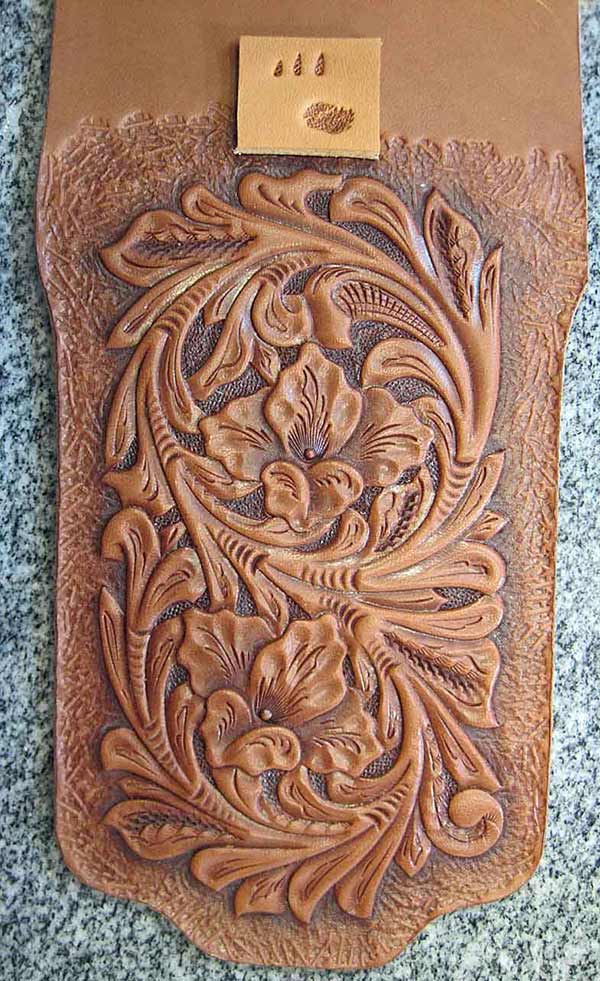
Coarse Backgrounding. Done within the work rather than around the perimeter. I use three small tools here. I ground these down from standard Tandy tools to suit my work. Their version is gargantuan by comparison and totally stupid. These get me into every nook and cranny, and that sharp pointed one really makes things nice. Moisture content at this point is almost but not quite dry. And that’s it. Done. Sit back and be amazed you just made something cool!
Finished Carved Leather