Yup, Even You Can
Sharpen A Knife
Yes, we feature knives on the Handgunner website. Shocking, I know, and yes, a remarkable show of our contempt for the norm for gun content, but nonetheless we choose to go down that dangerous path. So far I can’t help but notice the world hasn’t stopped rotating and we don’t have brimstone falling from the sky. Frankly, I actually get very positive letters from shooters just like you saying how much they like the fact we show some knives along with the guns. “Bein-since” (as Jon Tank, a friend of mine might say) we pretty much all have a knife — or two — in our collective pockets.
But alas, all is not rosy when it comes to our knives, and I’ll readily confess many people who show me their favorite cutters often offer-up a knife too dull to do its intended job. The old adage “A sharp knife doesn’t cause accidents, but a dull knife does” is pretty much spot-on. With a sharp knife you don’t have to push hard, wrestle to get through something, or take short-cuts (a joke, sorry) trying to fix something with a tool lacking in what it should have in scads — cutting power.
So let’s all just play nice and assume we have knives, like to look at them and sometimes it’s even more fun to have/buy/play/collect/use them than guns since they’re usually cheaper and easier to get. No fussy federal paperwork. You hand them the money, they hand you the knife. That’s easy. So how do we keep our favorite blades doing their jobs? We call them “cutters” for a reason, you know, and just how do you keep that keen edge alive?
It’s amazingly easy, actually. In the olden days there always seemed to be some old fellow who always carried a well-worn pocket stone and could put a shaving edge on a knife in no time. He could because of a very simple thing — he understood how. Once you understand how to do it, if someone hands you a smooth rock and a dull knife, you’ll put the two to good use and end up with a sharp knife. No, really.
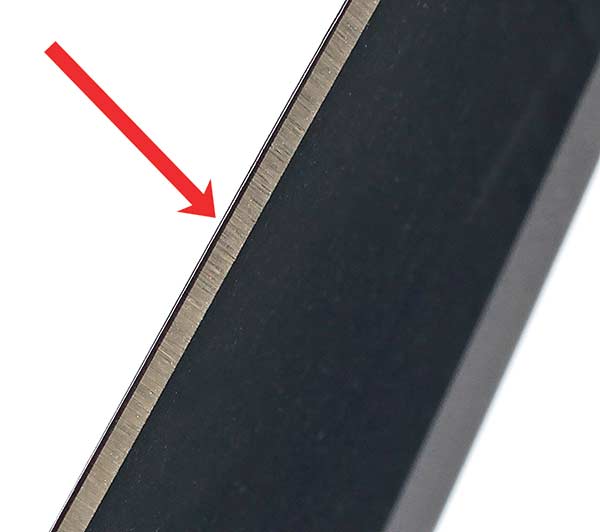
1. The tiny “flat” (thin white “line” at red arrow point) on the cutting edge
of this knife means it’s still dull, the two bevels don’t meet.
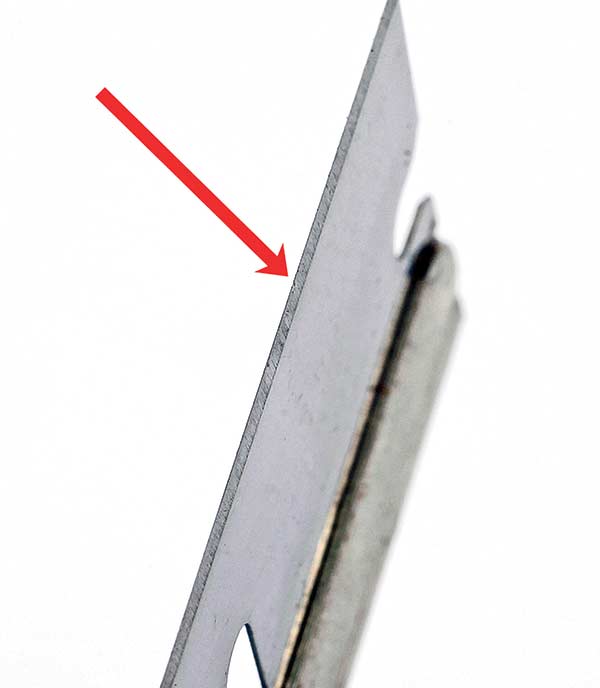
2. Red arrow points to bevel on this razor blade where the two sides
meet perfectly. This is why razor blades are so sharp!
Shhh …
What’s the secret? Well, there’s actually a few secrets which aren’t really secret. First off, let’s admit right up front there’s a bag-load of ways to sharpen knives. Some work okay, some work well, some don’t work at all and some still confuse me. But the basics remain the same regardless of the method. In a nutshell you simply need to put an “increasingly thinner edge” on the knife until it reaches a point where that edge sort of disappears into nothing and the two sides of the blade meet without any flat spot on the edge. Look at the photos. In Photo 1 you can see a “shiny” very tiny “flat” on the edge. That means the two sides don’t meet completely and the knife is dull. Photo 2 is a razor blade. Note how you can’t see a “flat” where the two sides meet. Those sides sort of taper-off into nothing — which is why razors are so sharp.
The goal then is to get those sides (or one side on some knives, or the flutes in serrations, or whatever you need sharp) to meet with as little “flat” on the edge as possible. Using various “grits” (roughness) of stones, wheels, diamond hones, belts, ceramic sticks even wet or dry sand paper (does a great job using glass as a flat spot to lay it on!), you can achieve that goal. The lower the “grit” number (say, 100 grit) the rougher the grind. Most diamond stones (which I like) are between 220 and 600 grit, more than enough to put a shaving-sharp edge on anything.
But natural “stones” and diamond “stones” go higher, up to over 2,000 “grit” (very, very smooth) but they still “cut the metal” and will polish that final edge. There’s even diamond paste in grits taking over where most stones end, and go up to 8,000 grit or higher! You sort of make a slurry and then rub the edge in it to put an amazing final polish on an edge. I use that sort of method on wood-working chisels and plane blades for their final hone.
Okay, so how do you actually do it then? Scroll down to the bottom of this article to find the two-part “Knife Sharpening” videos. They will give you a good “eyes-on” take on what I’m about to explain. Where people go wrong is they get a stone or diamond hone or fancy electric gadget and go to work. The problem is they usually constantly keep changing the angle the two blade sides meet. Even if there are guides on the machine!
To hone, you lay the blade at the right angle on a stone and slowly move the knife blade across the face of the stone as if you’re “slicing” a piece of the stone off, ending up at the tip (which you’ll need to raise a bit as you move the blade toward it across the stone). Say you grind one angle at 22 degrees, then flip the blade and grind that one at 22 degrees too. Great, keep at it and eventually they will meet and be sharp. But you won’t. The next pass will be 19 degrees, the next 28 degrees, the next 16 degrees and on and on.
The result is a mess, rounded over, the edge doesn’t really “meet” and if it does, it’s here and there, all helter-skelter. The biggest secret to knife sharpening is to establish an angle then keep that angle perfect while you continue to hone. How did grandpa do it by hand? He did it because he’d been doing it for 65 years and his muscles and eyes knew just how to hold things.
Today, you can cheat (or be smart?) and use guides or gauges or even a couple of quarters. While we could go into the exact angles and radius needed to meet certain needs in different knives and tools, the reality is to just remember to keep kitchen-type knives with a very slim angle at the edge, say around 15 to 20 degrees or so. Doesn’t really matter exactly, but for slicing, like a kitchen knife, it needs a slender edge. It won’t stand up to chopping though.
For a heavier use knife like a pocket knife doing daily duty, a fixed blade or even a light chopper, let’s go up to 22 to 25 degrees or so. It’s harder to get a real shaving-sharp edge at that angle, but you can come pretty darn close and it will be more than you’ll ever need. An axe or hatchet might need more like a 30 degree edge to maintain it during the pounding of rough work.
To maintain those angles, companies sell guides you can clamp on knives, or have stones with angles built in to set your blade back onto before you sweep over the stone. I find the clamp-on goodies a bit cumbersome so simply do it by eye. But if you put two (or three) quarters in a stack at the end of the stone, rest the back of the blade there, then sweep across the stone, you’re about there. Just keep that angle constant as you move! Some companies sell a kit offering clamps and stones on metal bars with jigs to help hold angles. You run the stones over the blade rather than the blade over the stones. They seem to work, but I’ve never really used one very much so hate to comment on them.
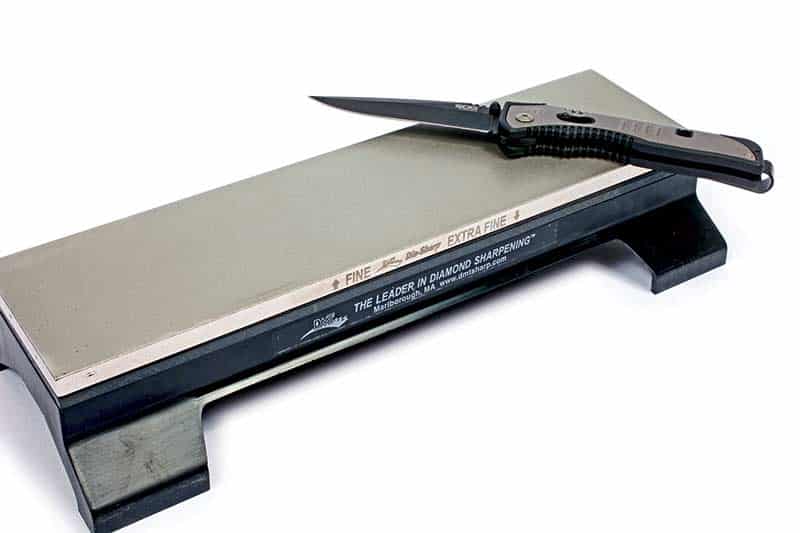
3. DMT’s burly diamond bench stones are among the very best tools when
it comes to sharpening. This one is fine and extra-fine.
In the pics you’ll see two wonderful things. The big diamond bench “stone” from DMT (Photo 3) is something to behold. This one is their marvelous 1,000 grit to 2,000 grit (two-sided) stone using a magnetic base. It’s massive, heavy and authoritive. Flip the stone, the magnet holds it securely, and off you go. This grit is for a final, polished edge on an established bevel. But in the right hands you can perform miracles with it. It’s also great for putting a “flat” on metal parts (1911 hammers, etc.). DMT (and others) have a wide variety of diamond and natural stone sharpeners and can meet about any budget.
The thing to remember about the diamond stones is the fact they always stay flat, unlike natural stones which can wear and eventually are not useable. And that’s another reason you likely can’t get your knife sharp — you may be using a worn-out natural stone! Look for groves, gouges, dishing and such.
The other goodies are what’s in this amazing “kit” from Work Sharp (Photo 4). This particular one has been “enhanced” by Ken Onion, one of the top knife designers around. Ken called me and said, “I know you don’t like gadget knife sharpeners, and I don’t either, but these guys nailed it.” And they did. I took this picture before I unlimbered everything and tried it out for almost six months. I didn’t want to like it, but it simply works as advertised. Basically, you get a mini-belt sander (knife makers use big belt sanders and various grits of belts to make knives) with belts of all grits (including so smooth you won’t think they work, but they do!). The tool can be configured in various ways to sharpen virtually anything you need to sharpen, and edge angles are easily “held” due to cleverly built-in angle guides.
I’ve used it to sharpen kitchen knives, axes, establish initial angles on plane blades, machetes, serrated edges, folders and you name it. It simply works as advertised. Plus, they’re an American company taking great care of their employees. There are many models available from Work Sharp, and some of their sharpening accessories (like the Field Sharpener in the blister pack shown) are awfully handy. Mine is in my chore-coat pocket all the time.
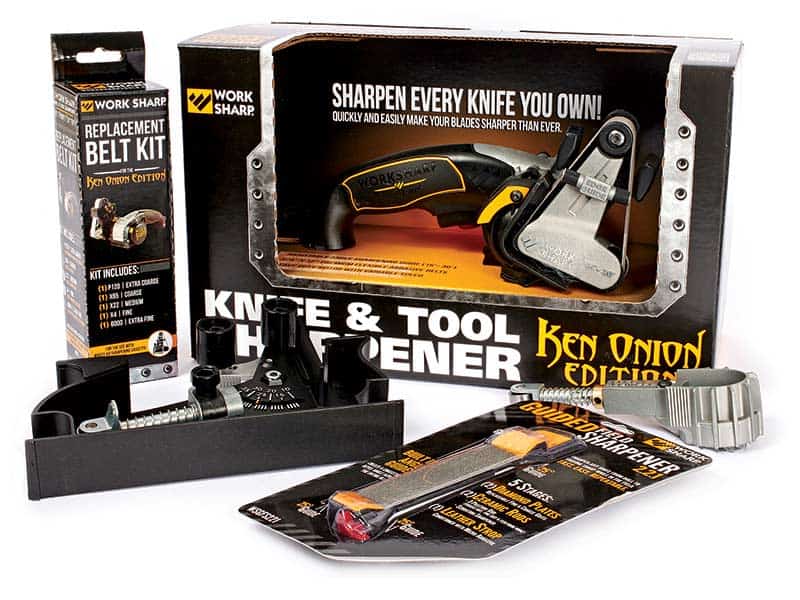
4Work Sharp’s Knife and Tool Sharpener is a belt sander-based tool
using various fixtures to keep edge bevels constant and belt grits to
hone edges. It works great.
The other goodies are what’s in this amazing “kit” from Work Sharp (Photo 4). This particular one has been “enhanced” by Ken Onion, one of the top knife designers around. Ken called me and said, “I know you don’t like gadget knife sharpeners, and I don’t either, but these guys nailed it.” And they did. I took this picture before I unlimbered everything and tried it out for almost six months. I didn’t want to like it, but it simply works as advertised. Basically, you get a mini-belt sander (knife makers use big belt sanders and various grits of belts to make knives) with belts of all grits (including so smooth you won’t think they work, but they do!). The tool can be configured in various ways to sharpen virtually anything you need to sharpen, and edge angles are easily “held” due to cleverly built-in angle guides.
I’ve used it to sharpen kitchen knives, axes, establish initial angles on plane blades, machetes, serrated edges, folders and you name it. It simply works as advertised. Plus, they’re an American company taking great care of their employees. There are many models available from Work Sharp, and some of their sharpening accessories (like the Field Sharpener in the blister pack shown) are awfully handy. Mine is in my chore-coat pocket all the time.
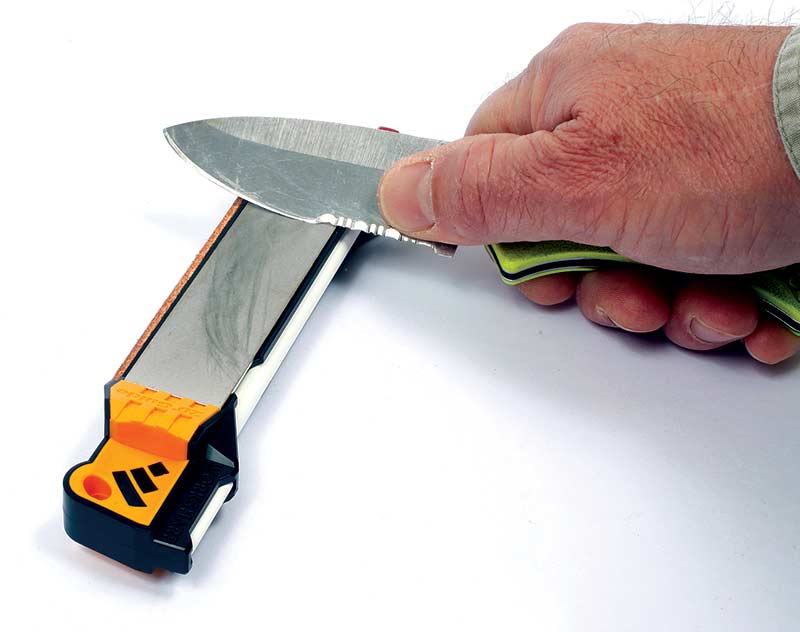
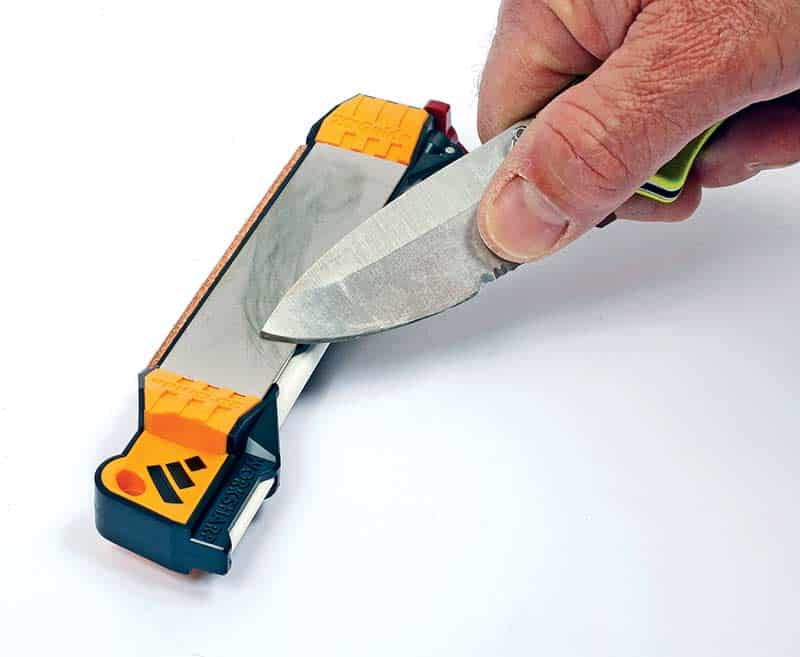
The “Move”
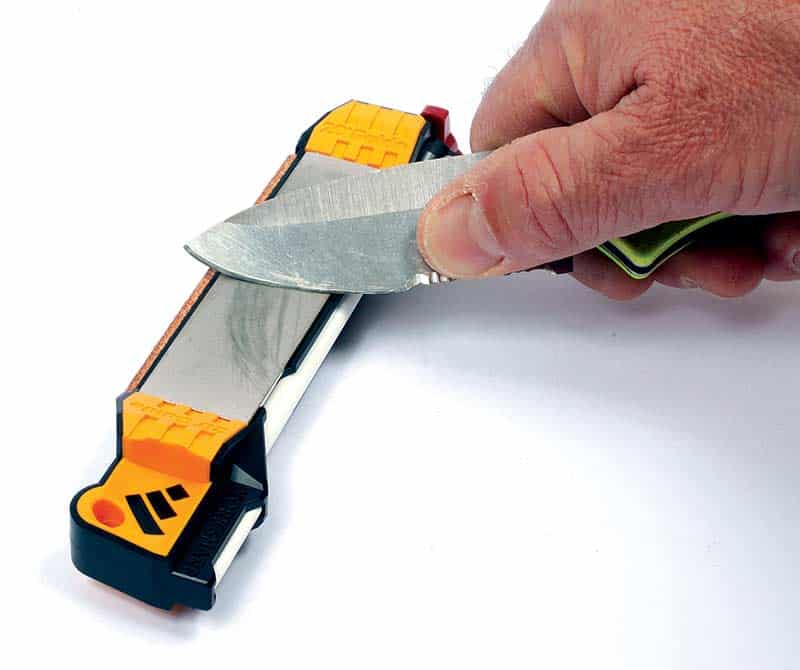
Check out Photos 5-7. I used the small sharpener from Work Sharp (it sits neatly on a table, using non-skid rubber-like ends), and did some sharpening moves on my old Benchmade. Note the lines of “swarf” (blade steel) on the diamond stone. That shows the sweeping movement you make as you move the blade over the stone. Establish your angle (this do-hicky has angle guides at the ends of the stone), then maintain that angle as you move the blade across the stone face, as if you were slicing a very thin slice of roast beast off.
Take a few passes, flip the knife over and do the same. Back and forth until you establish that bevel. Then go to a finer grit (this one has two diamond grits, a ceramic hone and even an abrasive impregnated leather “strop” to finish things off. If you’re not getting an edge, get a magnifying glass and look if you have a “flat” on the edge. If so, start over and be more careful about holding that angle steady!
It does take practice, but keep thinking about what you’re trying to accomplish. Watch that video a few times and get some hands-on training from a friend who always seems to have a sharp knife in his pocket. It’s not a mystery or even a secret, it’s just a simple process — but you do need to develop your skills some. Funny, but that sounds just like learning to shoot, doesn’t it? For more info: www.worksharp.com
Looking for the means to sharpen that “seasoned” folding knife?
Ever wanted to learn how to sharpen a tomahawk or a hunting knife? In Part 2 of a 2-Part series, American Handgunner’s Roy Huntington puts his knife sharpening expertise to good use in this broad overview. For a more comprehensive look at knife sharpening.