| Winning Edge |
0
By Dave Anderson
American Handgunner has featured the work of truly outstanding photographers such as Chuck Pittman, Robbie Barkmann, Ichiro Nagata and our own Joe Novelozo. Such work requires both great creativity and artistic vision, plus years of mastering the creative tools.
Most handgun enthusiasts have no plans of marketing or publishing their photos. But many would like to be able to make clear, sharp photos, perhaps for insurance purposes, to display a favorite handgun online, or to request assistance in identifying and valuing a firearm.
I get a lot of such requests. Some include photos, and only rarely are they of much benefit. Some are kind of funny. People lay a rifle or shotgun on the carpet and take the photo from above. To get the entire rifle in the photo they also have to include their feet, generally in flip-flops displaying curling, yellowed toenails. Seems the toes are usually the things in focus.
I don’t have a camera phone, so for the photos here I used an older Nikon Coolpix I bought around 2006. Long since discontinued of course, but it’s still a handy little pocket camera. The only picture not taken with it are those of the camera itself. Proof you don’t need anything fancy.
1. Here’s a number of common mistakes. The pistol is laid flat on a table, on a reflective plastic surface. The photo takes in far too much irrelevant background, and the white balance is set incorrectly so colors look strange. Side lighting results in strong shadows. The “auto” exposure feature sets exposure for the light-colored background, leaving the main subject too dark. It was taken indoors, without enough light, resulting in a slow shutter speed and sharpness lost to camera movement. Pretty typical of the kind of photo we get, along with a note saying, “Can you tell me what this is?” We usually can’t unless we guess some.
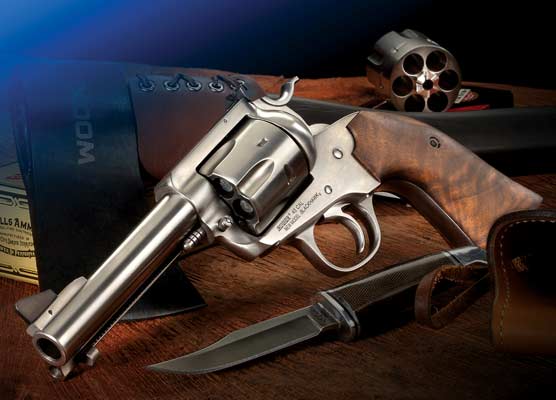
2. This is the same camera, same pistol, and actually didn’t take much more time or effort. Generally for “record” type photos I use white, non-reflective paper and any type of neutral, non-reflective paper makes a better background than the kitchen table or a busy carpet design. And please, no towels!
Here, I rummaged through my wife’s old teaching supplies and found a square of colored art paper. To get more light I used the table on the deck outside, taping the paper to the tabletop and to a lamp there so the paper made a continous curving background from the table top up. Open shade is better than direct sunlight; even better is a day of hazy overcast, with no harsh shadows.
Create separation between subject and background. I’ve seen photos with a pen or pencil stuck through the triggerguard to lift the pistol. I think it looks tacky. I like to use erasers to prop up the pistol, those pink erasers you used in school. They hold the gun up, and when it slips, as it will, the soft eraser won’t mar the gun’s finish.
My other tool was a piece of reflective white paper (actually the back of a calendar). I used it first to manually set white balance on the camera. If your camera doesn’t allow this, use either automatic white balance or the setting closest to matching the actual light source. Then I used the same reflective white surface to bounce some light onto the gun, opening up the shadows a bit.
I set the photo type at the “flower” icon (close-ups or “macro”) to maximize close-up quality, ISO at 400 (like the old film “speed”), made sure vibration reduction feature was active, mode at aperture priority and shot the photo hand-held at f/6.1 and 1/200 second. I got as close as I could to fill the frame with the main subject, and made sure the auto-focus symbol on the view screen was squarely on the pistol.
3. Same basic photo as (2) except I used Adobe Photoshop to open up the shadow a bit more on the grips and to enhance contrast some. You don’t need to do this, but it’s nice and actually easy to do with a simple photo program.
5. his is the little Nikon Coolpix I used for the gun photos. Any camera gives better results with a clean lens. I always start a photo session by cleaning the lens.
Any out-of-focus objects in the foreground tend to distract. Here I focused on the camera, and used a bigger aperture (smaller “F” stop) to decrease depth of field so the gun in the background doesn’t distract from the focal point (the camera). Note the .45 ACP cases holding the gun.
Web Blast! Go to Taking Gun Photos Extra to see actual set-up examples, and the “before” and “after” pictures we took using them. A little practice will have you taking excellent photos in no time!
Read More Winning Edge Articles

Purchase A PDF Download Of The American Handgunner Jan/Feb 2015 Issue Now!


