Quality Control in Layers
The Ultimate Reloading Series Part 10

When gathering components like cartridge cases and bullets, you can add an "inspection" step
to give each a quick look. You're handing them anyway, so why not?
Here’s a dirty little secret about reloading safety. If you wait until the end to inspect your finished cartridges, you’ve already missed the point. Quality control isn’t a final step. It’s a mindset that runs through every single part of the process, from the moment you dump range brass into a tumbler to the last cartridge you drop into a box.
Think of it like building a house. You don’t frame the walls, hang the drywall, install the plumbing, and then check to see if the foundation is level. Each step requires inspection and verification of the work of the one before it. You can’t start building the frame if there’s no foundation present or if the cement is still wet.
Reloading works the same way. Every step should be both a production task and a quality check on the previous one.
Catching Problems Early
The best time to find a defective case is before you put a primer in it. When you’re sorting and inspecting brass after cleaning, that’s layer one. You probably spotted some issues like steel cases when loading up your tumbler, but once that same brass is clean and shiny, it’s much easier to see more subtle problems.
Look for cracks, especially around the case mouth and near the base. Check for dents. Eyeball the primer pockets. If it looks wrong or damaged, toss that case. Five seconds of attention now saves you from a mystery malfunction at the range later.
Resizing adds another layer. When you’re running cases through the sizing die, pay attention to how each one feels on the press handle. Brass that’s been fired too many times may start to feel different. If a case requires noticeably more or less force than its neighbors, something is off. Your hands give you free information. Use it.
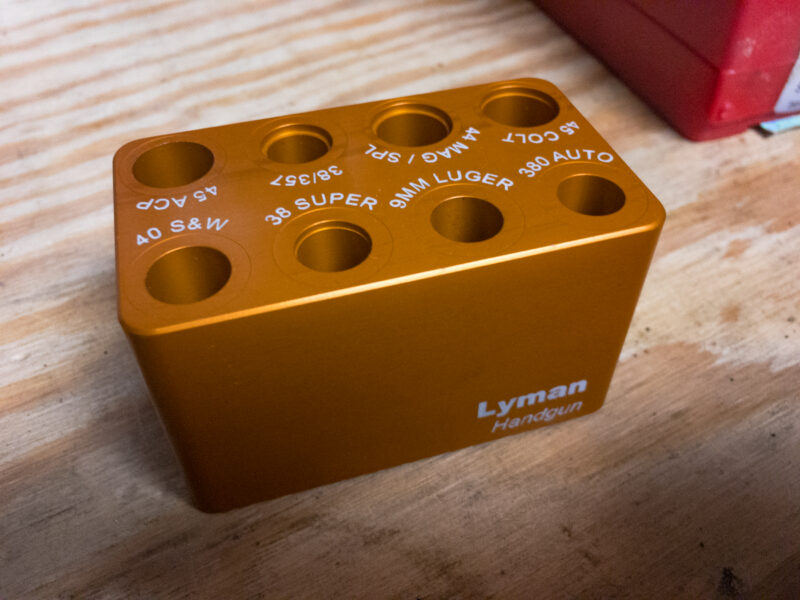
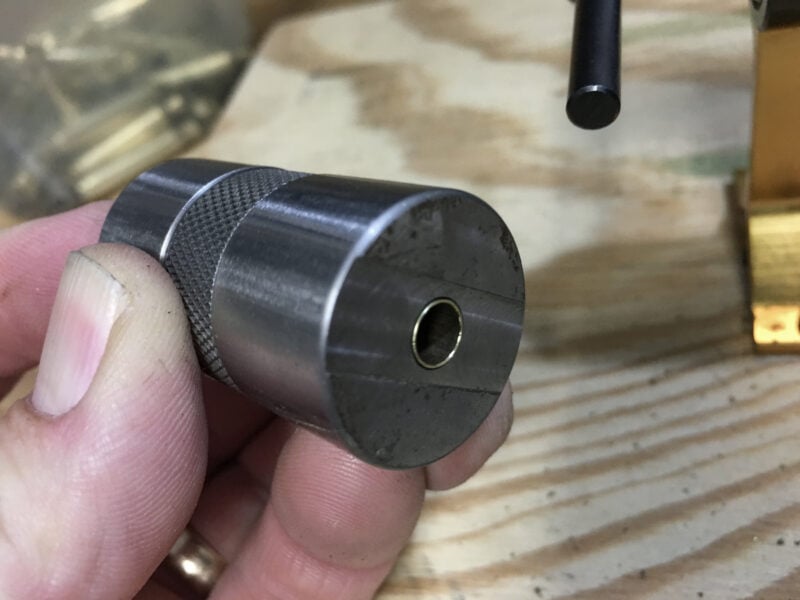
Chamber checker gauges like this one verify that your cartridges will feed properly
and make it easy to spot sizing problems.
The Priming Check
Seating primers is one of those steps where feel matters enormously. A properly seated primer should slide in with firm, consistent resistance and end up about or just below flush with the case head. If one drops in like it’s falling down an elevator shaft, that primer pocket is toast. If one requires way more force than the others, something is wrong with the primer or the pocket. Here’s where you spot those anomalies, like occasional .45 ACP cases with small primer pockets instead of large. Operating a reloading press is never a strength challenge. If you feel resistance, something is wrong.
After priming a batch, flip the cases over and eyeball every single one. Primers should all be oriented correctly and seated to the same depth. A high primer can be a safety issue, not just a cosmetic one. This takes about thirty seconds for a tray of fifty, and it’s thirty seconds well spent. When running a progressive press, I give each completed cartridge a look as I move them from the press bin to ammo boxes. When possible, I put reloads into plastic ammo boxes upside down so it’s easy to spot primer issues when scanning the bases of all of them together.
Pilots develop an "instrument scan" process, constantly looking at key gauges in a methodical way.
You can train your eyes to check things like correct primer orientation on every pass too.
Sometimes, one gets into the mix upside down.
Powder as the Critical Layer
If there’s one step that demands the most deliberate attention, it’s powder charging. This is where the consequences of a mistake are the most severe. An overcharge can create dangerous pressure. A missed charge followed by a normal round means you’ve just fired a bullet into an obstructed barrel.
Build your safety net here in layers. Verify your scale before every session. Keep only the powder you’re using on the bench. Peek inside every case after charging it. Spot-check charges on the scale every five to ten rounds. And when a tray is full, hold it up to the light and scan the rows. Every case should show roughly the same powder level. A case that looks empty or overfull compared to its neighbors gets pulled and investigated.
None of these checks are time-consuming on their own. Stacked together, they form a safety system that’s hard to beat.

Spot checking overall length will save you lots of grief down the road and
minimize the time-eating process of pulling bullets from out of spec cartridges.
Seating and Crimping Checks
When you’re seating bullets, your calipers are your best friend. Check overall length on the first few rounds until your die is dialed in, then spot-check throughout the run. A measurement that starts drifting tells you something shifted in your setup, and catching it at round fifteen is a lot better than finding out at round two hundred. Pulling lots of bullets is not how I like to spend my reloading time.
After crimping, give each cartridge a visual once-over. For taper crimps, the case walls should be straight and parallel with no remaining flare. For roll crimps, the brass should be turned neatly into the cannelure without any bulging below the crimp line. If you’re loading lead or plated bullets, check for shaved material on the outside of the case. Lubricant or lead residue on the exterior will gum up your chamber and cause feeding problems. Scrape it off or set the round aside.
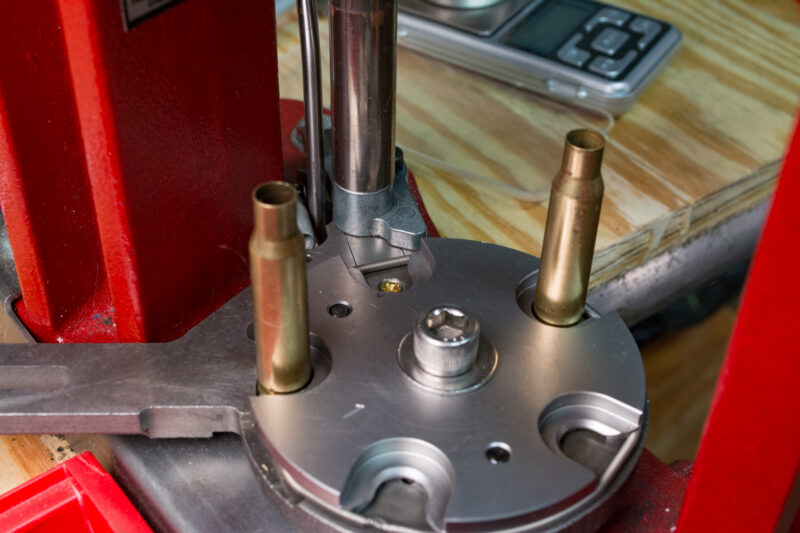
Case length / headspace gauges like these are worth their weight in gold.
They allow you to quickly check overall case length to make sure everything is in spec.
The Final Inspection
Even with all those layers in place, a last look before boxing is still worth doing. As each completed round goes into the box, give it one more pass. Does the bullet look properly seated? Any dents or dings you might have missed? Is the primer still in place and oriented correctly?
If anything looks questionable, pull it. A bullet puller costs a few bucks. A trip to the emergency room costs considerably more. When in doubt, take it apart and start over. Trust me, I can relate to the temptation of, “This one is probably fine…” But there is no reloaded cartridge valuable enough to gamble on.
One of the reasons I invest in plastic ammo boxes is that they hold ammo evenly,
so while a quick scan won't tell you if the overall cartridge length is correct, it will tell
you if one or more cartridges are "out of line."

Especially for handgun cartridges (these are .223 rifle), I like to load boxes nose down.
It helps to spot any primer anomalies.
Label Everything
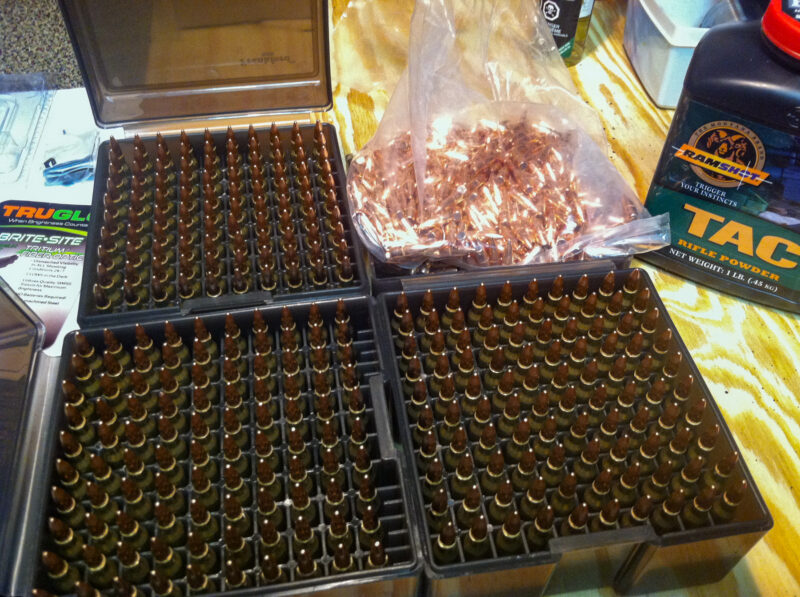
Once your rounds pass inspection, box them up. I prefer the plastic cases with individual slots for each cartridge. They protect against dings during storage and transport, and they make it easy to count what you’ve got. More importantly, label every box with the complete load data: caliber, bullet weight and type, powder type and charge, primer, and date. Future you will not remember what’s in that unmarked box six months from now. Ask me how I know.
The Whole Point
Quality control that happens only at the end is really just damage assessment. You’re sorting finished products into “probably fine” and “maybe not.” That’s better than nothing, but it’s the weakest version of the quality control ideal.
Real quality control is cumulative. Each step verifies the one before it, and each check you perform adds another layer of confidence. By the time a cartridge reaches the final inspection, it’s already passed a half-dozen smaller tests along the way. That’s how you build ammunition you can trust.
Now go shoot it.
In case you missed it, be sure to check out Part 9 (Crimping).
Get more exclusive online content from American Handgunner delivered straight to your inbox. Sign up for our free American Handgunner Insider newsletter.