Creating A Comprehensive Firearms, Shooting
And Safety Program — For Kids
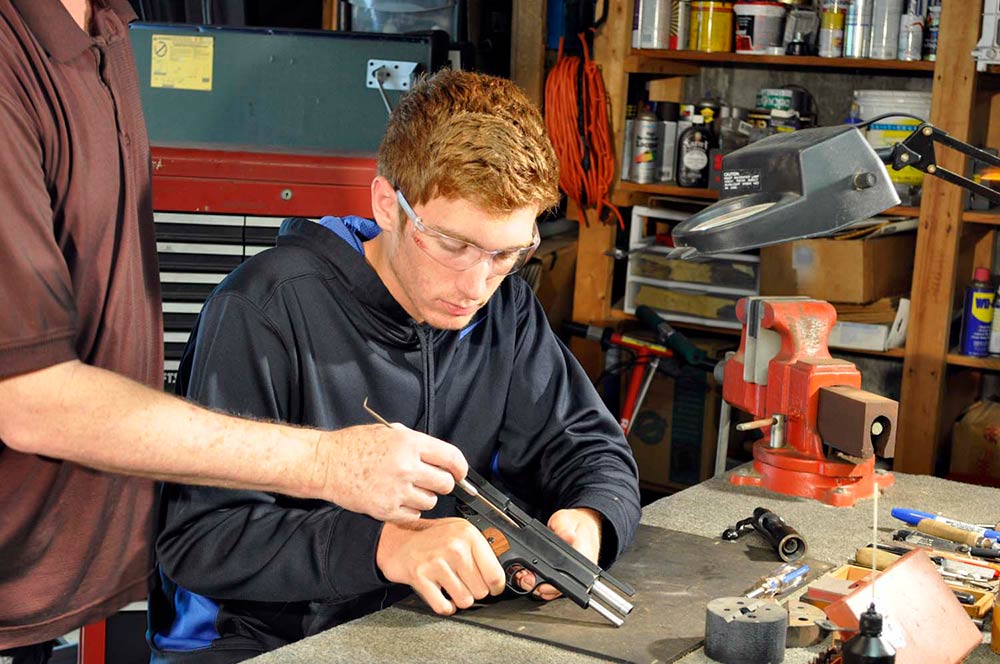
Teaching safety and general functioning of firearms is important to new shooters.
Here I’m teaching my son, Kyle, how a 1911A1 pistol functions.
Today’s generation has a multitude of devices and activities to keep them engaged. From one extreme, where kids stay in the house 24 hours a day glued to the flat screen playing videogames, to the other extreme, where kids are outside playing sports year around.
My son, for example, played baseball year round. Playing Little League in the Spring, then playing Summer travel ball and Fall Ball through his high school years, and now, playing college baseball as a pitcher, the kids of today can choose from a wide variety of activities to become engaged.
My son wasn’t really interested in firearms or the shooting sports when he was younger. I was in the firearms business for many years and there were always firearms in the house, so he was always taught to respect all firearms, and I would show them to him when he would ask to look at them. He would never touched them unless he asked first and I was there to supervise him.
It always seemed to satisfy his curiosity about them and when I asked if he wanted to go shooting, he was always a little hesitant. So I waited until he got a little older and was more confident. I believe as a parent, it’s not good to try to force kids to try new things until they are ready, and they’ll tell you when they’re ready.
So it wasn’t until he was much older, around 16 or so, he would ask me about my time spent with guns. I was withy the Army Shooting team, attended five gunsmithing schools, eight factory armorer’s courses, spent some years as a Small Arms Tech with the 82nd Airborne Division and 8th Inf Division and ten years as the Chief Gunsmith for a classified DoD facility. Based on his interest and my own experience, I decided to come up with a short program to introduce him to firearms safety, basic gun handling, nomenclature and basic handgun marksmanship.
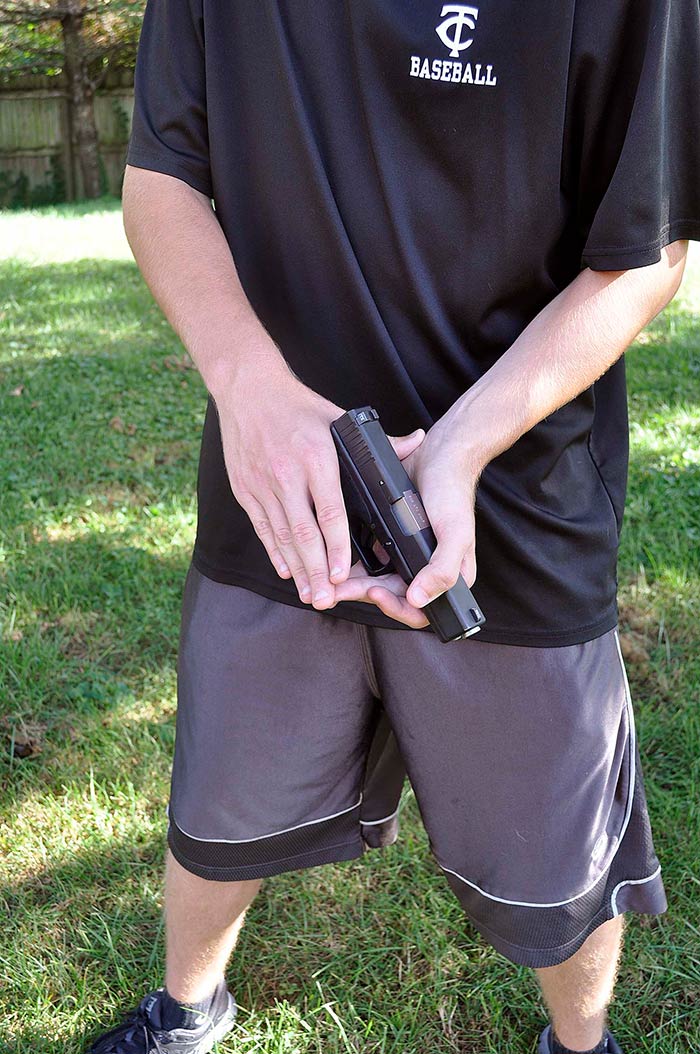
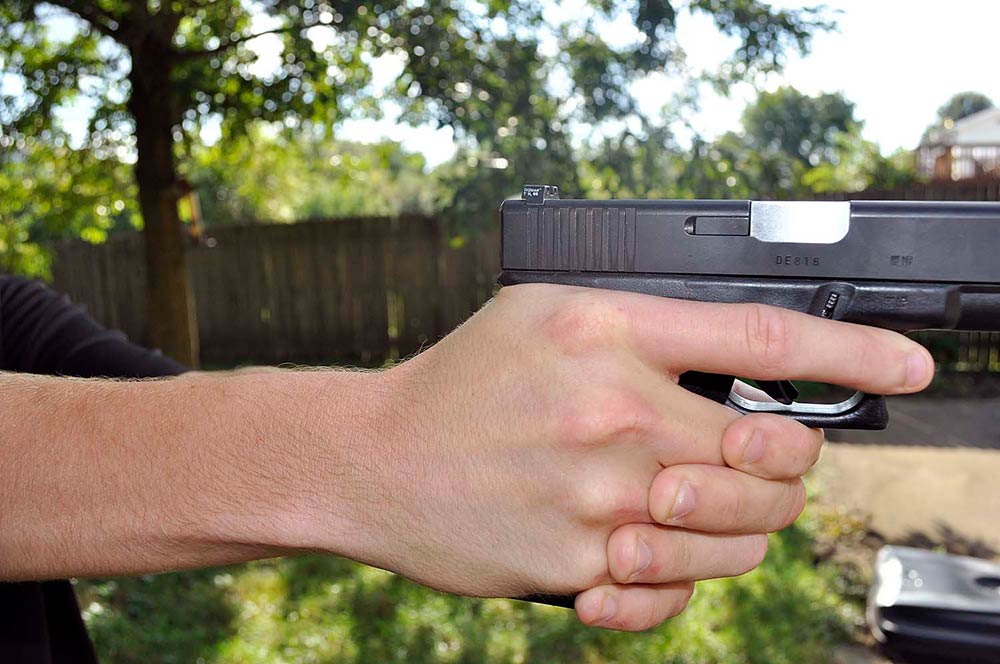
Use the non-firing hand to place the firearm into the shooting hand. Then wrap
the fingers around the grip and keep them there. After I get my grip,
I don’t re-adjust it before I start shooting.
Basic Safety
I know the NRA has great firearms safety programs, and there are marksmanship courses geared for kids in the Cub Scouts and other good organizations. All are great programs, but I thought it would be good to combine all of those elements, and more, into a comprehensive short program for kids who are around 10 years of age and older. The program worked so well I thought other people who had kids would be interested in it as well. And fortunately, American Handgunner offered me this avenue to share my experiences.
The first step with any firearms training program is basic safety. I combined this with a good understanding of how firearms work, basic loading and unloading and how the safety of the particular firearm operates. Twenty-two caliber pistols are universally accepted as a first handgun to teach not only safety but as a good introduction to marksmanship. This is because of their low recoil, ease of shooting accurately and also because ammunition in relatively inexpensive especially when compared to centerfire ammunition.
The ability to shoot accurately for the beginning shooter is critical because it instills confidence in their new found skill, and also in your ability to convey marksmanship fundamentals to them. If they see they are achieving good results early on, new shooters will have confidence in what you’re teaching them.
I have a .22 cal. S&W Model 422 I bought for my wife many years ago. I used that pistol to teach her how to shoot, so I thought it was a good candidate to show my kids how a semi-auto operates and how to safely load and unload one.
I also have a Hi-Standard .22 cal. revolver my father gave me before he passed away. I thought it would make a great candidate to show them how revolvers operate, and how the safeties work in those types of handguns as well. Revolvers do have safety features, just not necessarily external manual safeties like an autopistol does. New shooters need to know what those features are. One of the basic safety rules is to always be familiar with the safety features of the firearm you’re using and if unsure, ask someone. No safety is foolproof.
Notice how the grip allows the recoil to travel straight up the arm.
This allows for more comfort and control when shooting.
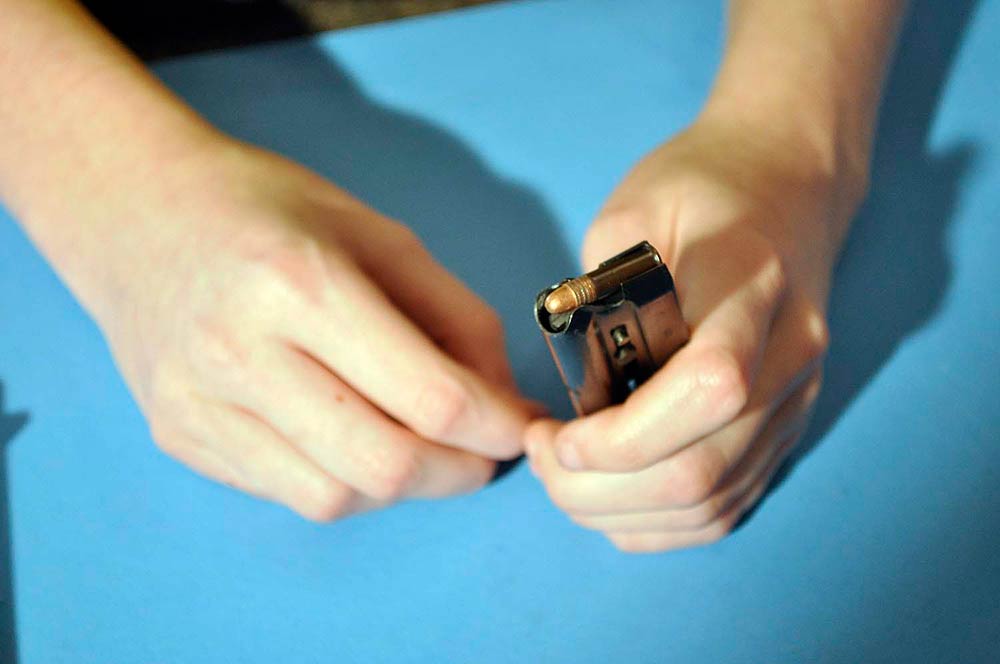
Dummy cartridges are critical to teaching safety and marksmanship to new shooters.
Teaching Fundamentals
My current position is as an instructional developer. For ten years, I’ve been working with subject matter experts in creating effective classroom and online learning programs. I also ran an effective classroom armorer’s training class for classified DoD personnel for over ten years. I have a good understanding how people learn, and teaching shooting and good gun handling skills is not much different from teaching them about other subjects.
People learn in different ways, and without getting into different learning theories and adult teaching, I will say most people learn first by seeing how some task is performed, then by actually doing the task themselves.
This is the approach I’ve used with my kids and it has worked out very well. I show them how to perform some task, then let them perform the same task while I watch and provide help and correction if they need it.
Starting with the S&W 422, the very first thing I wanted to teach was to emphasize every firearm, no matter what someone says, is always loaded until you have personally inspected it. And if you are out of sight of that firearm for any amount of time, always check it again to make absolutely certain it’s unloaded and pointed in a safe condition.
The second element I teach is to always keep the trigger finger outside of the trigger guard. Actually, these two safety fundamentals go hand in hand, so to speak. When checking the firearm to make sure it’s unloaded, always keep the finger off the trigger. Some people like to keep it alongside the frame above the trigger guard, and some people like to lift it off and away from the gun as much as possible. I don’t think either way is wrong, as long as the finger is kept well outside of the trigger guard and away from the trigger.
The third fundamental I teach is to always keep the firearm pointed in a safe direction. That way, if the other safety fundamentals are violated, and the gun is negligently discharged, it will not harm anyone. There are several other rules about firearms safety I teach, but those are the basics. For a full listing of firearms safety rules go to the NRA website at: http://training.nra.org/nra-gun-safety-rules.aspx.
Once I’ve taught my kids about basic safety, the next step is loading and unloading. I have dummy cartridges for this purpose and they work very well. I also use dummy cartridges when teaching them marksmanship at the range. Randomly inserting a dummy round in the cylinder or in the magazine while we are shooting will likely show any anticipating of the shot or “flinching.”
I also go over all of the safety mechanisms of each particular firearm, and emphasize while many firearms are similar, not all are the same. They need to make sure they understand how the various safeties work on the firearm they are handling.
I then teach them how to properly load and unload both pistols and revolvers using the dummy cartridges. I also use a couple of training aids to teach them basic marksmanship fundamentals at the range. There are seven basic fundamentals of marksmanship and they are universal for all types of handguns, and can also be adapted to rifles and shotguns. For this article I’ll be addressing pistol shooting fundamentals.
These fundamentals are mainly designed to be used for informal target shooting, not any specific type of shooting. Many different types of shooting have specific techniques relative to their form of shooting and those could be taught later, after their grasp of the basics is complete.
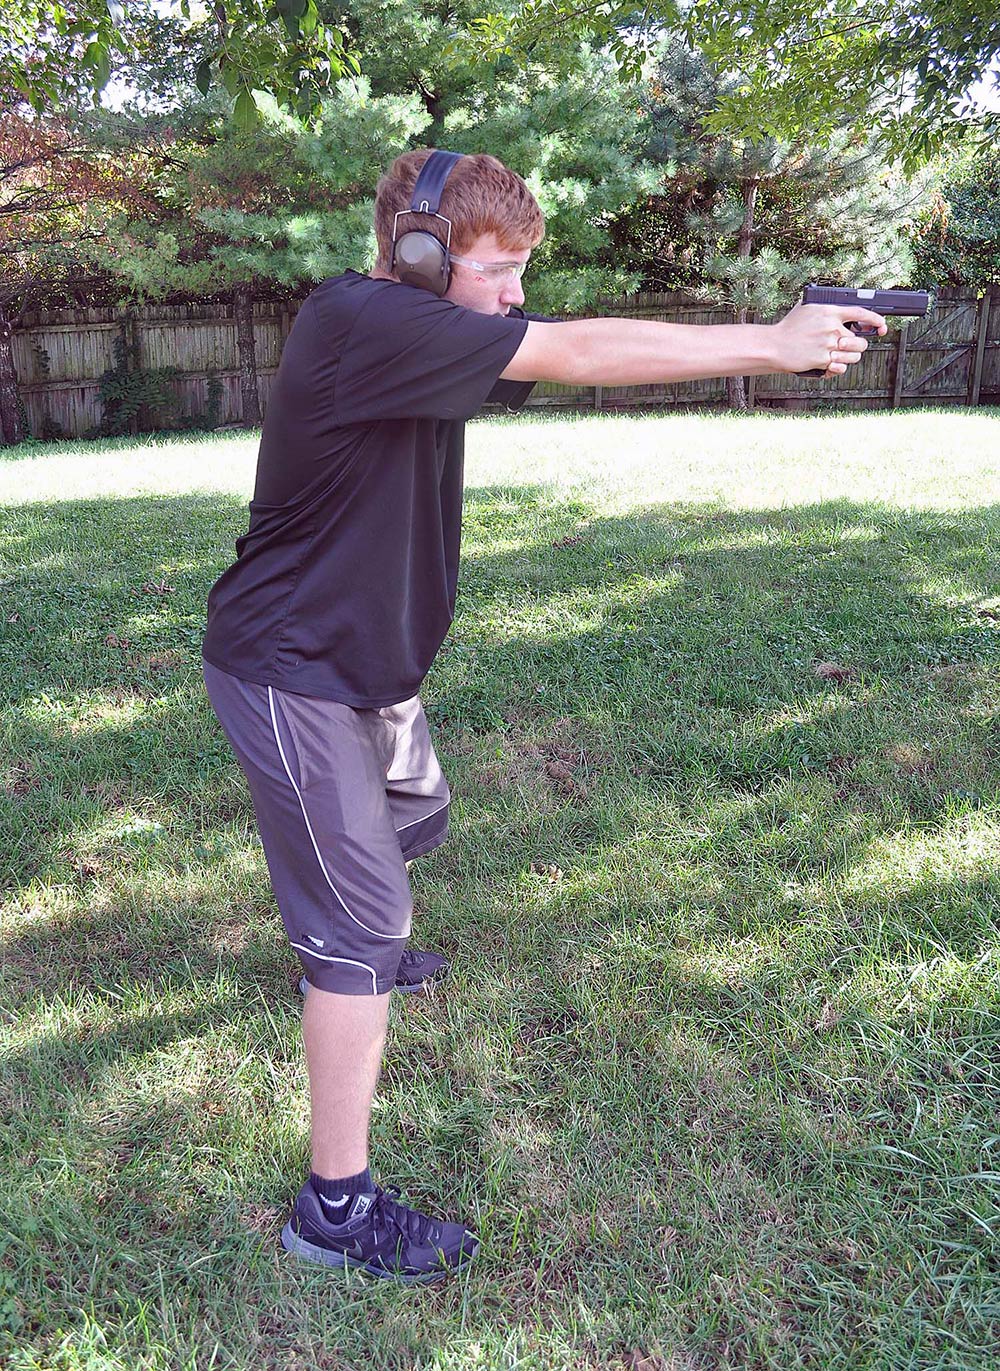
A good stance, position and grip will help make shooting more comfortable.
Notice the knees are bent, shoulders are rolled forward and my son is
bending forward at the waist to help control the pistol.
The Seven Fundamentals Of Basic Marksmanship Are:
1. Stance: This is the overall configuration of the body and serves as the foundation of the body’s shooting platform. I always place my feet shoulder width apart, bend the knees and bend forward slightly at the waist. The arms should be extended forward, and the weight of the body should be about 60 percent on the balls of the feet.
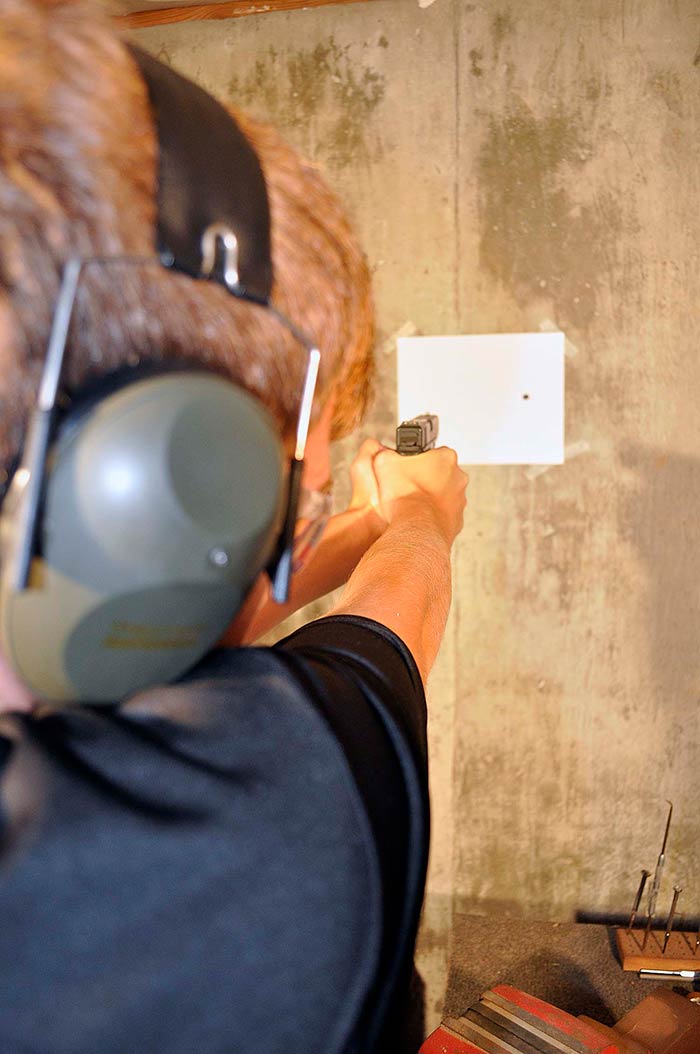
Start out by dryfiring against a blank wall. This helps the shooter concentrate
on the front sight and applying steady pressure to the trigger. They can ignore the target.
2. Position: This means the body’s position relative to the target. I try to have as natural point of aim as possible. The way to find this is to close the eyes while facing the target with the grip held in the normal firing position and pointed toward the ground, then raise the pistol as if to fire. Open the eyes, if you’re pointed somewhere close to the center of the target, you’re good. This makes sure you’re not fighting the pistol back to the target when you’re shooting. This reduces fatigue and helps you to concentrate on sight alignment.
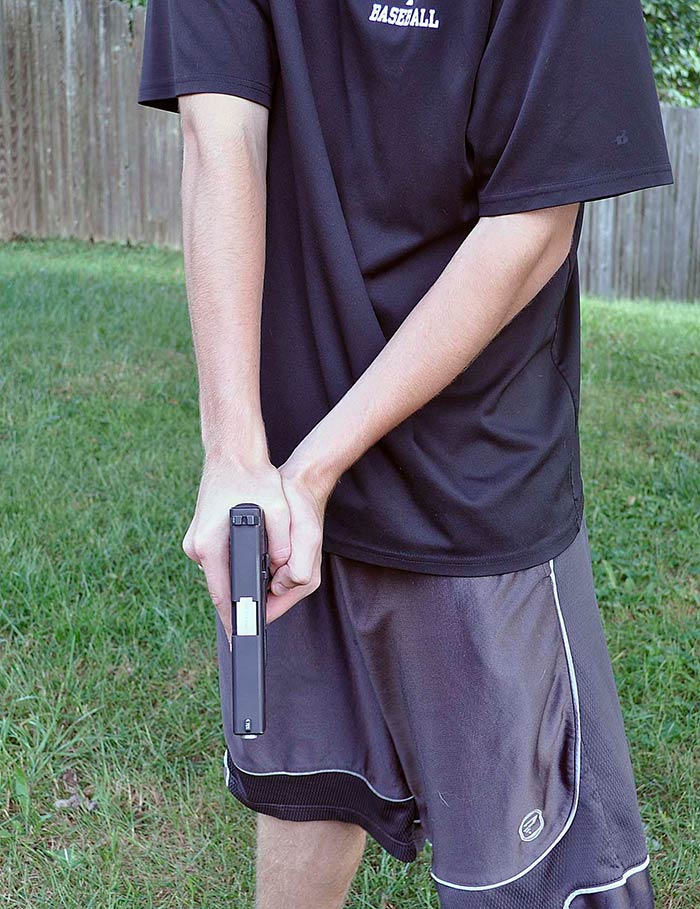
What not to do when gripping the pistol. Notice how low the shooting hand is on
the back of the frame. This will cause the pistol to torque in the hand around the
wrist and the perceived recoil will be much greater. It will also be harder to control
the recoil of the gun, and the fatigue factor will be increased. But the finger outside
of the trigger is perfect!
3. Grip. The grip should be applied with firm but not excessive amount of tension. I start by placing the pistol into the firing hand and then wrapping my fingers around the pistol. Once I get a good grip on the pistol, I never re-adjust it; that’s called “milking” the grip. Also, the amounts of tension I recommend to my kids is to squeeze the pistol until it starts shaking, then back off until it stops. This is usually a good amount of tension to start, but it can be adjusted up or down. Every person will need to find their own proper grip tension as it will be different for each shooter. The grip should also allow the recoil to travel straight up the arm. The hand should also be placed as high on the pistol frame as possible as this will reduce the torque on the wrist.
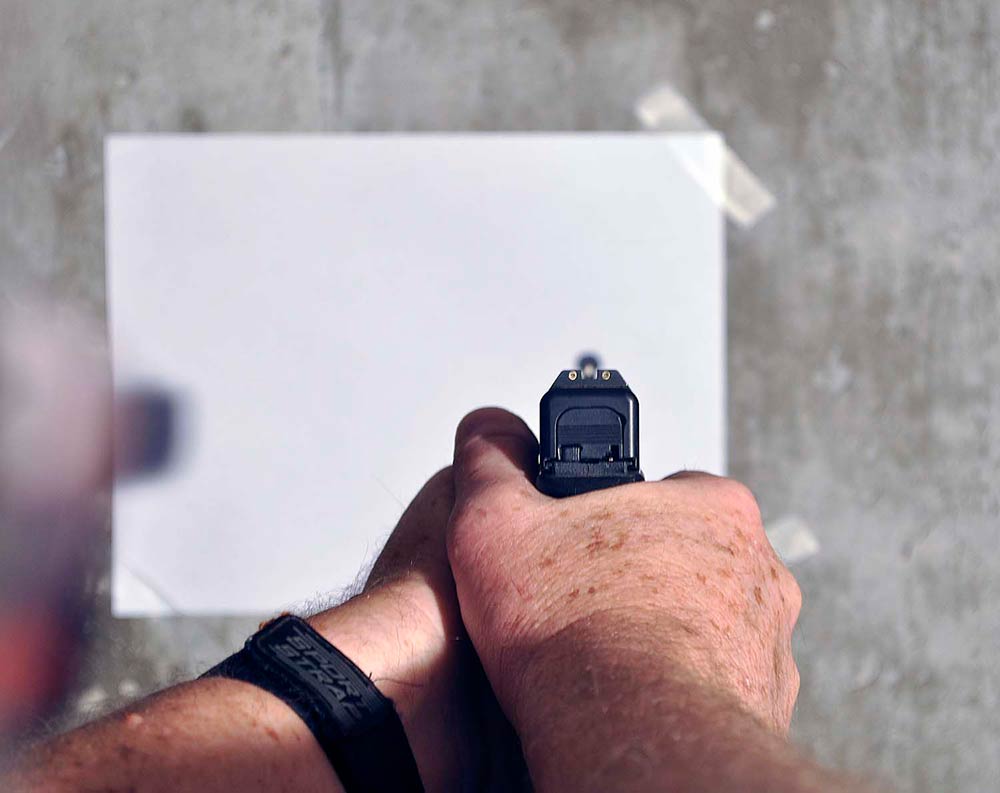
After dryfiring with a blank target, I can gradually add a target to the training dryfire
routine to simulate firing on an actual target. Always concentrate on which way the
front sight moves when the striker falls. The front sight should be in focus at all times
4. Sight Alignment. This is, without a doubt, an important fundamental in pistol shooting. Good sight alignment is nothing more than the top of the front sight flush with the top of the rear sight, and equal daylight on both sides of the front sight. This is not to be confused with sight picture, which is what rifle shooters and some pistol speed shooters use. For teaching beginners, emphasize sight alignment. I use a couple of good training aids when I’m teaching my kids. First I explain what good sight alignment is, then I go back to the dummy cartridges and we do dry firing practice starting with a white piece of paper taped to a blank wall. What I’m doing here is to get them focusing on the sights without thinking or looking about the target.
Also, I want to make sure they can “call their shot.” I’m talking about the ability for my kids to tell me what the front sight did at the moment the hammer or striker fell. Dry firing is one of the single most effective drills a young shooter can do to improve their skills. Dry firing, and the ability to call the shot, determines whether or not the shooter is employing good follow-through. Follow-through is similar to follow through in throwing a ball or kicking a football. Follow-through in shooting is trying to keep concentrating on the front sight, and trying to keep them aligned as the gun goes off.
When I was with the Army Shooting Team, we would dry fire constantly and it really helped. If the sight dips down and to the left for a right handed shooter, this means my son or daughter anticipated the shot and forced it. This is known as “jerking” the trigger. Same situation if the front sight goes high and to the right, this is called “heeling” and means she pushed with the heel of the hand in anticipation of the gun going off. If the sight goes left or right, this means the trigger finger is placed too far in, or not far enough on the trigger. After practicing with a blank paper, I usually introduce a black circle to represent the target at 25 yards and continue dry firing.

This is the correct way to “Choke up” on the pistol, and will help in recoil control.
5. Trigger Control: This means nothing more than the ability to apply pressure to the trigger straight to the rear until the gun goes off. Sounds simple, and when I explain it to my kids, they understand it immediately. But to actually do it correctly shot after shot, is very difficult. This is where dry firing can really pay off. Watching the front sight and seeing what it does as the hammer falls will tell a lot about how I’m applying pressure on the trigger. Remember trigger pressure should be applied at a steady building rate, no matter how fast the shot or sequence or shots is. And keep in mind, if you have a perfect sight picture but mess up the trigger press, you miss.
Notice how the barrel is off-center of the arm. The hand is rotated too far inward.
The recoil will not travel up the arm.
6. Breathing: This is an often neglected fundamental but it’s very important. Taking a deep breath prior to firing a shot or series of shots, allows me to achieve a “minimum arc of movement.” What this means is when I bring the pistol up to fire, the sights will move around and after about 5-7 seconds, that movement will gradually decrease. That’s when the shot or series of shots should be delivered. If I wait longer than that, the movement will start to increase as I run out of breath. So I’ll take a deep breath, bring the pistol up and settle in, focus on the front sight and deliver a shot while the pistol has the least amount of movement.

Safety is paramount. Always ensure the finger is outside the trigger guard and
the pistol is pointed in a safe direction when loading and unloading.
7. Mental Discipline: Shooting is really more of a mental exercise than a physical one. Mental discipline involves many facets but can be broken down into separate phases. Preparation — which is nothing more than getting in a mindset to shot or deliver a shot. Planning — this is simply devising a plan in advance on how to fire a single shot or a course of fire. Relax and Focus — taking a few deep breaths and reviewing the plan will lessen the nerves and will result in better results. Visualization is very helpful here. Analyze — this is looking at the impact or shot group on the target and comparing it with what the orientation of the sights were as you delivered the shot or shots. If I saw the front sight go high right, is that where the shot is on target? Can I call the shot? Make corrections. I try to determine if I was successful or not, then determine why or why not and try to correct it.