Test That Gun!
Best Methods For Testing Handgun Accuracy
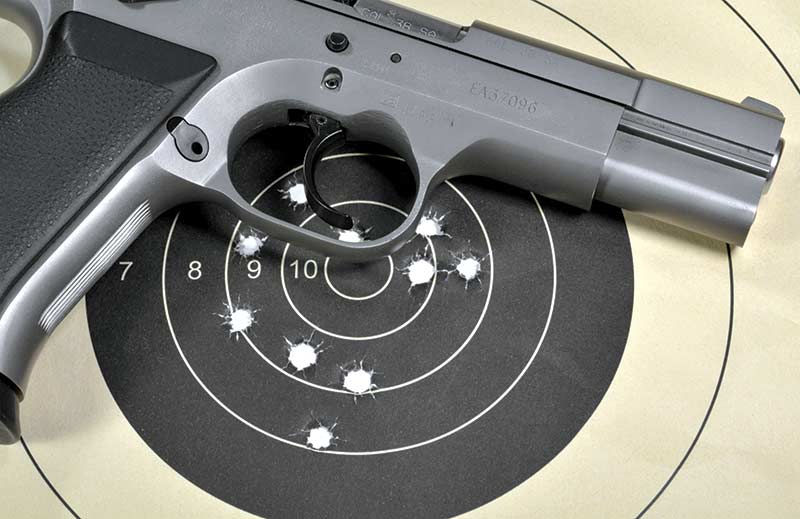
You’re at the range. You’ve got your handgun and ammo and you’re going to find out how it shoots. Now what? There are good ways to test your pistol for accuracy, and there are bad ways. The point of doing this is to determine how accurately the gun and ammo shoot. You have to use the right method, or you won’t be able to come to a valid conclusion.
What Is Accuracy?
With respect to testing for accuracy, there are at least two types. One is testing how accurately we shoot the gun. The other is how accurately the gun shoots.
In the first example — testing how well you shoot the gun — you’re testing your skill as a shooter to put the rounds where you want them. It involves mastering the proper grip, holding the gun and your body steady, sight alignment and trigger control.
The second type of accuracy testing is to determine how well the gun shoots. There are two elements at work: the mechanical accuracy of the gun and the accuracy potential of the ammunition. In order to test the gun and ammunition for accuracy, you want to remove any effect the shooter might contribute.
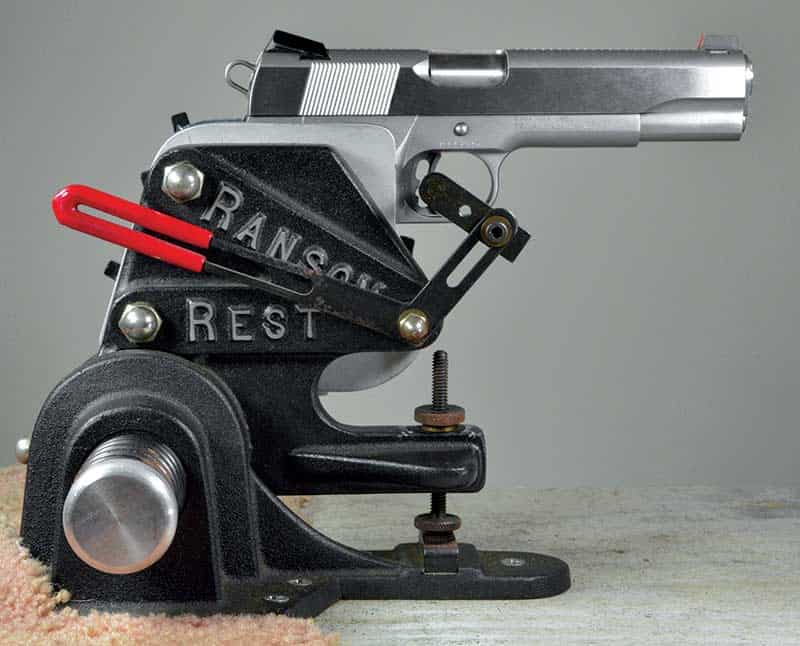
A Ransom Rest is a mechanical “vise” holding the gun perfectly steady shot to shot.
Machine Testing
The best method eliminates the human variable and uses a mechanical device to hold and fire the gun. That’s what a Ransom Rest does. The gun frame is secured in the rest and holds it in the same position for every shot. The trigger is tripped by a lever. Thus, gun alignment and trigger pull are done by machine.
Aligning the sights to the same position by eye with a tolerance measured in a few thousandths of an inch for multiple shots is not easy. Thus, while the Ransom Rest might be theoretically imperfect with a loose slide to frame fit, in practice it does a much better job of repositioning the gun to point at the same spot than we mere humans can.
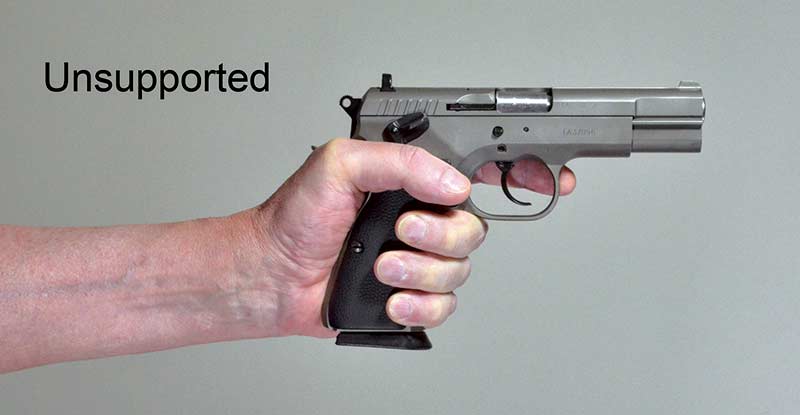
Shooting unsupported is the least reliable way to test the gun or ammunition for accuracy.
Offhand Challenges
Most shooters have to test their gun the old-fashioned way — by hand. There are right and wrong ways to do this. Let me start with the worst way, which is unsupported (offhand).
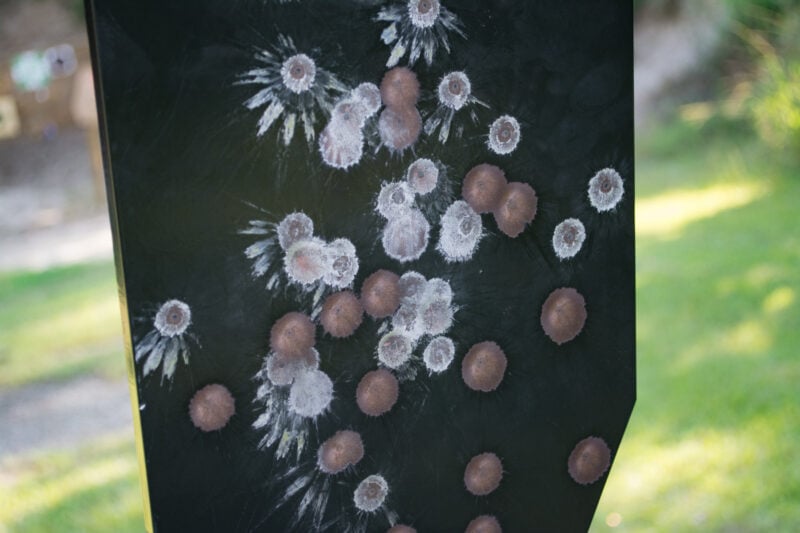
Things can go poorly when shooting unsupported. One day at the range a shooter in the bay beside me said he recently bought a new gun, and it shot terribly. What did he mean by terrible? He said it was shooting about 3 to 4 feet low at a distance of about 10 yards. Maybe the gun’s sights were off, he thought.
He asked me if I would shoot it to confirm his suspicion. I sat down, rested the gun on the bench and shot at a rack of falling plates at about 10 yards. Three shots, three plates went down. He was speechless. It turns out he was shooting offhand. He was flinching so much the bullets were hitting several feet below the target.
Any flaw in technique can show up on the target. It’s harder to apply perfect technique shooting offhand, and any flaws, such as flinching, can be grossly magnified.

Shooting by only supporting the arm is not the best method. The gun is
free to move by any imperfections the shooter introduces.
Bench Shooting
The better way is to shoot from a bench or other firm support where you can rest the gun on a surface. There are several companies making pistol rests for this express purpose, such as Caldwell, MTM, Hyskore, CTK Precision, Target Shooting Inc. and Bullshooter, to name a few. You can also use any one of a variety of shooting rest bags.
The specialty rests are ideal for the job, but you can also just use simple sandbags, wooden blocks, rolled up towels, whatever you can dream up. For countless years I’ve used simple sandbags and wood blocks. They work!
Whatever type of support you use, the method in which it’s used is the most important. You can rest your arms or wrists on the support, or you can rest the gun on the support. Which is better? Rest the gun!
Keep in mind you’re trying to eliminate any movement of the gun that can be attributed to you. If you rest your arms or wrists on the support, the gun is hanging out there free to move, wiggle, wobble, shake, sway, twitch or jerk. Whatever your body or arms or hands do will be transferred into gun movement. You don’t want that.
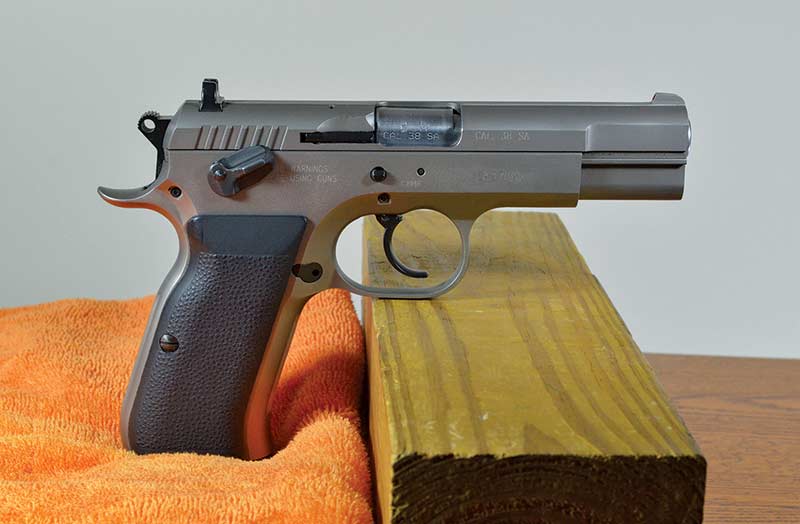
The commercial rests are usually designed to put the barrel or dust cover on the front of the rest (depending on the gun design), and the bottom of the grip on the rear of the rest. Thus, both the front and back (bottom) of the gun are supported. This is the ideal method — support at multiple places. You can emulate the two-point support with blocks or sandbags. Put the front of the gun on your block/sandbag, and the bottom of the grip on the bench.
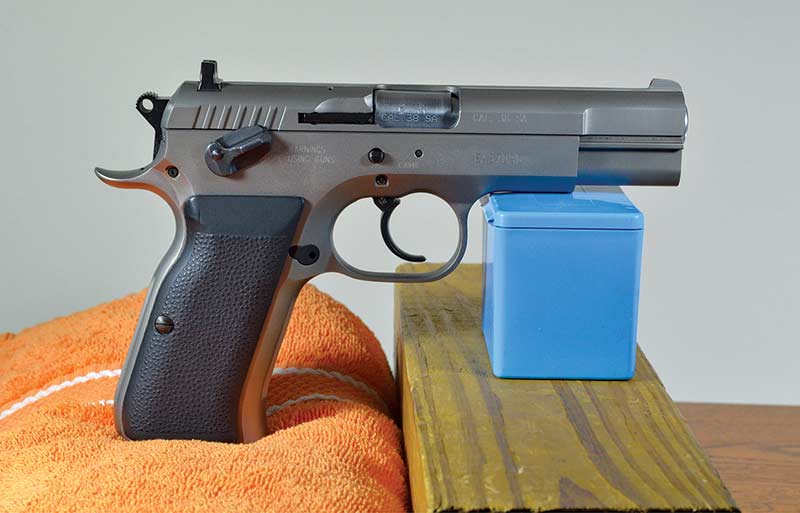
Improvisation works provided you find ways to support the gun
at two different points. Perfect stability is the goal.

Rest Tips
Depending on the height of the front rest, the bottom of the grip might or might not rest on the table. You can use a spacer (another block, sandbag, towel, bottom of your hand, whatever) to rest the grip on.
If I’m using plain old sandbags, sometimes the trigger guard ends up being the front part of the gun supported. That will work, too. This isn’t rocket science, it’s simply being practical to provide solid support to help you keep the gun steady while you carefully squeeze off those shots.
If you rest the back of your forearms or elbows on the bench, make sure they’re on a soft cushioned surface (soft pad, another sandbag) so they don’t get bruised from the recoil.
Be sure the slide that extends past the dust cover on semiautomatic pistols does not contact the support rest. This can produce fliers and cause gun malfunctions. And be sure to rest your butt in a chair. Do your test while sitting, so you don’t introduce body sway into the equation.
Even with a properly supported gun, you still have to do your part. You still must use proper shooting techniques to make this method work effectively. Take it slow and easy and pay attention to your trigger pull.
If you’re shooting a revolver, pay close attention to where the front of the cylinder is positioned. Make sure there is nothing directly to the side of the gap between the cylinder and barrel (including your fingers!). The high-pressure blast of the flame coming from the gap, especially with magnum rounds, can damage your rest and redirect the blast back toward you if you’re not careful.
When I use sandbags with a revolver, sometimes they are to the side of the cylinder/barrel gap, so I cover the sandbag with a towel. The flame blasting from the gap can be so intense it will rip holes in the towel and set it on fire. One day when I was testing .44 Magnum loads, I shredded a towel to bits and set it on fire half a dozen times.
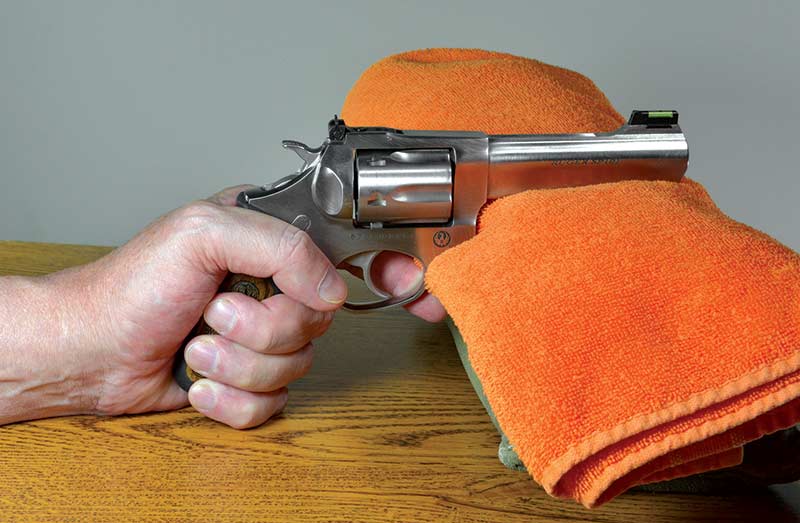
Revolvers require special attention when shooting off a rest because of the high-pressure
gas and flame that escape from the gap between the cylinder and barrel. Protect valuable
surfaces with a rag or towel. And keep your fingers away from that gap!
Distance
At what distance should you shoot? The common standard distance for handguns is 25 yards. It’s the gold standard and is a good distance to get an impression of dispersion, or tightness, of hits.
With short-barreled guns, especially guns designed for self-defense, you might want to shoot closer at 7 to 15 yards.
Serious folks will shoot to 50 yards, especially bullseye shooters, since that’s the range they engage the slow fire targets. Longer distances are also possible depending on the shooter’s intended purpose. I used to test the accuracy of my .44 Magnum loads at 100 yards in preparation for Silhouette matches that shoot out to 200 yards. And that was with iron sights.
There you have it. If you have access to a Ransom Rest, use it. If not, support the gun, take your time, get the sights aligned, squeeze the trigger slowly, and find out how your gun shoots!
For info: RansomRest.com, Hyskore.com, CTKPrecision.com, TargetShooting.com, BullShooterSightingIn.com, BTIBrands.com, MTMCase-Gard.com