DIY Gun Cabinet
Get Motivated!

Finished and in the place it was designed for in Roy’s office. It holds
a handful of guns he likes to keep handy, along with a bit of ammo
and accessories on the top shelves. He put two stainless “J-hooks”
on the side to hold muffs and glasses at hand. There’s no reason you
couldn’t put locks on the glass doors if you like or change the design
to match your space and needs.The lighter color inside helps to make
the light show off the contents. Roy found the simple colors of
revolutionary-era American furniture and home interiors almost
always make pleasing combinations.
I’ve had several “store-bought” gun cabinets, and frankly, I’ve been disappointed in each of them. Unless you spend in the thousands, you get casual construction at best in a stapled, particle board build with “Genuine Veneer” (stick-on wood grain?), plexiglass door fronts and a cabinet at the bottom you can’t reach and won’t open easily anyway. After a short time, the seams start to open, the vinyl begins to peel, and you’re left with that bad taste you hate to have. This is the sort of furniture you see at the curb eventually, with “Free” scrawled on a torn piece of cardboard stuck to them.
Short of a custom build of real wood or stumbling onto an actual gun cabinet in a good furniture store (good luck there), the best route is to just suck it up and build one yourself. Before you panic thinking of your dull-bladed skillsaw, dead-batteried electric drill and cluttered garage floor, regroup and keep an open mind here. Even someone with modest tool skills (and aw sharp blade in that skillsaw) can drum up some semblance of a custom gun cabinet to meet their particular needs.
Remember, this is just a box, that’s all. Once you make a box using the best big box home store’s plywood you can find, the rest is just decoration and paint, followed by that self-satisfied grin when you see it in the flesh.
Chances are good the fanciest gun cabinet in the world begins life
as some sort of box. If you own a decent square and take your time,
you can make your first box perfectly square, which goes a long way
toward success as you build on that basic box. It’s also best to rough
out some dimensions and build ideas before you start to cut.
Roy started with good quality sanded 3/4" ply from Home Depot.
Corners can be simple butt joints (the two pieces simply butted
together with glue and good screws) or something like this, with
a rabbit one, so the other piece sits on it. This offers better support
and more glue surface. You could make this with a cheap router easily.
Can you say Harbor Freight tools?
Roy used dados to keep things tidy for the main shelf. A router makes quick work of these or, better yet, dado blades on a table saw. Just use a good straight edge and measure, measure, measure before you cut. Don’t assume the plywood really is 3/4", for instance, because many are just under or over. And remember, YouTube is your friend for learning how to do many of these things.
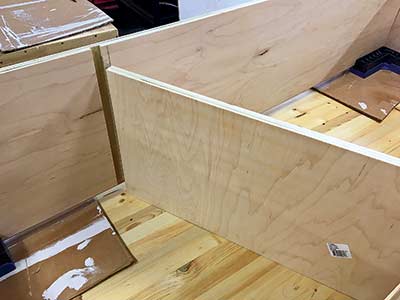
Here, you can see how a back panel will sit. Note the top panel sits neatly on the back edge of the shelf, hiding the joint. This allowed Roy to use smaller pieces and make good use of off-cuts. These are things you usually learn from the school of hard knocks. “Hey, I forgot that seam would show!” Oops.
Shop Time
Okay, I’m blessed with some hard-earned skills and a shop of good tools like a table saw, routers, jointer, planers and more. But I started doing all this with a skillsaw, hand drill, a couple of good straight edges and drywall screws. I added things as my skills grew (can you say nail gun?) and each time I tackled a project I didn’t think I could do, I found I could — eventually. And so can you.
What we have here is a gun cabinet I made for my home office. I like to keep a few guns handy to deal with varmints, “emergency” plinking events, some small-lot ammo storage of handy calibers and simply because I like the company of a few good guns. I gave this one some thought regarding the design, and so far, it’s played out well. Note the staggered top shelves. Having the top one shorter allows you to see what’s there and prevents that dark cave of forgotten goodies so often happening in drawers and cabinets of such things.
Let’s take this on in a step-by-step tour. Keep in mind this is just to give you some ideas and get your blood going. For your own first build, you could simplify things, change dimensions as needed, do away with the glass front and use wood and even think about using a pre-built kitchen-style pantry cabinet as the basic “box,” which you can then modify and add to as needed. A bit of trim, some good paint or stain, and you’re about there. Other than that final slightly smug smile as you admire your handiwork, that is! Just do it, as they say.

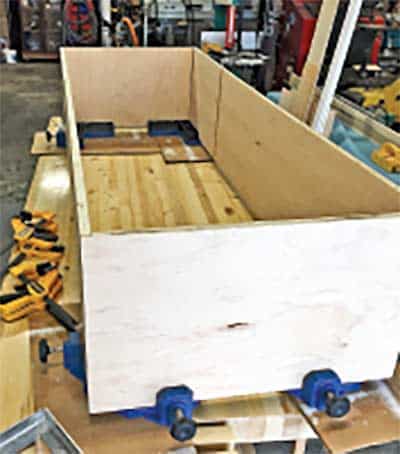
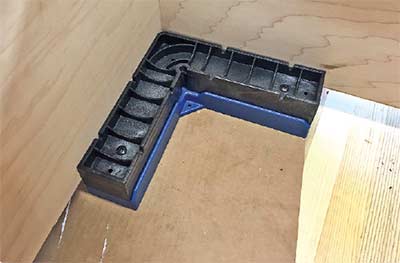
Roy cheats by using these cool corner holders during assembly.
They help to keep things aligned if you’re working alone. Note how
the side of the cabinet nestles into the bottom. After test-fitting,
it’s time for glue and the nail gun.
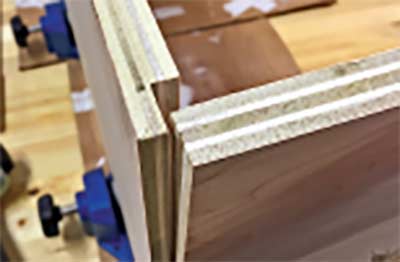
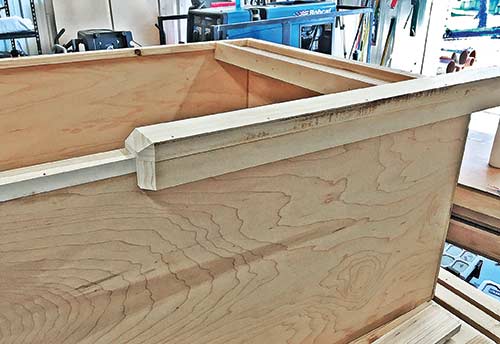
It’s starting to look like something at this point. Note the bar
clamp to hold the sides tight while the shelf glue dries. If you
look carefully, you can see a rabbit (ledge) around the top.
That will allow the back piece to be recessed neatly. More on that soon.
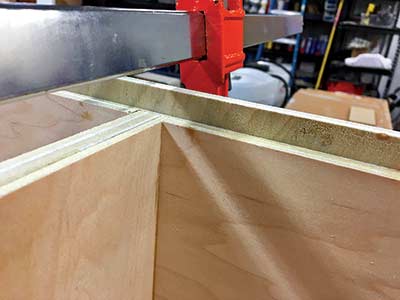
Here’s a close-up of that rabbit. In Britain, it’s called a
“rebate,” which might explain it better. A dado blade in a
table saw, or router can do such magic things easily.
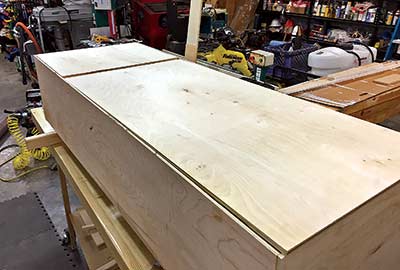
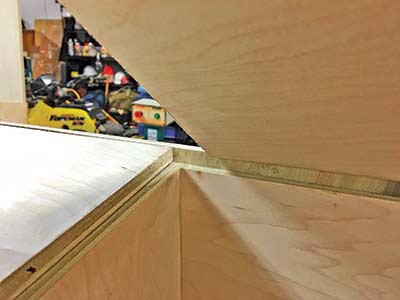
The top panel is home, while the bottom needs glue, then the nail gun once it’s seated. Once the back goes on, it really strengthens the case. Keep in mind you could also just simply glue/nail the back panel right on the edges of the sides instead of cutting that rabbit. But the rabbit adds strength and hides the edge of the plywood.
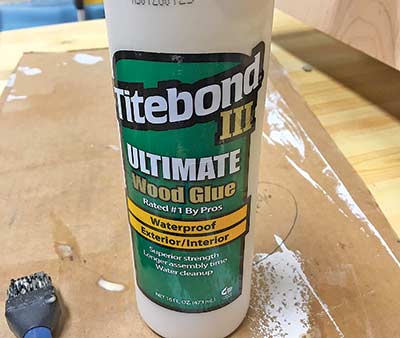
Roy’s go-to glue is Titebond III. It’s waterproof, sets up fast but not so fast you don’t have time to assemble things and is thick enough to stay in place when you apply it. He even builds cutting boards and outdoor furniture with it.
Double-checking square is critical. If you make a 1/16" mistake in a couple of spots, suddenly, you’re at 1/8" or more off as the build continues. Pretty soon, you have a 1/4" gap somewhere. Take the time to make it right.
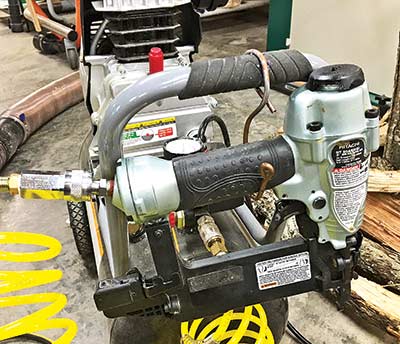
A simple nail gun (think: $100) and a small compressor really makes
things move faster and more smoothly. It’s easy to hold a part in place
and anchor it with a few key nails. You can also add screws then
without worrying about parts shifting.

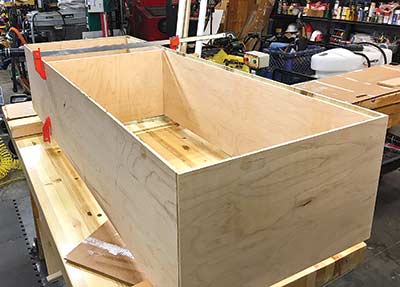
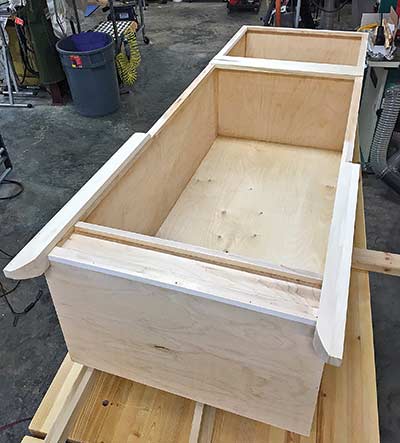
Sitting things upright allows you to get a good eye on things. Once the case is built, there’s also no reason you can’t change or add features at this point. Note the bottom cross-piece is in place, strengthening the bottom.
If you were to just sit the case on the floor, it would look awkward and heavy. It’s better to lift things a bit with legs of some sort to make it seem lighter and more professional looking. Roy opted to try out a new technique he saw on a YouTuber’s woodworking channel for the legs.
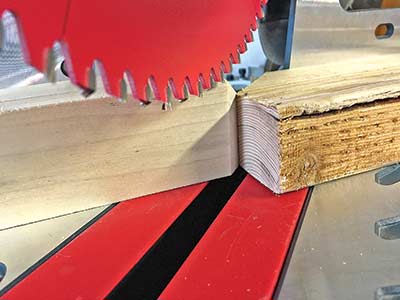
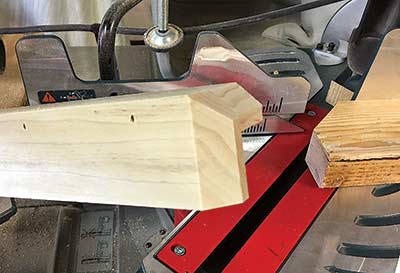
Roy used a mitre saw to cut the top angles of the legs. Keep
your brain going thinking about safety while working with all the
tools. Never make a cut without glasses and ear protection (if it’s noisy).
And wear even a simple dust mask when sawing or sanding. The glue
residue and some sawdust can be toxic. Really toxic!

Roy made a plywood template to transfer the curve for the leg
bottoms to all four legs to keep them consistent. Never hesitate
to use a template or to even make a sample build of something
using cheap wood to test fit the ideas and design. Then use
the “real” wood for the final build.
Here’s a leg marked and ready to cut. Note the pin holes from the
nails used to hold things together while the glue set. Titebond III
sets up in about an hour for handling, but keeping things clamped
or nailed/screwed is best because final set-up takes about 24
hours to make sure of things.
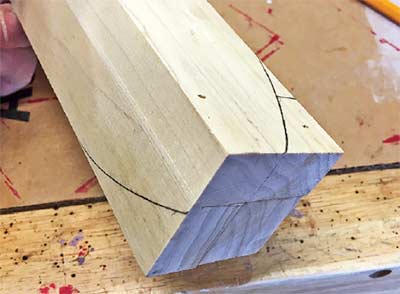
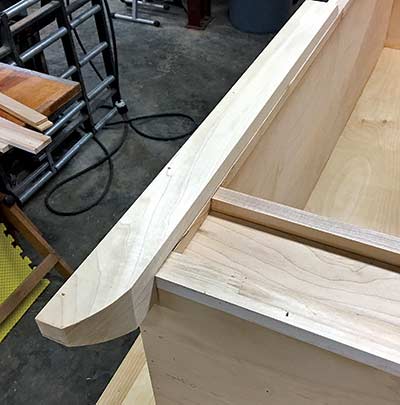
A bevel at the top of the legs is there simply to make
things look nice. A flat top would look blocky.
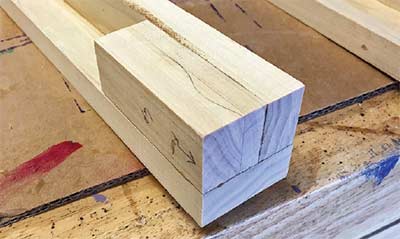
While the final legs look complicated, they actually weren’t. Here’s the
basic glue-up before Roy trimmed the bottoms to shape. This is where
having a nail gun comes in handy. Hold the parts together while you tack
them with the gun. Titebond III is extremely strong, and often the nail gun
is used just to hold things in place until the glue sets up. Roy’s found most
joints will fail in the wood grain rather than the glue joint.

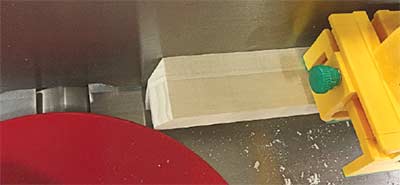
A bandsaw makes short work of the gentle curves. It took a
bit for Roy to get his head around these two cuts but once
he did the first it all made perfect sense. It’s amazing how a
simple design feature can add a great deal to a project.
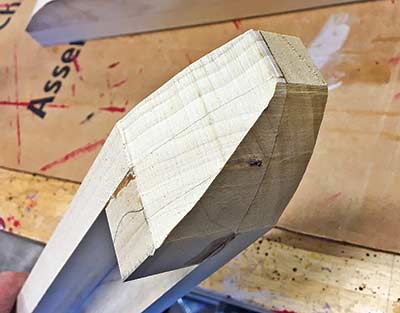
Those two curved cuts meet at the leg’s bottom turning what
would have been simple, flat bottoms into something much more
elegant. This shows the rough cuts, and it will all need to be
final sanded before assembly.
The legs took a bit of time, and once they were finished, Roy used
his jointer (a machine to make wood flat) to make sure all four were
spot-on. You could do the same thing with a good hand-held bench plane.
The only real thing machine tools do for a woodworker is speed things up
but can also help to make very accurate cuts if you do your part.

All four legs ready to install. This is a good time to reinforce
how important accurate measurements and cuts are. If there was
something skewed on the legs, it might affect how they fit on
the case or if the cabinet eventually sits level or not.
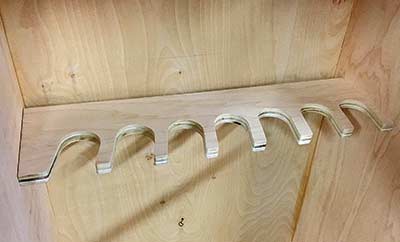
Some careful measurements of rifles and shotguns revealed
a good distance for the muzzle cut-outs. Roy used the bottom of
a spray can for the round portion and the angles allow the guns to nest neatly.
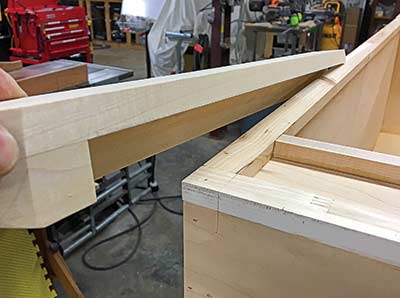
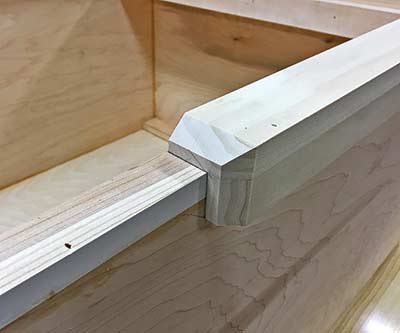
Test fitting assured things worked as they should. The bottom
corner of the case sits on the “shelf” built into the leg.
Glue and pin nails hold things in place. You can make sure the
nail heads are just beneath the surface. If they don’t go quite in,
then fill with wood filler and sand for final finishing. Roy elected to
paint the cabinet, but if you were going to use stain, you’d need to be careful about using fasteners where they might show. In most cases, simply using glue and clamps will be fine.
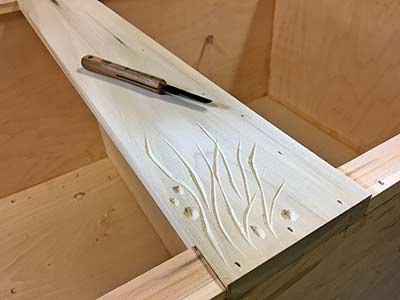
In the spirit of “what the heck,” Roy did a bit of carving on the trim
piece just below the top door. The shapes were random, but you’ll
see it really added a nice touch once things were painted and in place.
Here’s a detail of the leg top showing that angled cut.
It’s the sort of simple design element helping to please the eye.
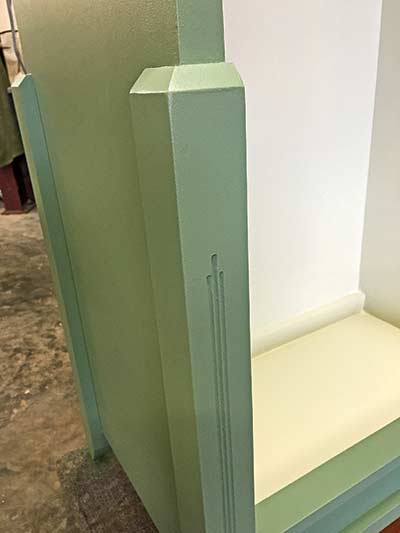
Painted-up, the legs looked swell. Note how the routed grooves
catch the light, creating shadows, and the angled top reflects light
differently than the surface of the legs. All great for looks — and simple to do.
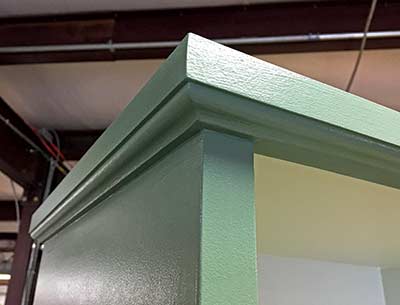
Store-bought molding created a nice cap for the cabinet. Roy combined
square and rounded stock on top of each other for this look. It’s easy, fun
and can really change the looks of a project. Anytime your eye is forced to
pause on a part of the project, it’s likely due to what’s called a “reveal,” a line
of light or dark shadow created by an overhang, groove, angle or cut helping
to break up the monotony of things. Imagine if Roy had just left this as a square box. Boring …
Nearing final assembly at this point. Note how it’s all just boxes within boxes,
along with a few accent pieces. Roy needs to do a final sanding before painting.
At this point, he had the final measurements for the openings, so arranged to
have glass cut to fit. It’s always good to wait until the case is finished in case
you’ve had to change anything during construction. The glass was installed
using special hardware from a place like Rockler or Woodcraft.
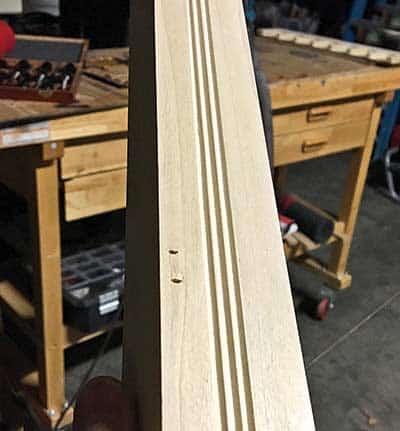
Small grooves were routed in the fronts of the legs just for a bit of eye-candy. A few small touches like this can really help to set a project apart. Building simple cabinets for the garage is one thing, but something to hold your favorite guns deserves a better look.
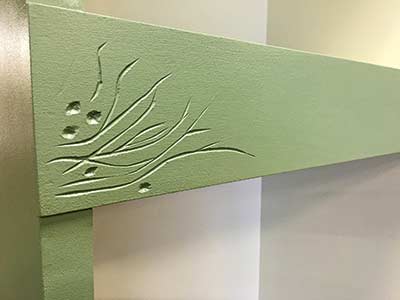
Once painted, the carving invited shadows which made the relief pop.
Don’t be afraid to experiment. In this case, if the carving hadn’t worked,
Roy could have replaced that cross piece or simply filled the carving in
and sanded it flush again.

Ready for the final install of the muzzle cut-outs, which were lined
with felt and painted outside the cabinet. At that point, Roy installed
the pre-cut glass panels and had to make an on-the-run change using
spacers to get things to fit right. Don’t be surprised if you need to make
a running change sometimes. And remember, it’s not a mistake, it’s a
“Design Element!” Roy also mounted hidden lights in the gun portion at this point.