Case Mouth Expanding
The Ultimate Reloading Series Part 5

Last time in the Ultimate Reloading Series, we talked about case resizing. That’s the step where we take a fired case, which is expanded during shooting, and smash it back to its original dimensions so it’s ready to continue the reloading process.
This time, we’re going to go in the complete opposite direction and talk about doing some more expansion of that same case. Sound strange? Well, in a sense it is, but here’s the thing. After case resizing, the “air space” interior dimension of the case mouth is going to be a little bit smaller than the diameter of the base of the bullet that we are going to reload in a subsequent step.
Ipso facto e pluribus unum, we are going to have to expand the case mouth just a hair to be able to load that bullet without making a mess. Let’s get into the details.
A 9mm Example
Before we get into this, keep in mind that some dimensions, like bullet diameter, vary by a thousandth or a few thousandths deliberately, so don’t get too hung up on the specific numbers here. We’re just going to illustrate the situation.
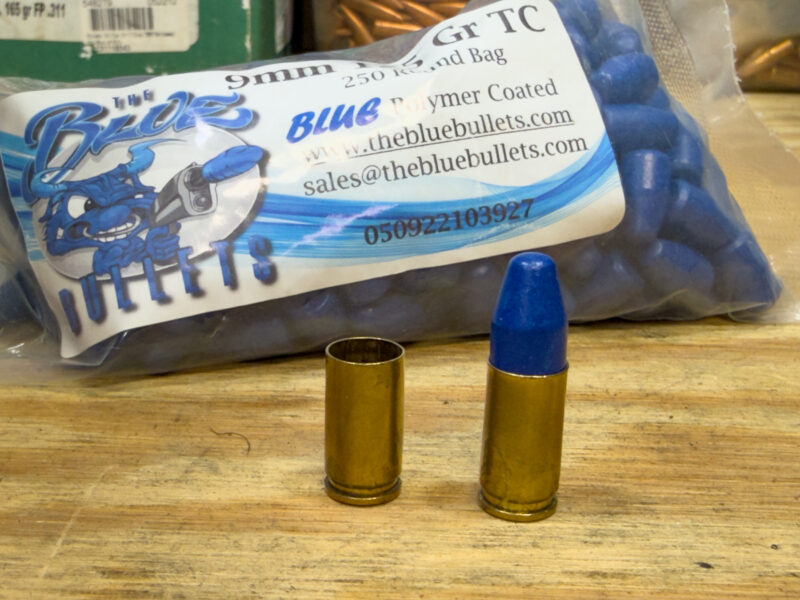
A 9mm cartridge case, after resizing to proper dimensions, is going to have an exterior case diameter at the mouth of 0.380”. The interior “airspace” diameter is usually going to measure, after resizing, in the 0.351 or maybe up to 0.353 inch range. If you’re up to speed on your math, you’ll notice that a 9mm bullet usually measures 0.355 inches in diameter, so it won’t fit in the hole. No worries, this is a good thing.
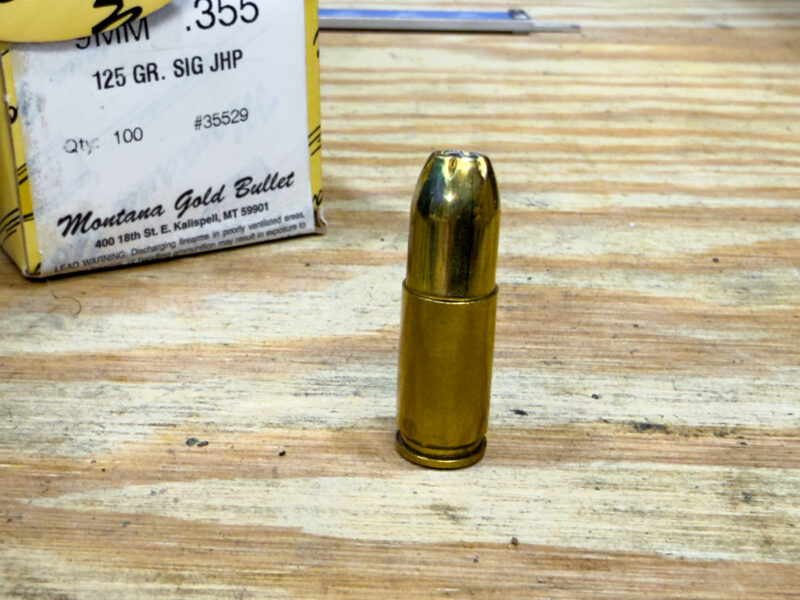
Here's a case that has been resized, but the mouth has not been flared.
As is, it'll be tricky to seat a bullet without damaging either the bullet or the case.
Delicate Mouth Expansion
Think of a case mouth expander die as a plug that pushes into the opening of the case mouth and stretches out the opening to make the interior diameter large enough to fit a new bullet.
Like most things in life, we are often tempted to adopt the “if some is good, then more must be better” approach. That works great with Brown Sugar & Cinnamon Pop-Tarts, but is entirely wrong for case mouth expansion. To get good results, we must move in the opposite direction and adopt the “less is more” method. You want to adjust the case mouth expander die so it creates just enough of an opening to seat a new bullet. Sure, if you expand the mouth even more, you can literally drop a bullet into place, and that seems like a good thing. It’s not.
This is a great opportunity to spend just a second on a concept called case neck tension, which overlaps with the concept we’ll encounter in a future step: crimping.
Case Neck Tension
When you seat a new bullet, what’s doing most of the work of holding it in place securely is friction between the bullet’s exterior and the interior walls of the case mouth. Hence, you really want to make sure that when you go to seat that bullet, it requires a good bit of force to push it all the way down to its proper depth. People are tempted to rely on the crimping step to jam the case walls back up against the side of the bullet, but this is far less than ideal and here is the reason why.
The best way I’ve found to describe this is to envision drilling a 1-inch hole in a 2×4. Now go get a 1/2-inch dowel and put it in that hole. It wobbles around loosely, right? So, what if we “crimp” that 2×4 in a vise and smash the hole up against the 1/2-inch dowel? You can do that all day long, and that dowel is never going to have a tight fit in the hole that you’ve drilled. On the flip side, what if we drilled a 3/8-inch hole for that 1/2-inch dowel? The dowel wouldn’t fit easily, but if we hammered it in, there would be a lot of friction and pressure holding it in place once we manage to seat it. Get the picture?
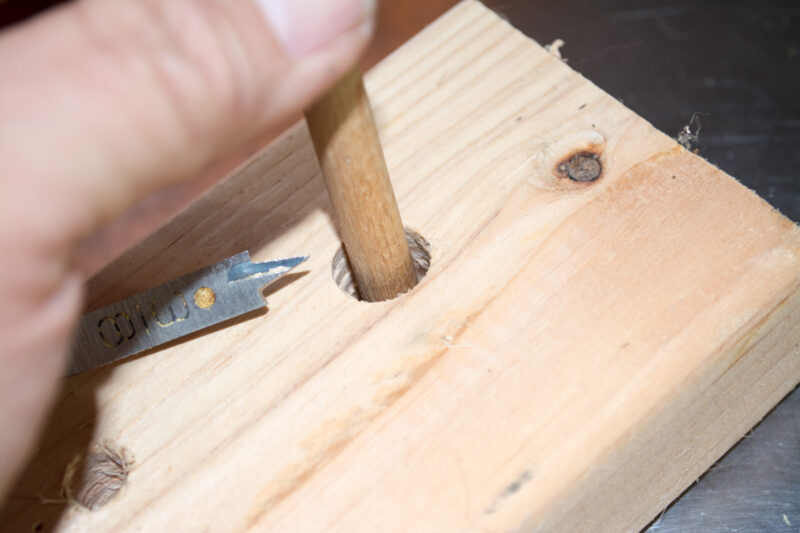
I could "crimp" this 2x4 until people agree on politics, and it still wouldn't create a tight fit for the dowel.
This illustrates the importance of minimal case mouth expansion.
The same thing applies to seating a bullet in a cartridge case. Yes, there are types of crimps, and I’m referring to roll crimping, which absolutely helps lock the bullet in place. But you never want to sacrifice the friction value you get for starting the process of securing a bullet. Think of case neck tension as the primary “locking” concept and a roll crimp as an extra layer of insurance. When both are present, all the parts of the firing process are happy.
Die Set Up
When adjusting your case mouth expander die, use a very light touch, especially with jacketed bullets. They’re sturdier and a lot more forgiving. If you expand the case mouth just enough to get the edge of the bullet in there, you can safely press that bullet into place against lots of friction resistance without damaging the bullet or the case. If you’re using lead bullets, you’ll need to expand the case mouth slightly more because lead tends to deform and do strange things if you try to shove it into too small a hole.
This is a coated lead bullet that's been resized enough to get started in the same case.
Many lead projectiles are a thousandth or two larger in diameter and will require a bit more mouth expansion.
You’re just going to have to experiment with this, but always, always, always err on the side of a lighter touch with the amount of expansion you apply to the case mouth.
You’ll also want to adjust the amount of expansion depending on the type of press you’re using. If you’re using a single-stage press where you have a lot of control over holding that bullet in place until it goes into the seating die body, you can use a lighter touch on the expansion. If you’re using a progressive step press that is more automated, you’re going to want to expand that just a little more to make the process more forgiving for that bullet to be able to sit there on top of the case as it moves around the inside of the press and prepares to make its way into the die.
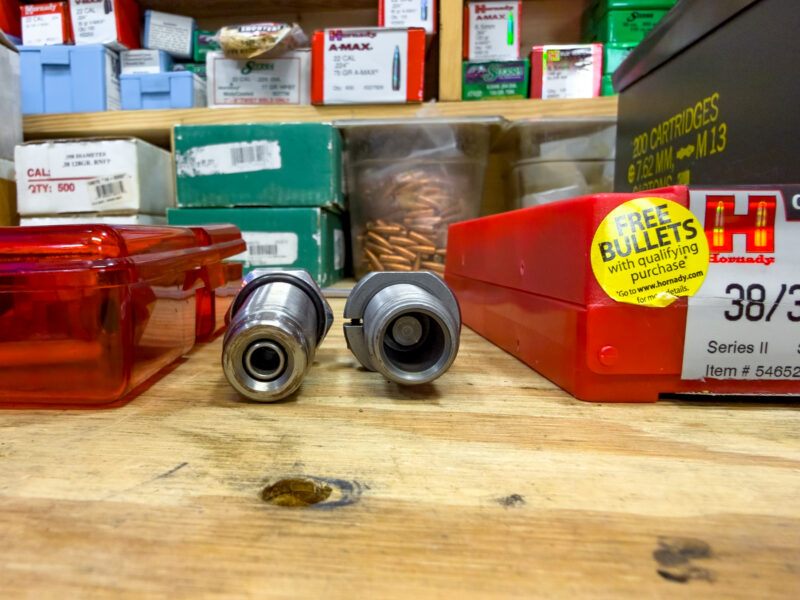
Here are two different case mouth expansion dies. The one of the right doubles as a "powder through" die,
so you can expand the mouth and drop a powder charge in the same step. The one on the right has a solid plug for expansion,
so the powder drop would be a different step.
Combining with the Powder Charge Step
Those of you with some experience in reloading may know that we can often combine two steps into one. That is the case with the mouth-expansion step and the subsequent step of dropping a powder charge into the case. Most progressive presses do this, so you’re performing both operations in one step. The adjustment process is a bit more finicky as you’re setting both the mouth expansion and the travel required to operate the powder drop mechanism, but once you get it right, it’s reliable and repeatable.
We’ll revisit this and some of the tips and tricks when we talk about powder charging in a future part of this series.
For now, remember this. When setting your case mouth expansion adjustments, less is always more.
Read Part 6 (Priming).
If you missed Part 4 (Case Resizing).
Get more exclusive online content from American Handgunner delivered straight to your inbox. Sign up for our free American Handgunner Insider newsletter.