The Process
The Ultimate Reloading Series Part 2

Using rifle cases, here's a sequence view of all the steps: dirty case, clean case, spent primer still present,
spent primer removed, case resized, new primer installed, powder added, bullet seated and crimp applied.
Back in Part 1 of the Ultimate Reloading Series, we talked about building up a starting stockpile of brass. While you certainly can buy a complete supply of ready-to-load new cases, it’s the scrounger way to accumulate them for “free,” so to speak.
So now that you’ve got some brass cases stockpiled, it’s time to talk about the next steps. This time, we’re going to walk through the overall process at a high level. Then, each step detailed in subsequent articles will make a lot more sense.
Before we dive in, it’s worth noting that of the four components in a cartridge, only one is reusable — the cartridge case itself. That’s a good thing, as it’s generally the most expensive bit of the whole deal. Being able to reuse the pricey part is what drives reloading economics. The other three components, projectile, powder and primer, are all expendable, so you’re buying (or, in the case of bullet casting, making) replacements for each reload of a cartridge case. Given this, the case is kind of the center of the universe in the reloading process. As you’ll see, that’s where most of the reloading work is done.
One more thing. Below, we’ll outline all the steps, but thanks to the sorcery of clever reloading dies, some of the steps can be completed in a single action. For example, bullet seating and bullet crimping are often done in a single operation, though I prefer to separate them because I’m finicky and want absolute, independent control over seating and crimping.
Cleaning and Sorting
There are a couple of good reasons to clean your brass before reloading. First, if you work with range pickups, you can do a much better job of inspecting the condition. Small dents and cracks are much easier to see on a shiny brass case than on one that looks like it’s been ridden hard and put away wet. Second, clean brass will be kind to your reloading equipment. Operations like resizing and priming rely on tight tolerances. If there’s loose dirt or caked-on residue on your cases, you’re going to have problems. Cases may get stuck in dies, or in steps like resizing and re-priming; excess dirt might cause damage to cases or dies when you start exerting lots of pressure.

The ultrasonic method is arguably "neater" but the dry tumbler does a better job of renewing the brass shine.
Your cases don’t necessarily have to look bright and shiny (although that’s always desirable), but they do need to be free of dirt, dust, and other residue. Discoloration? No problem. Physical residue? Trouble ahead.
Resizing
When you fire a cartridge, even handgun cartridges develop tens of thousands of pounds per square inch of pressure, with most ranging from, say, 15,000 psi to 35,000 psi, although there are exceptions higher and lower.
While the pistol or revolver chamber helps contain all that pressure, the brass case is subject to plenty of abuse, and it will expand to fill any remaining space in the chamber. It can even stretch lengthwise just a bit, although this effect is far more of an issue with rifle cartridges, as the pressures are usually twice as high on average.

A reloading press is nothing more than a piston used to drive cases with force into a reloading die.
Bottom line: after firing, the cartridge case is larger than it was before firing. To reload the case and make sure it fits everywhere as intended, you’ll need to squish it back down to factory “new” dimensions. Normally, the critical dimension is the diameter of the case. A reloading press, paired with a resizing die, makes quick work of this quite simple process. Using mechanical leverage, you’re driving the expanded case into a “mold” with interior dimensions of said “mold” matching the desired exterior diameter of the case. It’s a bit like a Play-Doh press, although more expensive.
Case Flaring
When you resize a case, the mouth gets squished back to the same dimensions as the rest of the case. This makes it difficult to seat a new bullet without deforming either the case, the bullet or both.
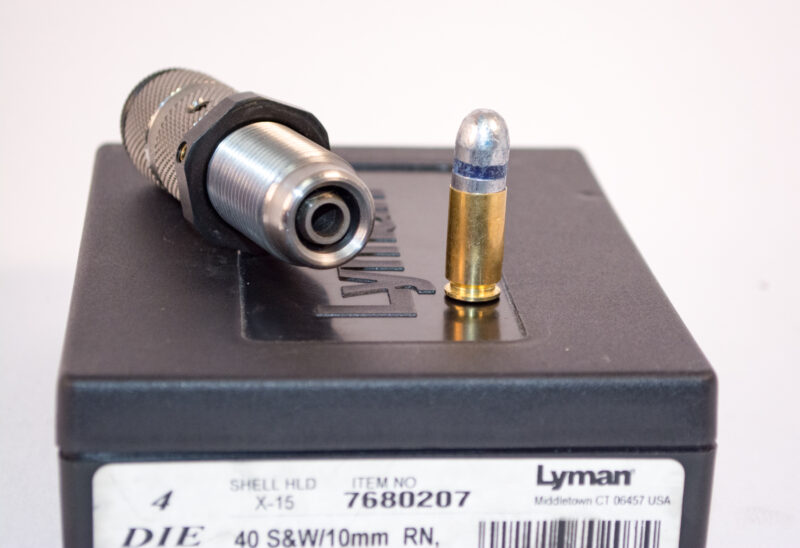
This is a case mouth expanding die, used to open the mouth just a hair to allow the bullet to be started.
The flaring operation opens up just the mouth of the empty case, just enough to start seating a new bullet. You want a tight fit here, so as we’ll see in the flaring lesson, less is more, and a delicate touch makes all the difference.
Re-Priming
Primers turn the mechanical energy of the firing pin strike into a small explosion to ignite the powder charge. It’s a one-time affair, so after a primer ignites, you have to drive out the old one and press in a new one. Our first expendable component.
Powder Charging
Hey, when we shot the cartridge the last time, we burned up all the powder, so adding more is in order.
This is another step where care and extra inspection are the right approach. Too much or too little of the right powder, or using the wrong powder altogether, are recipes for potential disaster. Don’t worry, when we get to this lesson, we’ll share lots of ideas to make your process as foolproof as possible.
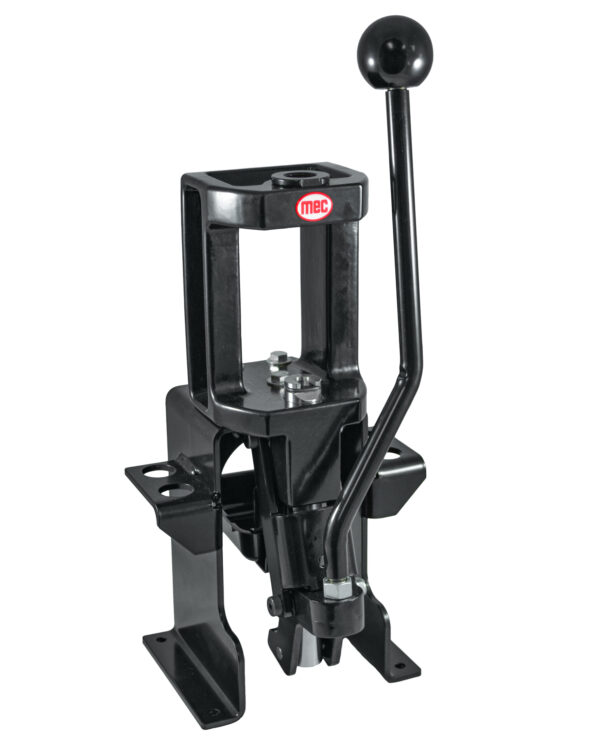
Here's a MEC single-stage (does one thing at a time) reloading press.
The handle drives a pistol up into the die while applying
lots of mechanical advantage.
Bullet Seating
So by this stage, we’ve flared the case mouth in preparation for a new bullet, we’ve installed a new primer, and we’ve added the right powder charge.
This step uses the press and a seating die to jam the bullet into the case to precisely the right depth.
Bullet Crimping
Once the bullet is in the right place and seated to the correct depth, we’ve got to remove that flare that helped us seat it in the first place. This is the crimping step, which “unflares” the case rim so it will easily fit into the pistol or revolver chamber.
Some calibers use a “roll” crimp, which presses the case rim inward into a groove in the bullet to help prevent the bullet from moving back and forth in the case during recoil. Lots of revolver cartridges with lead bullets use this approach. We’ll dive into the nuances of different types of crimping later.

Technically, reloading is defined by a lot of steps. However, many are often combined.
This Dillon 550C reloading press uses just four stations to do everything,
including separate seating and crimping operations.
Inspection
Well, to be accurate, we should label this last step as “more inspection,” as you should be inspecting things as you go throughout the process.
So that’s the basic process. If you relate it to something more familiar, like perhaps using one of those refillable Keurig cups for brewing your own favorite blend of coffee, it’s pretty simple. Use it. Get rid of the old remnants. Clean everything out. Refill with new consumables. Repeat.
Stay tuned!
Read Part 3 (Time To Clean The Brass).
If you missed Part 1 (Hoarding Brass).

It may look complicated, but when you look at the simplicity of the steps,
the reloading process is very straightforward.
Get more exclusive online content from American Handgunner delivered straight to your inbox. Sign up for our free American Handgunner Insider newsletter.