What You Need to Know About Bullet Seating
The Ultimate Reloading Series Part 8

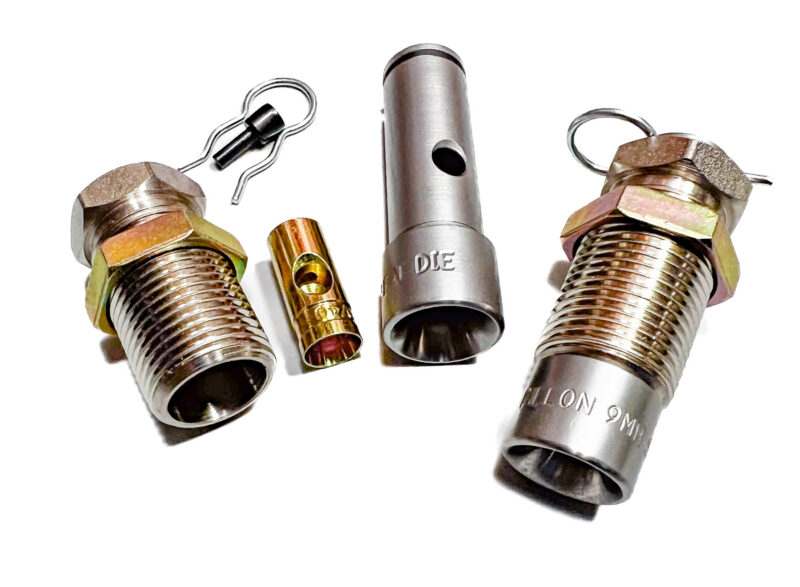
The expander die (left), seating die (pointed upward) and resizing and depriming die (right.)
Here we are, in the 7th inning stretch. The case is primed, charged, and ready for a brand-new projectile. All that’s left is pressing a bullet into the mouth of the cartridge to the correct depth and, in the next step, crimping as necessary to keep things secure and tidy. Sounds simple enough, and it is, but “correct depth” is doing a lot of heavy lifting in that sentence.
Why Depth Matters
Every load recipe specifies a Cartridge Overall Length (C.O.A.L. or C.O.L.) for a reason. That number isn’t a suggestion. It controls the internal volume of the charged case, and the internal volume directly affects the resulting pressure when things go bang.
Think of it this way. The powder charge for a given recipe was developed assuming a specific amount of airspace inside the case (which might be zero in some cases). Shove the bullet in too deep, and you shrink that space. Same powder, smaller volume, higher pressure. Leave the bullet sitting too high, and you get the opposite problem: more volume and less pressure than intended. I’m pretty sure there’s some law we all learned back in school about how pressure and volume are inversely related. As you squish down volume, pressure increases. Anyway, neither situation is where you want to be.
There’s more to it than just pressure math. A cartridge that’s too long might not chamber properly or fit in the magazine. In a revolver, an oversized round can stick out of the cylinder far enough to lock things up entirely. That can be embarrassing. On the other end, a bullet seated too deeply can create its own reliability headaches, not to mention pressure problems.
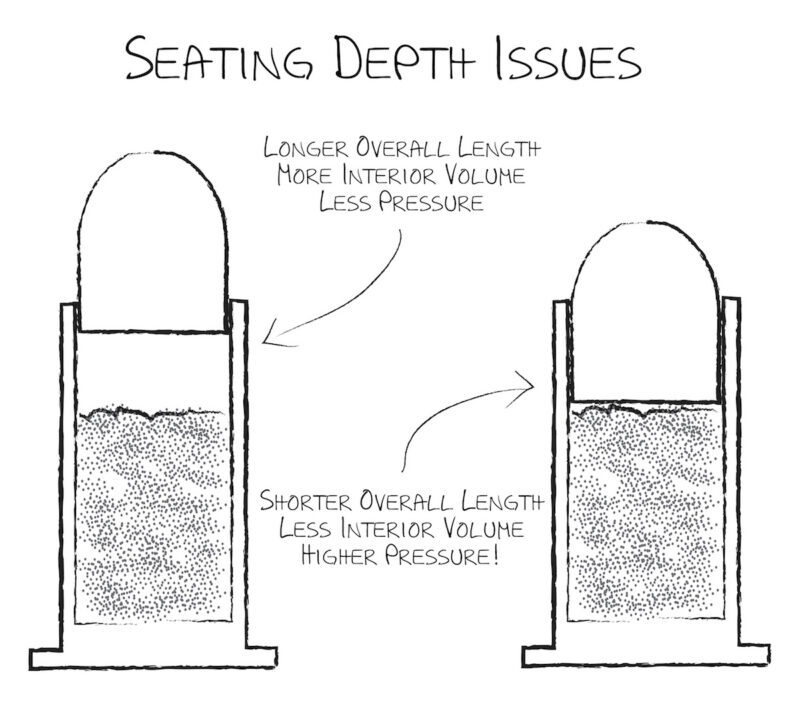
An exaggerated look at how incorrect seating depth (and overall cartridge length) can impact interior volume
and resulting pressure. Image courtesy of "The Practical Guide to Reloading" by Tom McHale.
Safety First: We’re talking about peak pressures in the tens of thousands of PSI. Always verify bullet weight, bullet type, and overall length against published load data before you seat anything. It matters.
Weight Isn't the Whole Story
Here’s where new reloaders sometimes get tripped up. Two bullets can weigh exactly the same but have completely different profiles or shapes. A long, pointy hollow point and a stubby flat-nose match bullet might both tip the scale at 185 grains, but they’re not the same length. Since you’re pressing and measuring C.O.L. from the top, the seating depth required to hit the correct overall length will be different for each one.
This is why reloading manuals specify bullet type alongside weight. A recipe calling for a 185-grain jacketed hollow point in .45 ACP will list a different C.O.A.L. than one using a 185-grain flat-point match bullet at the same weight. Same scale reading, different cartridge dimensions. Pay attention to both.
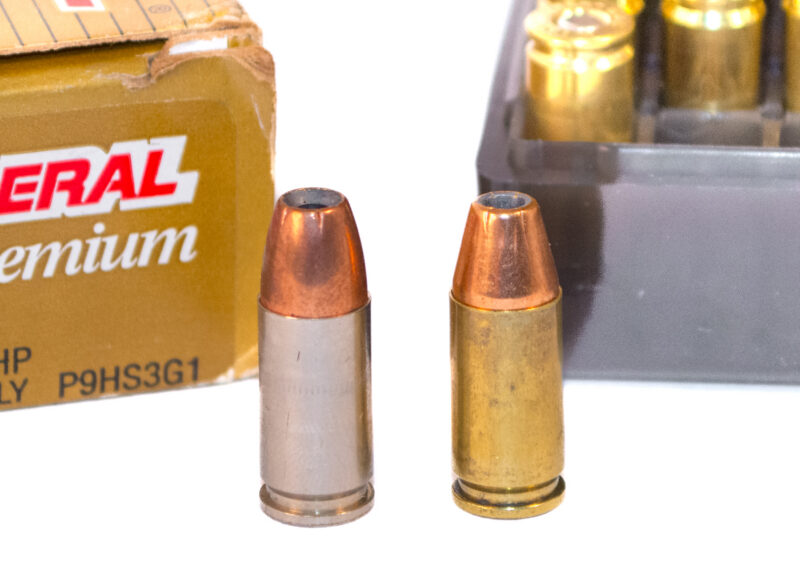
Different bullet "shapes" can yield different required overall lengths. It's important to always use a C.O.L.
published for the specific profile of bullet you're using.
Seat First, Crimp Later
Most seating dies are designed to do double duty, pressing the bullet in and crimping the case mouth in a single stroke. And if your brass is perfectly uniform in length and your die adjustments are dialed in tight, you can pull that off. But “can” and “should” aren’t the same word, at least according to my preference.
Here’s the problem. Seating pushes the bullet downward. Crimping squeezes the case mouth inward. Do both simultaneously, and you’re applying force in two directions at once. Picture corking a wine bottle where the neck gets tighter and tighter as you push. With jacketed bullets and perfect brass, you might never notice an issue. But load softer projectiles, like lead or plated bullets, and you can deform the bullet enough to create a visible bulge in the case wall. That bulge can cause chambering problems, and I may or may not have discovered this through personal experience.
Separating the two operations takes an extra pass through the press, but it’s a far more forgiving process. Each adjustment is simpler, and you eliminate the tug-of-war between seating and crimping forces. For my money, it’s worth the extra step every time. I like the extra control over each step. Get the seating right. Then get the crimping nailed.
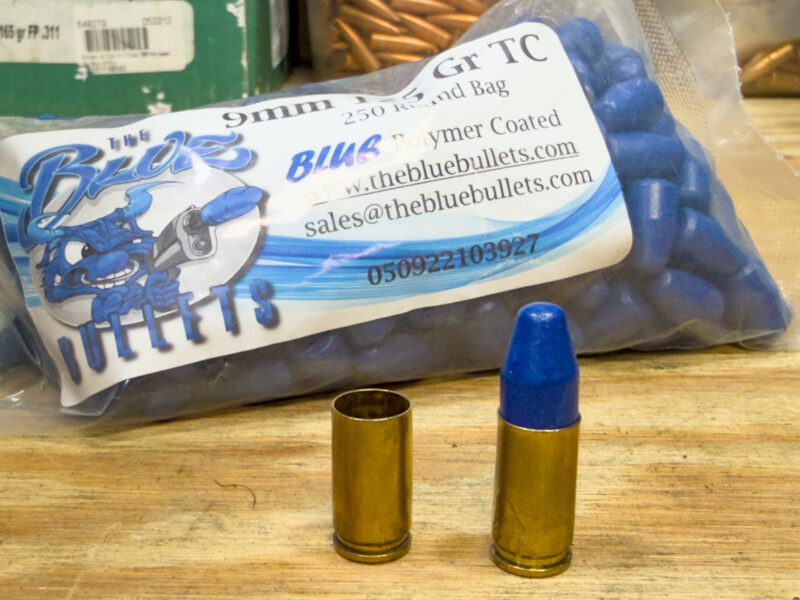
A coated lead bullet from The Blue Bullets ready for seating. Note the minimal case flare:
the bullet barely gets started into the case before the seating step.
Setting Up the Seating Die
The process is methodical but not complicated. Take your time on setup, and the actual production run is smooth sailing.
Start by checking your seating plug insert. Most handgun-caliber dies ship with two: one with a concave recess for round-nose bullets and one with a flat recess for flat-point or wadcutter designs. Match the insert to your bullet profile.
Back the seating plug way out so it won’t contact a bullet yet. You want plenty of clearance to start. Next, put an empty case in the shell holder and run it up into the die. Screw the die body down until it just barely contacts the case mouth, then back it off about a full turn. You’re avoiding contact between the die body and the case because the die body’s interior is shaped to apply the crimp. If it’s touching, it’s crimping, and you don’t want that yet. Lock the die body in place with the locking ring.
Now swap in a charged case, balance a bullet on the mouth, and run it up. Thread the seating plug down until you feel it contact the bullet. Lower the ram, snug the plug down a couple more turns, and run the case up again. The plug should now be pressing the bullet into the case.
Dillon seating dies are especially good for progressive presses. Note how the die insert has a generously
flared mouth to guide and center the bullet to the searing plug (second from left.) This allows you to minimize
case mouth flare and still seat a bullet reliably.
Lower the ram and measure the overall length with your calipers. You’ll almost certainly need to adjust. Tighten the plug a bit, run it up, measure again. Repeat until you’re hitting your target C.O.A.L. Once you’re there, lock down the seating plug so it doesn’t drift on you. If you went too far on the first attempt and your case length is too short, toss that cartridge in the “pull this bullet and powder out” pile and start over.
From here, it’s production mode. Seat the rest of your batch, spot-checking overall length every several rounds to make sure nothing has shifted. Consistency is the name of the game, and a caliper check takes all of three seconds.
The Short Version
Bullet seating is one of those steps that rewards patience during setup and pays you back with speed during the run. Get the die adjusted right, keep seating and crimping as separate operations, and verify your measurements as you go. That’s really all there is to it. The next installment covers crimping, and then you’ll have a completed cartridge ready for the range.
Read Part 9 (Crimping).
If you missed Part 7 (Powder Charging).
Get more exclusive online content from American Handgunner delivered straight to your inbox. Sign up for our free American Handgunner Insider newsletter.