Priming
The Ultimate Reloading Series Part 6

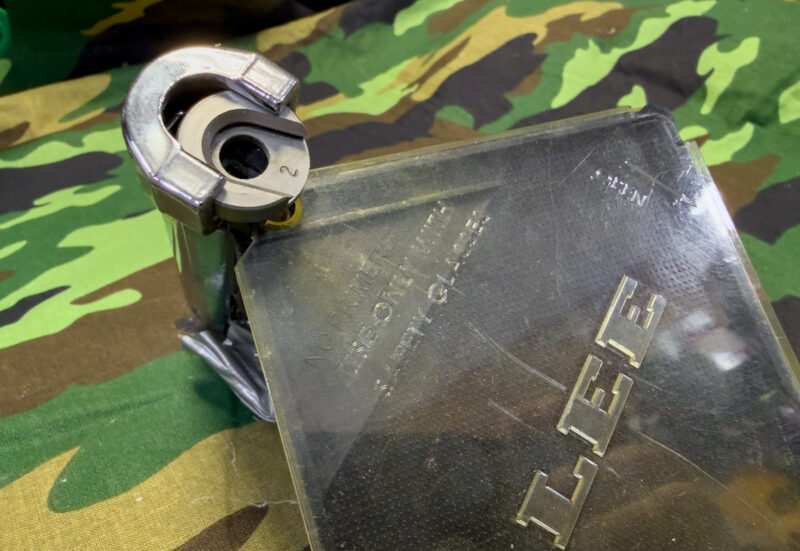
Most hand priming tools, like this Lee model, use a tray that gravity feeds primers into position
for the next case. Hold at an angle like this, and the next one drops into place.
If you’re following the series, we’ve been working on the primary component of the reloading process: the cartridge case. That’s the only reusable part. And being the most expensive component, this is what makes reloading economically feasible.
At this stage, we’ve got a clean and resized cartridge case. We’ve also flared the case mouth a bit to prepare for seating a new bullet. Now it’s time to start working with the “explodey” stuff, starting with inserting a new primer.
Before You Begin: Safety First
Primers exist for one reason: to explode when struck. They convert mechanical energy to chemical energy. That means you’re deliberately applying pressure to a tiny explosive that’s intended to detonate with impact every time you seat one. Protective eyewear isn’t optional here. It’s mandatory. When seating primers, always position the cartridge case so the open mouth points away from your face, just in case anything goes wrong.
One more thing: keep your bare hands off the primers as much as possible. The oils from your skin can contaminate them and cause ignition problems down the road. Occasionally, you’ll need to flip one right-side up, and that’s fine. Use a tool or fingernail if necessary. Just don’t make a habit of handling them excessively.

When using tubes, you'll need a tray. The section behind my hand orients the primers closed-side down
so when you flip them onto the lid you see here, they're ready for pick up. No touching required.
Gah! Crimped Primers
But first, a heads up about a gotcha you’ll almost certainly encounter. If you reload military brass, think 5.56mm, 7.62, or military-spec 9mm, you’re going to encounter crimped primer pockets sooner or later. Manufacturers crimp primers to prevent them from backing out under the intense chaos of automatic weapons. The process essentially squeezes the metal around the primer pocket inward, creating a tighter installation.
What this means to you… That constricted primer pocket opening won’t accept a new primer without some preparation. You need to remove the crimp first, or else you’ll be trying to force a new primer into a “too small” hole. Remember the part about primers being designed to detonate under pressure?
Here’s the tricky part: crimps are nearly invisible to the naked eye. With experience, you’ll learn to identify headstamps from manufacturers who typically crimp their primers. But even careful inspection won’t catch everything. Eventually, a crimped case will sneak into your ready-to-prime batch.
When that happens—and it will—you’ll feel it. Whatever priming method you’re using, a crimped pocket creates unmistakable resistance. The primer simply won’t seat.
This is critical: if you encounter abnormal resistance, stop immediately. Do not force the primer.
The good news is that crimped brass isn’t ruined. You just need the right tools to remove the crimp before repriming. But that’s a topic for another day. For now, know what crimped primers are, learn to recognize suspect headstamps, and never force anything. All of reloading should be a smooth and predictable process. If you ever have to force something, there’s a problem.
This Lee Precision hand primer uses shellholders for the caliber you're priming.
It's pulled halfway out here for visibility.
Hand Priming Tools
For somewhere between twenty and seventy-five dollars, you can own a tool that’ll last a lifetime. I’ve accumulated both single-stage and progressive presses over the years, but my hand priming tools still see regular use.
Hand primers let you complete the priming operation as a standalone task. No bench, no press. Just the tool, some brass, and a box of primers. Sit on the couch, watch some TV, and knock out a few hundred newly-primed cases.

Can you tell this one is well used? I had to add padding and duct tape to reduce blisters on my hand.
It looks terrible, but is a lot more comfortable.
The real advantage is tactile feedback. You’re pressing each primer into place with your own grip strength, not hydraulic force. After a couple hundred repetitions, you develop an intuition for when primers are seating correctly. That same sensitivity makes hand primers excellent for catching crimped pockets before they become a problem.
Most hand primers use interchangeable shell holders sized for different calibers. Install the correct one, load your primers, cover the tray, and you’re ready. Some models have a universal, self-centering shell holder. Love these!
Slide a case into the holder, squeeze the handle, and drive the primer home. Holding the hand primer somewhere around 45 degrees works well. At that angle, gravity feeds the next primer into position, and the case mouth points away from your face.

This RCBS hand priming tool is my favorite. Note the spring-loaded shell holder.
No separate shell holders — it works with any caliber just like this.
Bench-Mounted Priming Tools
Think of a bench primer as offering more leverage than a hand tool but more feel than a press-mounted system. You’re still getting enough tactile feedback to catch crimped pockets, but the lever mechanism saves your hands from fatigue during longer sessions.
The process mirrors hand priming. Instead of squeezing, you pull a lever. Your grip strength gets a break while your brass gets primed.
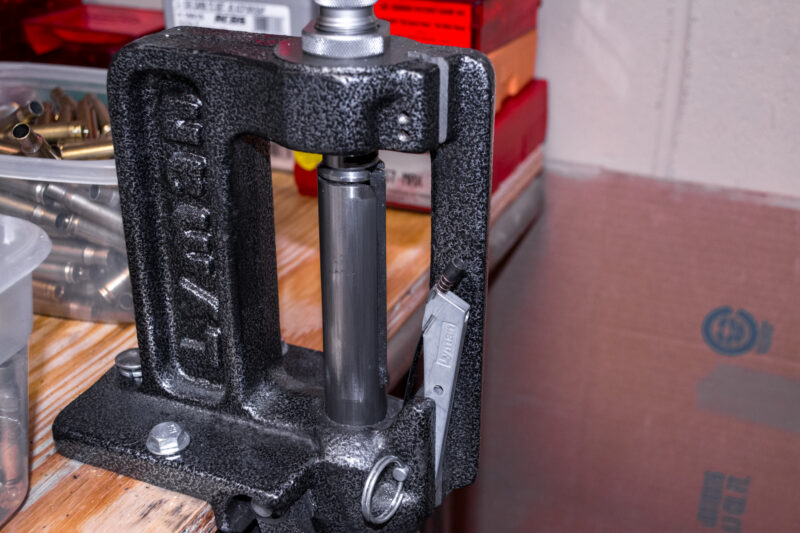
Many single stage presses like this Lyman model feature a priming arm. It slips into a groove in the piston,
and the piston lowers the case onto the primer for seating.
Priming on a Single-Stage Press
Many single-stage presses offer priming attachments that use the press’s mechanical advantage to seat primers. I’ll be honest… I’m not a fan. It works, but the process feels cumbersome.
Some setups handle primers one at a time, while others accept primer tubes for semi-automated feeding. With each stroke of the press, you activate the priming mechanism to seat the next primer.
The advantages are that you’re using the press’s substantial leverage, you can use the same shell holders you already own for other operations, and the priming happens farther from your hands and face.
The disadvantage is workflow. In my experience, it’s simply not as smooth as dedicated priming tools. But if your press came equipped with the capability, there’s no harm in trying it.

This Dillon 550C press uses a tube feed. The mechanism on the top beeps when the supply is getting low.
Progressive Press Priming
If you’ve invested in a progressive reloading press, you already know how this works. The press handles priming as part of the complete reloading cycle. With each stroke, you’re not just seating a primer but also resizing, decapping, belling, charging, seating a bullet, and crimping. One pull, one finished round.
The luxury of progressive priming is integration. Priming stops being a separate operation and becomes just another part of the production cycle.

For progressive presses and some bench priming tools, tubes like this Hornady (top)
and Dillon (bottom) help you pick up primers to fill the tube.
Making Your Choice
You can’t go wrong starting with a hand priming tool. The investment is minimal, the learning curve gentle, and the tool useful regardless of what other equipment you eventually acquire. I reach for mine regularly, whether I’m processing a small batch or prepping brass while away from the bench.
Whatever method you choose, remember the fundamentals: protect your eyes, position cases safely, don’t handle primers excessively, watch for crimped pockets, and never force anything. Follow those rules, and priming becomes a meditative part of the reloading process rather than an anxious one.
Read Part 7 (Powder Charging).
If you missed Part 5 (Case Mouth Expanding).
Get more exclusive online content from American Handgunner delivered straight to your inbox. Sign up for our free American Handgunner Insider newsletter.