Got Grips?
Fitting Triple-K Replica Hard Rubber Grips to Your Italian SAA
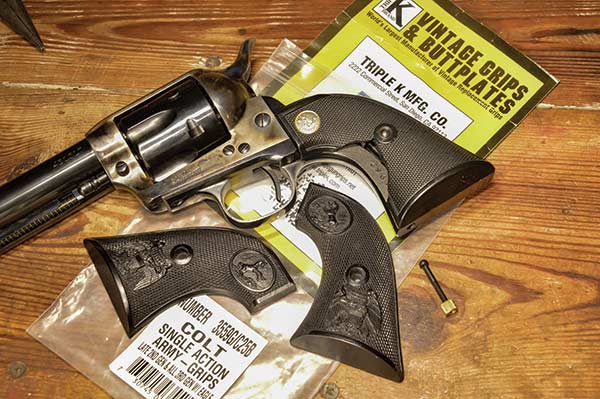
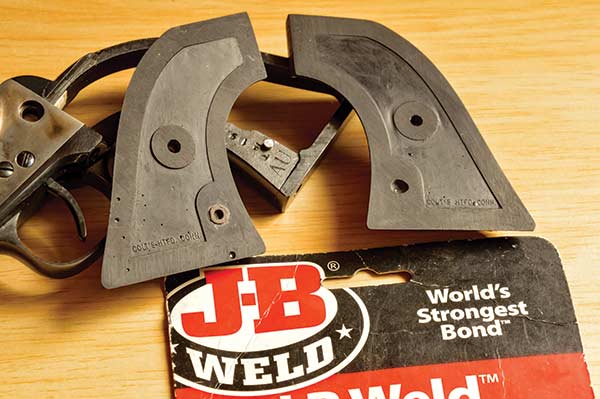
Broken grips made for a bargain trade on this Cimarron Model P
and the opportunity to give it a major and unique historical upgrade
with 1880s Colt eagle two-piece grips from TripleK.com.
Family-owned, San Diego, California-based, Triple K is best known for the leather equipment and magazines they’ve been making since the early 1960s. Gun collectors worldwide know them as the first, best and often the only source of replacement magazines, grips and buttplates for all manner of historic firearms. The company’s slogan is “If it’s rare, obscure or collectible, Triple K has you covered,” and they truly do. When I got a nice used Cimarron Model P Colt 1873 Single Action Army replica with broken plastic grips on a trade, my intent was to fit it with replicas of the original Colt hard rubber grips for a historical look you rarely see on Italian clones. Of course, Triple K had them.
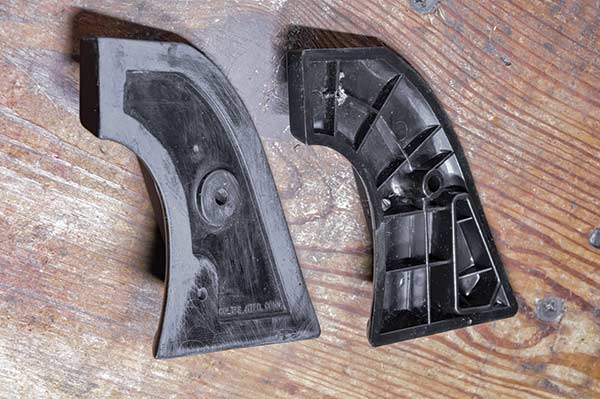
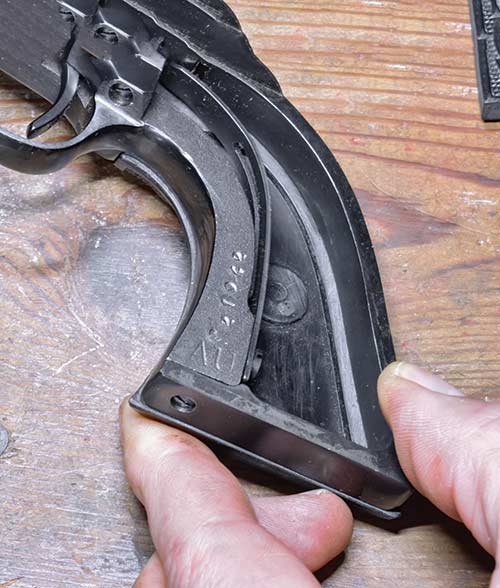
The vintage replica grip (left) relied on an indexing pin to anchor it
on the grip frame. The injection molded plastic Cimarron grip has a
molded-in flange to hold it. Frank needed to add a pin to install the replica.
If your original grip fit well, save it as a template for the initial shaping of your replacement. Frank matched the replica Triple-K grip (bottom) to the old Cimarron grip (top).
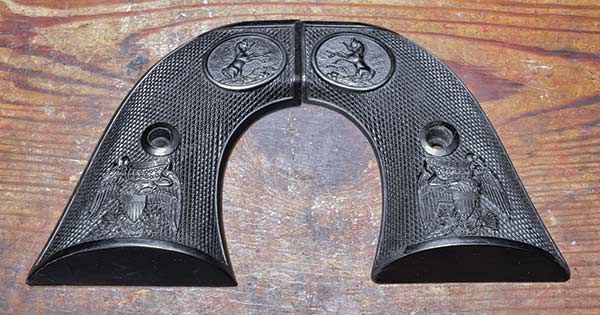
Grips For The Colt SAA
Colt started using hard rubber grips around 1881. The first type had the American eagle as well as the rampant Colt and was used for about 10 years before a new style without the eagle was introduced. To me, the early eagle grip embodies the Old West. Even though those early grips were wrong for my pistol (with its post-1896, push-button, cylinder-pin latch), the heart wants what it wants. Nobody would notice while it was holstered anyway.
There are six different Colt 1873 SSA grips in the Triple K online catalog, two being the eagle style. But since they’re all for real Colts, I wasn’t sure if they would fit a clone. How much dimensional variation there was in the original Colt grip frames within and between generations, and how much there is in the Italian reproductions, I do not know. The catalog provided critical dimensions that were helpful, but they are also happy to compare their grip to a tracing of your grip frame if you mail it to them. The tracing is a great idea, but only if you do it with a very sharp pencil or engineering pen so it’s precise. The grip I chose was the Colt Single Action Army w/Eagle — Late 2nd Generation & All 3rd Generation model (SKU 3559G). Described as fitting all post-1972 pistols and looking, from the listed dimensions, to have enough meat on it to fit my grip frame, it cost only $37.50. The hardware from the Cimarron-logo grip didn’t fit it, so I got Triple K’s original-style hardware kit (SKU: 3558G) for another $16. This grip was just big enough to fit to my grip frame
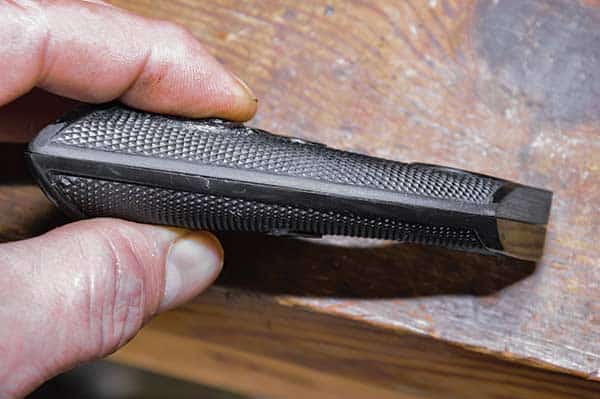
Most of the work to get the replica grip to fit involved thinning it down. Do this carefully with 80-grit sandpaper, using an orbital motion. A hard flat sanding surface and frequent checking is key.
Once thinned down, there was still substantial overhang
on the front and rear grip frame.

Scribe a precise line in the back of the plastic along the grip frame using a sharp, pointy instrument
Unlike pencil, a scribed line is thinner and more precise,
and it won’t smudge off during handling.
Planning For Fitting
There are a few things to remember when fitting grips. It’s easier to remove material than add it and check the fit more often than you think you should. By removing excess grip material slowly and checking fit against the frame frequently, you’ll often notice unexpected and very important developments in the fit before you go too far.
With any grip replacement, begin by assessing your new grips. Are the backs flat and flush fitting on the frame or warped? Where do they index on the frame to stay in place? Will the material you think you have to remove be so excessive it will cut into the checkering or designs on the grip panel? Take your time in the evaluation stage. You may not notice everything right away, but by going slowly, you’re likely to catch things you missed initially. Finally, work with one grip panel at a time.
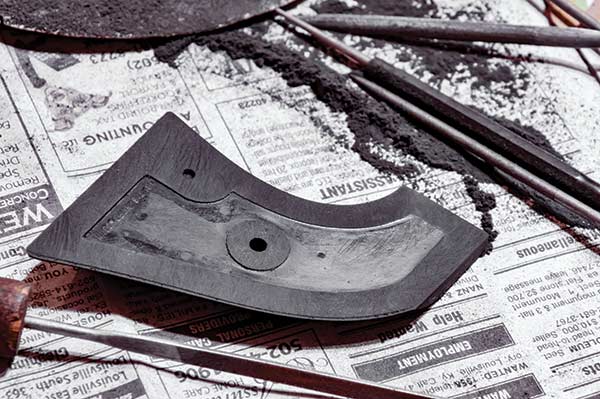
The un-fitted grip (left) shows how much material was removed to obtain a perfectly fitted grip (right).
Fitting The Backstrap & Frame
The Triple K replica grips were beautifully cast in shiny black plastic, and they lay flat with a significant overhang over the metal on all edges. In addition, the grips were too proud (about 0.060″) around the junction of the backstrap and frame, which is normal for 3rd Generation guns. However, the original 19th-century hard-rubber gripped Colts I studied all showed a near flush fit with metal at this point, so I needed to thin my grip panels down for a better fit here. The question was, how would this affect the fit in other places?
Unlike a one-piece wooden grip locked to the grip frame by its inletting, original two-piece grips are indexed with three points of contact. Two at the top in the right-angle juncture of the frame and backstrap, and a third at the bottom with a metal pin set in the side of the front strap mated with a hole in the grip. Since the Cimarron grip indexed on the bottom with a molded overhang inside the grip, there was no pin to index the new vintage-style Colt grip. I would solve this problem later.
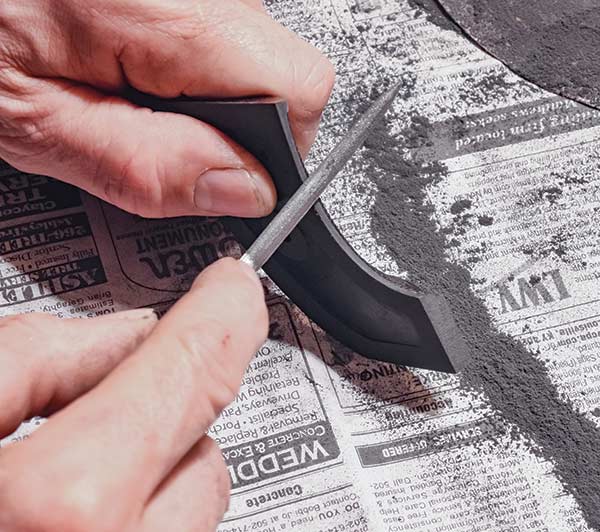
File away the excess almost down to the scribed mark.
After you confirm the fit, taper the edge.
Indexing Adjustments
During my initial assessment, I noticed the indexing fit at the top of each grip wasn’t quite square with the metal it was supposed to mate to. So, I carefully sanded the front and top grip edges to mate perfectly. Then I began carefully sanding the back of the grip, putting more pressure on the top to thin it more at that point, but maintaining a totally flat back surface. I rubbed the grip in an orbital motion of 80-grit sandpaper placed on a hard, flat surface. Checking the fit frequently, I ended up thinning each panel about 1⁄16″.
Thinning the back of the grip also reduced the excess overhang on the bottom and sides significantly because those edges are angled. Every fraction of an inch the grip was thinned also reduced its exterior dimensions. By carefully checking the fit often, it became apparent the bottom edge of the grip shouldn’t be shortened. Instead, it made more sense to take material off the top indexing edge of the grip to get a flush fit behind the trigger guard and simultaneously raise the butt edge.

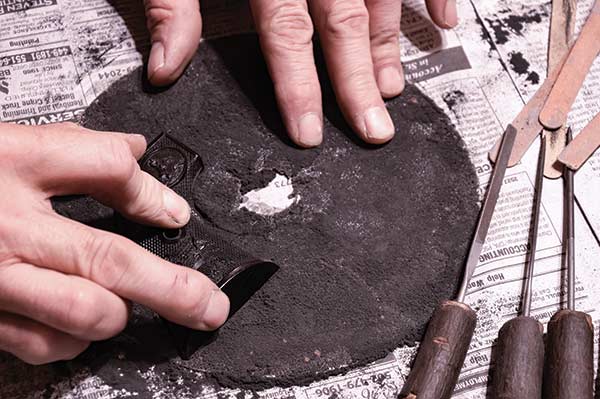
One way to locate a pinhole on the frame if you have a pin hole in
the grip is to make a tiny marker-pin for the grip hole and cover the
frame with white paint so you can find the mark when they are pressed
together. The marker pin needs to fit the grip hole snuggly.
Watch The Border
On examining the grip overhang at the rear corner where the backstrap meets the butt, I worried it was so great I might end up cutting into the checkered area when trimming it flush with the backstrap. To prevent this, I moved the grip forward to balance it evenly on the grip frame’s back and frontstraps. I did it by sanding down the front vertical indexing portion of the grip where it contacts the frame.
These Colt grips have a fairly narrow bordered edge around the checkering that has to be preserved. A big part of the fitting was locating the grip in just the right spot so I could blend the corners of the border cleanly after shaping the edge contour to match the metal grip frame. You can see in the before-and-after comparison photos how much material I removed at this 90-degree index point in order to allow me to blend the border’s corners at the bottom of the grip frame and on top behind the hammer.
Use epoxy to correct the inevitable errors in getting your grip pinhole
exactly where it needs to be. This is done before final fitting and polishing.

Deepen the mark for drilling with a sharp center punch.
Make sure the grip frame is square with the drill bit.
Corners
Once I had my top index points properly located, I found the grip’s butt edge needed no reduction at all. By taking material off the top, naturally you elevate the bottom. This movement also got those pesky bordered corners where I could blend them nicely. I held the grip panel in place and used a pointy dental pick (you can use a needle too) to scribe a line on the inside of the grip along the front edge of the grip frame. The thin scribed line is better than pencil because it won’t rub off. With my outer edge marked on the grip, I carefully filed the excess away, checking fit often, and leaving the edge square. Then I did the same for the back edge of the grip. Once satisfied the edges were a good match, I used a half-round Swiss file to taper the square edge and blend it into the border. The time for a final polish on the edges would come later. My next step was to set the lower indexing pin in the grip frame.
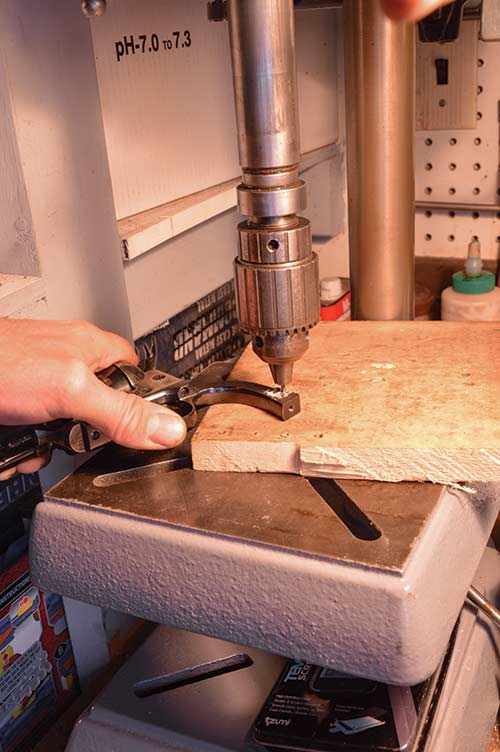
Use a drill press, not a hand drill.

Make an indexing pin slightly oversize and press it
in with an arbor press or use a roll pin.

Compare the finished/polished edge (top) with the file rough
edge (bottom) awaiting the same treatment. Do this work after
you have the grip pinholes properly located.

Is it a clone or a Colt? Slipped inside this authentic Mexican
loop holster (also from TripleK.com) it's hard to tell.
Indexing Pin
Locating the exact spot in the frontstrap to drill a hole for the lower indexing pin probably isn’t worth the effort it would take, because slight, and even gross, mis-location of the pin can be corrected on the grip side nearly invisibly with epoxy. You can easily get the hole pretty darn close by using a marker pin. I made one by pointing the end of a piece of 1⁄8″ steel rod on the bench grinder, filing flats on either side of the point so I could grip it with needle-nose pliers if it got stuck in the grip hole, and then cutting and filing the bottom flat so it would sit squarely in the bottom of the grip hole with the point about 0.010″ above the grip surface.
To locate the hole with the marker pin, cover the front strap with white paint, seat the tiny marker pin in the grip pinhole, lightly aligning the grip on the grip frame where it needs to be, and then press hard over the marker pin so it indents the paint. The dot in the paint is more or less the center of your index pinhole. Then, you enlarge the mark with a sharp center punch and drill it on the drill press with a slightly smaller bit so you have a nice snug press-fit for the 1⁄8″ diameter index pin.
Sometime during the 2nd Generation run of Colts, the factory changed the location of the indexing pin. Since my clone was a copy of the 1st generation Colt, and my grips were 3rd generation Colt, I found the frontstrap mainspring screw in the way of the hole I wanted to drill for my indexing pin. Rather than re-drill the holes in the grips, I just removed the screw and drilled up to the threaded hole. Instead of a single roll pin, I pressed in two shorter solid pins cut from the same rod as my marker pin tool. Final adjustments for depth and location will be corrected easily on the grip itself by slightly repositioning the pinhole by cutting away material with an Exacto knife and filling in the missing material with epoxy. Unless you use a fast-set epoxy, tape the grips in place securely while they dry.
Once dry, I did my final polishing of the grips, where I’d trimmed them back with a dime-sized piece of 100-, 150-, 220-, 360-, 400-, 500- and 600-grit sandpaper. Then, I buffed it to a nice shine with a piece of ordinary writing paper.
The final touch was treating the bright brass hardware on the screw kit with Birchwood Casey Brass Black.
For more info: TripleK.com, BirchwoodCasey.com, Brownells.com