How I Destroyed — And Resurrected — A Walther PPK/S
And things you shouldn’t do — ever …

I’ve enjoyed the matte finish on the top of the slide —
no glare when sighting in bright conditions.
I’m pretty sure Dirty Harry delivered a subtle message to aspiring hobby gunsmiths. It’s good advice because sometimes you gain the most valuable experience by learning what not to do. If the cost of such a life lesson is a butchered gun and subsequent “can you fix this” visit to a competent gunsmith, chalk it up to education expense.
Let’s rewind to a time long ago and not so far away, when I knew even less than I do now. I’ll just say my hubris was only surpassed by my ignorance and leave it at that. I urge you to remember there may have been a time when you did something equally stupid, so please be gentle — I’m baring my soul in the interest of higher learning.
As a freshly minted gun owner, I got a bug up my butt to buy an old Walther. Money was tight, so I was looking for deals on the auction boards. One caught my eye: “Gunsmith Special! Interarms Walther PPK/S!” It arrived rough. I figured it had been through a couple of wars and at least three seasons of “Desperate Housewives of Possum Kingdom, S.C.” It lacked grips, ejected magazines randomly when firing and only cocked the hammer when cycling on odd-numbered days. The finish resembled the interior of a construction dumpster.
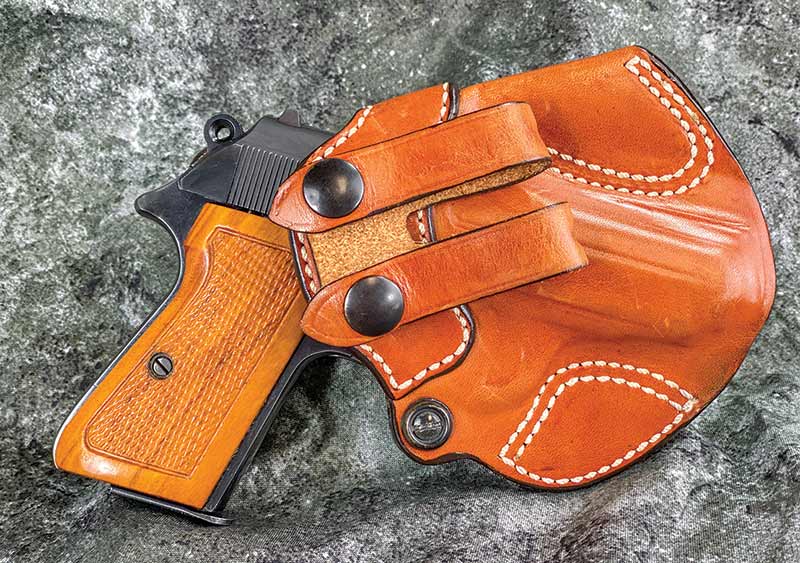
This now carry-ready pistol pairs nicely with a leather DeSantis IWB holster.
Now What?
All of those seemed surmountable problems to an expert like me with precisely zero experience working on guns. I bought some wood grips and new magazines, looked for anything broken, reassembled the pistol and took it to the range for reliability testing. I wanted to carry this 007 classic, so I had to make sure it fed self-defense ammo without fail. In case you didn’t know, that stuff is expensive. A few magazines in, I figured out this pistol couldn’t feed three rounds in a row.
No worries. Maybe it was just “ammo sensitive” being an old gun and all. Fast forward to another expensive trip to the gun store and a return to the range with different, although equally abusive on the wallet ammo. The result? Same problem. So, I tried again. And again. Not only did I prove the definition of insanity, retrying the same failed strategy hoping for a different outcome, I burned through second and third mortgages with my ammo bills.
Finally, I got smart and took it to a gunsmith. Sounding supremely confident to a noob like me, the counterman informed me, “These old Walthers are finicky about the magazine lip profile. We see it all the time.” After making some adjustments, he returned the gun. Still no love. I’ll spare the details, but I made repeat visits to this local ’smith, and many others, and received nothing but a bucket of fail for my efforts. With the benefit of hindsight, I now see those local “gunsmiths” were guys just like me who thought they knew more than their experience supported.

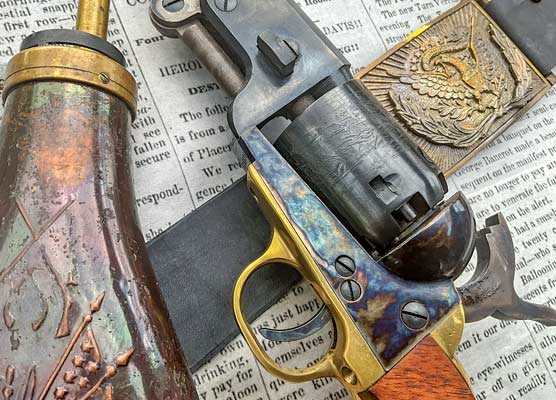
The original ad photo, in all its un-retouched glory. Tom wanted you
to see the “gunsmith special” as he saw it advertised.
Power Tools
Enter the Dremel. Having bought and adjusted somewhere north of 13,512 Walther magazines to no avail, I was now confident the problem emanated from the feed ramp. I’d been reading about the importance of “polished feed ramps” so I buffed the snot out of this one using a felt Dremel bit and some grocery store metal polish. While it looked great, the pistol still shot with the same success rate as monkeys in a Food Network baking competition.
No worries.
I surmised I needed to bevel the feed ramp just a hair to ease feeding of modern hollowpoint bullets. The fact the pistol didn’t even feed Cor-Bon Pow’R Ball ammo, which not only have a round nose, but a slick polymer one, eluded my logic.
I broke out the Dremel, and I might have used, let’s just say, “aggressive” bits on the feed ramp. And I learned. If you practice dry-firing at home, you know not to keep the firearm and ammo in the same room. For safety. There’s a lesser known apothegm, and I’m taking full credit for it. Don’t allow those orange and green Dremel bits having the texture of bricks and cinder blocks in the same county as your firearms. You’re welcome.
If you want to use a Dremel tool, knock yourself out. Just make sure the bit has the letters F, E, L and T in its name. Needless to say, the results were about as good as the first iteration of the Affordable Healthcare Act website.
So, let’s recap. I didn’t learn the importance of knowing my limitations after spending eight or 10 figures on premium ammo for testing, working through every crank gunsmith in town, depleting the national Walther PPK/S magazine supply, polishing like no one’s business and finally, performing steel liposuction. Yes, I can be stubborn occasionally. It was time to suck up my pride and call for help — professional help.

One benefit of the professional rework by Cylinder & Slide is this old PPK/S
feeds modern ammunition, like this Black Hills HoneyBadger, flawlessly.
The Pros
Enter the Cylinder & Slide shop. I’d seen their ads and read volumes about their pistol artistry for years in American Handgunner. There were two roadblocks to seeking help. The first was pride. I overcame that easily enough since I was mailing the gun to them. I didn’t have to endure a face-to-face walk of shame with my bag-o-parts. While I didn’t exactly lie outright, I might have implied the guy I bought this pistol from “sure messed it up.”
The second was cost. The pistol in question was worth maybe a couple hundred bucks at the time — before I started “improvements.” From a resale perspective, doing a custom job didn’t make fiscal sense. I rationalized by telling myself I would make this a personal keeper — a cool and historical gun finely tuned for everyday use with modern ammunition while looking like a million bucks.
The pros at Cylinder & Slide opened my eyes, not only to what was required to fix this little pistol, but to possibilities to make it better. See what happens when you listen to the experts?
Before quality custom work, my not-very-professionally installed wooden grips had a tendency to move around with each shot because there’s a single grip screw passing through the frame holding both panels in place by friction alone. A glass bedding job on the back of each panel to match the steel cutouts solved the slipping problem once and for all. Good idea guys!
As for metal work, they, umm, repaired the damage “some guy” did to the feed ramp. It’s now slick, gouge-free, feeding any .380 ACP ammo I care to supply — without fail ever. That’s valuable, but the nifty work was apparent in the extras my Cylinder & Slide consultant recommended. Note the radius work on the trigger face. Sure, this is a preference decision, but that polished and rounded trigger face changes the feel of the double-action press dramatically. It now operates more like a finely tuned revolver.

Note the muzzle crown. It’s gotten some wear and tear in the 15 years
since the custom work, but this project was always intended to create a
working gun, not a safe queen.
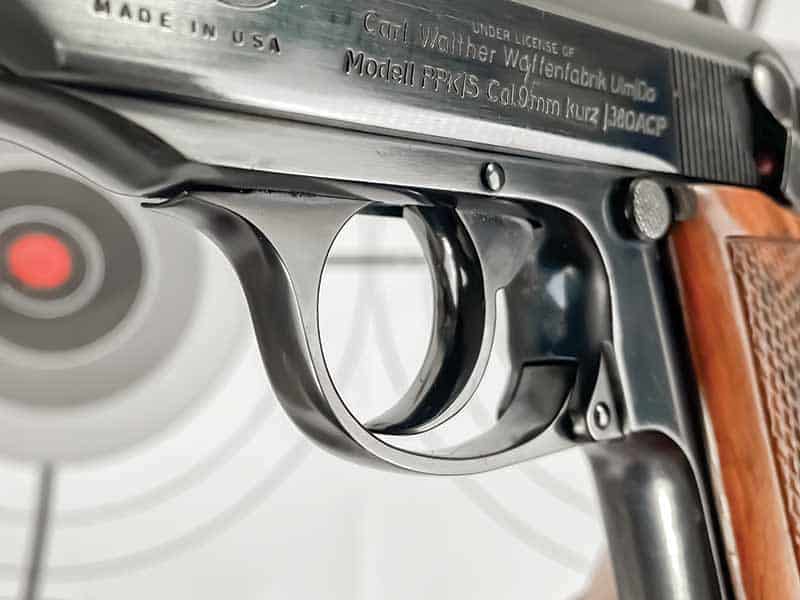
The beautifully radiused trigger made all the difference on this pistol.
It now shoots like a finely tuned revolver in DA mode.
Live And Learn …
A few other improvements rounded out this custom job. The gun gurus at C&S suggested, and received my enthusiastic approval for, a re-bluing job, so the frame and slab sides of the slide are mirror finished. The curved sections of the slide now sport a matte surface, reducing glare. Since the gun was broken down for all the other work, I decided to have C&S polish all internal surfaces. Last, but not least, I had the barrel re-crowned with an 11-degree bevel because part of its “gunsmith special” heritage was a beat-up muzzle.
So, what does all this have to do with DIY gunsmithing? Simple. Good judgment comes from experience, and a lot of that comes from bad judgment. If you can minimize the cost of bad judgment by knowing your limitations, all the better.
Enjoy your DIY gunsmithing endeavors, just proceed with caution. If you’re embarking on a learning journey, start with the basics. There are several beginner-friendly DIYs in this issue. Those projects are a great place to start!
For more info:
www.cylinder-slide.com
Ph: (800) 448-1713