Lower That Hammer Spur!
A Simple Mod Enhances Handling
The final result puts the hammer spur right at hand when shooting,
making it much easier to cock. This simple modification significantly
changes the way the gun handles and feels when shooting.
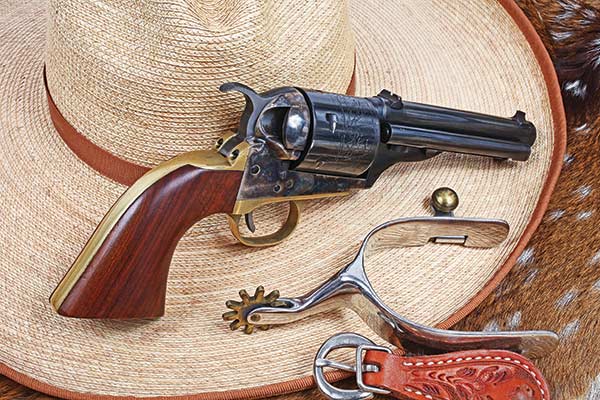
I have a nifty Uberti “Cartridge Conversion” single action in .38 Special. I’ve put decent sights on it, slicked the action up and even put a hammer over-cock stop on it, but I’ve never liked the hammer spur angle. Black powder revolvers are famous for their “too high” hammer spur, making easy one-handed cocking often ungainly and awkward.
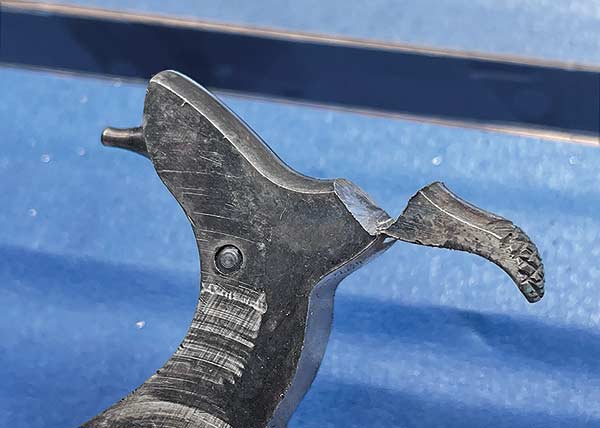
One day not long ago, I was looking at it, and it suddenly dawned on me it’d be an easy fix. Ten minutes later, it was in pieces and I had the hammer in my vise. A few short minutes later, I had partially cut through the hammer spur with a Foredom tool and cut-off wheel and used my shop-made hammer to tap it down a bit. Semi-scientific eyeballing revealed it looked about right, so it was off to my shop. I do my gun work at a bench in my garage, but my welding gear lives in the “big” shop.
I’m a self-taught TIG welder, and it’s paid no end of dividends over the years. Filling holes, welding up sears, 1911 frames, filling “oopsie” dovetail cuts or doing a zillion other welding jobs has made life easier in the shop. Like the old saying goes, “If you can weld, then anything is anything you want it to be.” Give or take some, I suppose.
Most black powder-style revolvers have very high hammer spurs.
Roy’s .38 Special “Cartridge Conversion” suffered the same fate,
but Roy thought lowering the spur would change things neatly.
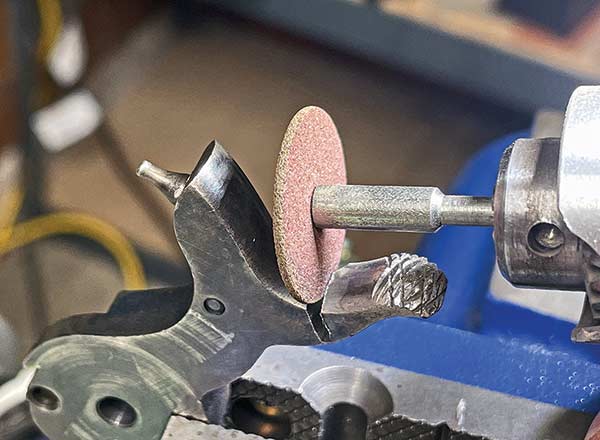
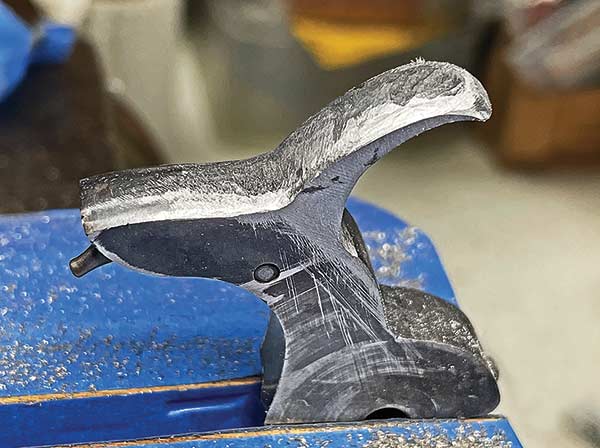
Ten minutes later, using a Foredom tool and abrasive cut-off wheel,
the hammer spur was cut but not completely off. Leaving a bit of
steel allowed it to be bent down and stay put, making welding easier.
A few taps with a shop-made hammer got a rough angle going.
This entire job was done by eye and an artist’s touch rather than jigs or specs.
Looking “about right” to Roy, he imagined how it would look filled
in and filed to shape. You could use a classic Colt Single Action
hammer for some ideas if you want.
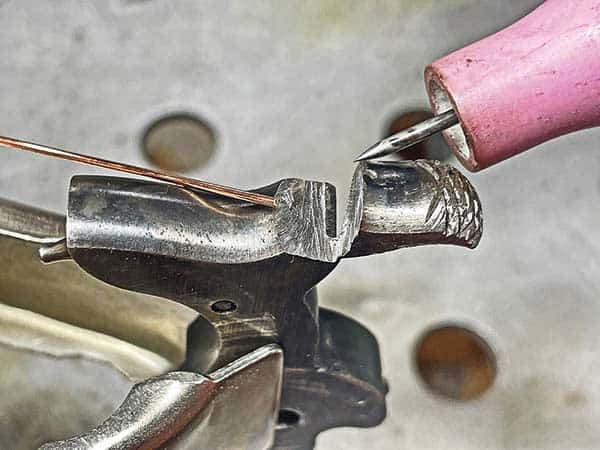
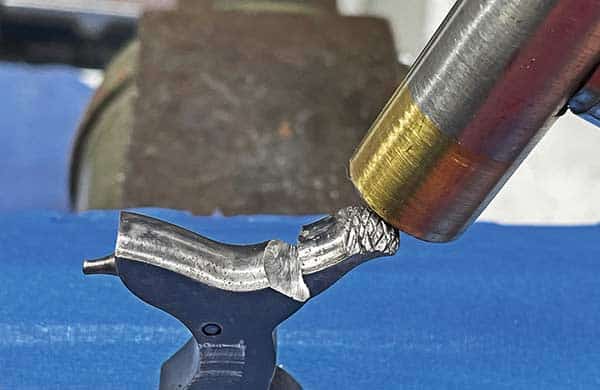
TIG is made for jobs like this, and fortunately, Roy knows his
way around a TIG welder. The job is a simple one and just takes a few minutes.
A Quick Weld
I put some heat paste on the sear areas to keep heat from flowing there, set the gear up and in about five minutes had the gaping canyon left by my sawing and bending filled.
Back at my bench, it was all hand files, small needle files, abrasive papers and eventually the Foredom tool with various tools. Once I had the spur shaped the way I liked it, I put a bit of checkering on the thumb area. I also used a flat sanding block with 220-grit abrasive to polish the hammer sides to make things look nice. I like that 220 surface finish; it’s subdued but handsome.
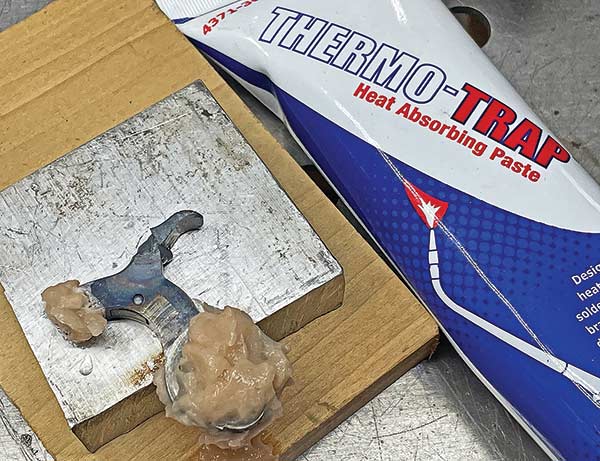
Some “Thermo-Trap” heat paste keeps welding heat from critical bits
of the hammer. Here the welding is about half done and Roy stopped
to apply more paste.
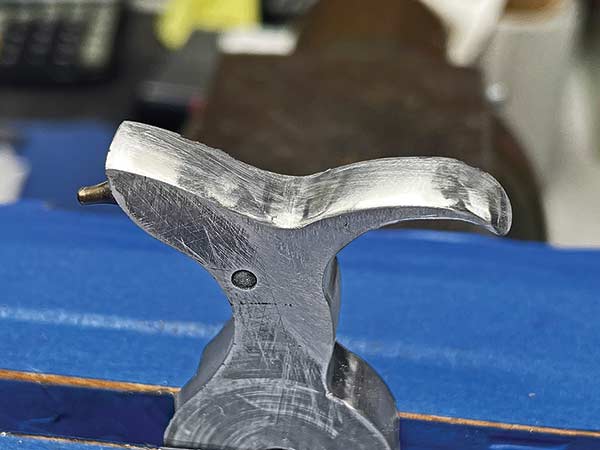
Some rough filing back at the bench showed there were
no voids in the weld.Then the serious work of slow filing,
shaping and checking the shape began.
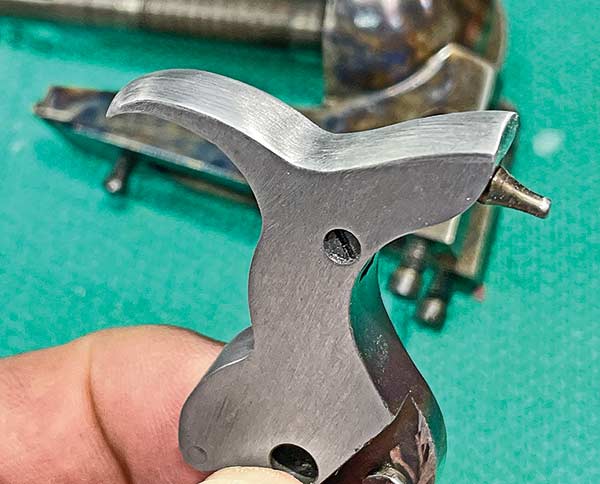
As the shape took form, Roy kept inserting it into the frame
to eyeball how it looked, continuing to shape things by eye.
Just about there in this photo and time to start to really work at
the smaller imperfections, shape the edges and take care of the detail work.
Another Idea
Once the gun was reassembled, the difference was huge. Suddenly the hammer spur was right at hand and easy to find and cock. But I remembered how the hammer over-traveled badly. This means at full cock, it goes past the sear engagement point and then sort of bumps back up against the sear surfaces when you release it. Over time, it beats the mating surfaces and causes fast wear and a sloppy action feel.
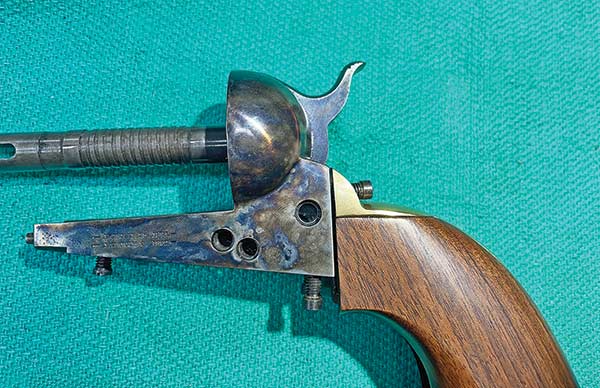
I knew a trick and decided to do it. First, drill and tap an 8-40 or so hole into the bottom portion of the grip frame, below the bottom of the hammer. Peek at the photos to see where. Then put a screw into it and slowly adjust it until the spring hits it right at the point the hammer reaches full cock. The photos explain simply. What you end up with is a very firm “stopping” point, with no over-travel. This keeps the sear surfaces happy and, frankly, feels great when you cock the hammer too.
It takes a bit of fiddling, though, turning the screw a tad, reassembling it, trying the hammer, turning the screw a bit, etc., until you get it just right. Once it’s right, I turn the screw in until it stops, keeping tabs of the turns. Then squirt some Loctite on it and re-thread it to the correct spot. You could also measure it with a caliper, I suppose. But try it one final time to make sure it’s right before the Loctite sets.
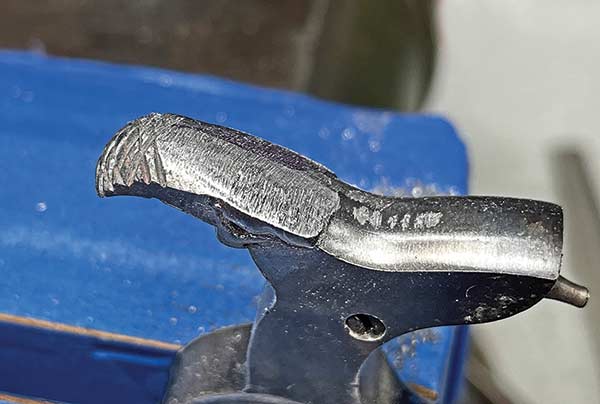
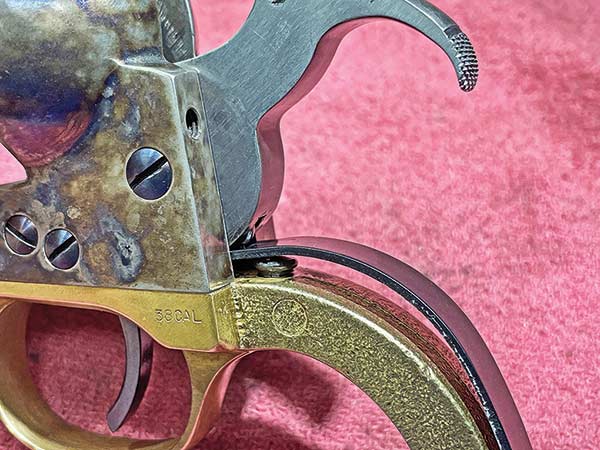
Here, the final shape is established, and Roy has
done a 220-grit finish to the hammer sides and top.
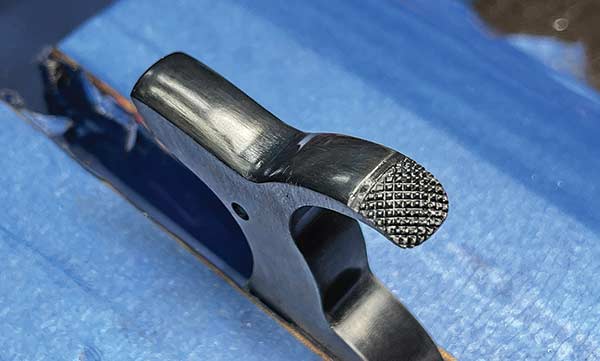
A test fit revealed the need for some checkering to keep
the thumb from slipping off. Once done with a checkering file,
Roy applied some cold blue and called the job finito.
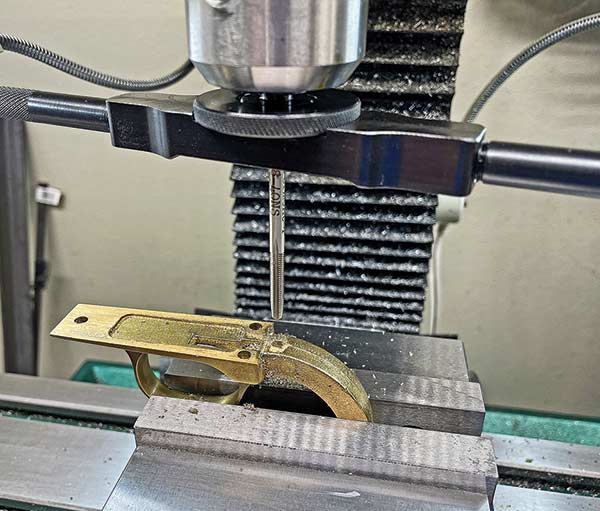
Roy wanted to install a stop screw so the hammer didn’t “over cock”
and damage the sear surfaces. Here he’s drilled a hole and is about
to tap it using an 8-40 tap. The tap wrench in the milling head helps to
keep things straight. This could also be done using a hand-tap, with no trouble.
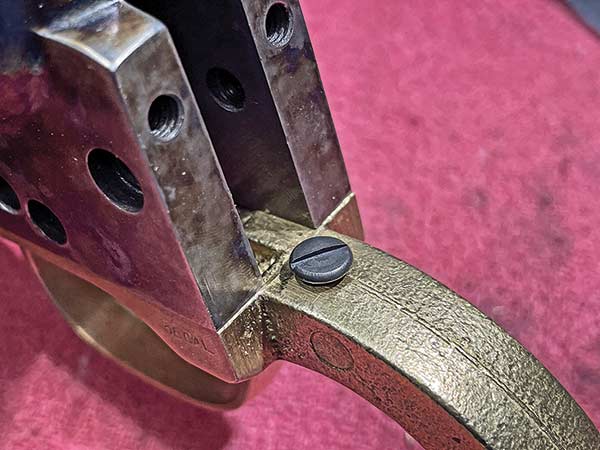
The deal here is to install a screw and then adjust it until it
bumps into the underside of the hammer/hammer spring at full cock.
Here’s the setup. This mod can work with most single actions
based on the Colt design. The difference in feel is huge, and
the modification is easy to do even for a novice gunsmith.
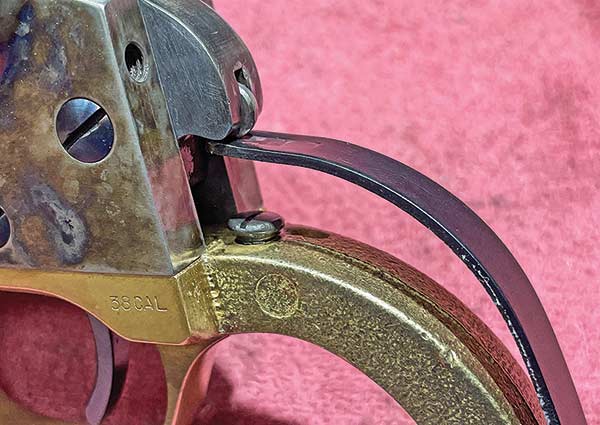
At full cock the spring rides on the screw head, striking it at
the exact moment the hammer comes to full cock. The feel is
one of a solid “snick” as the hammer reaches full cock and
stops solidly with no over-travel slop. It’s a very cool feeling.
Final Thoughts?
Other than the welding part, all of this is easy and can be done with hand tools, even the drilling and tapping for that stop-screw. I’m betting most of you “know some guy who welds” or can find a local shop good for a $20 job likely done while you wait.
Something like this is satisfying to do and can really change the way you like a gun. Experimenting on a black powder single action is fun, and if you mess up badly, you’re not out a huge amount of money. Most of the mods, like action work, the hammer spur, the hammer stop, maybe re-cutting the muzzle chamfer, etc., are all well within the ability of anyone with even rudimentary tool skills, and it makes a big difference in how these guns function. A few files, some abrasive paper, a vise, maybe a Dremel-type tool, a tap and die set and you’re good to go for a good adventure — or three!
For more info: Brownells.com; HarborFreight.com