The Mother Of Necessity
Sometimes You Gotta Do What You Gotta Do

Dave needed a new cartridge belt, so he made one
to suit his needs. Others can do likewise!
I’ll preface this by acknowledging up front I’m kind of a frugal fellow when it comes to spending money on something I can fix or replace with a little time, experience and a passion for doing something nobody else might do.
They say necessity is the mother of invention, but being tight with a dollar is the mother of necessity.
For the past few years, it has become something of a habit to not carry one of my .357 Magnums afield because the cartridge belt purchased for that caliber many years ago from a now-defunct leathergoods outfit had outlived its usefulness. The cartridge loops would no longer hold ammunition securely, and for some reason, I’m convinced the belt has shrunk, not unlike how GUNS Magazine’s John Taffin described a gunbelt he built a few decades ago in an article appearing in the October 2021 issue, in his “Campfire Tales” column. I suspect Taffin made his rig out of the same leather mine was made from. Hmmm?

With a left-over 2-inch belt blank, Dave went to work, marking
the blank leather surfaces for stitching holes, at the proper intervals.
So, last month I finally broke down, found a belt blank of the proper length that seemed pretty tough, soaked it and went to work. Though widely known as a fan of the .41 Magnum, I’ve got a couple of vintage Model 19 S&W revolvers and a 1980s circa Colt Python which have been spending far too much time in the gun safe — all with their original boxes intact — and not nearly enough time on my hip.
This is a project anyone might accomplish with a little patience, some tools easily purchased from Tandy Leather, along with needles and waxed linen thread, and a work bench or even a kitchen table.
Holsters for my .357 sixguns all have one thing in common: belt loops for 2-inch belts, but not wider belts. I cut cartridge belt blanks for the .41 and .45 Colt to 2 ¼-inch widths just to be different, but I had a 2-inch blank so it became my platform.
Now the fun part: I wanted to make sure it holds plenty of ammunition for the times, which are becoming far fewer and even farther in between, when I might be out in the field for a while. Instead of cutting the cartridge loop leather a full inch wide, as I do for .41, .44 or .45-caliber cartridges, the strap for this endeavor was cut at 7/8-inch, dyed and oiled, and marked at 1-inch intervals to be stitched onto the belt at half-inch intervals. Sure, the finished loops are tight; they’re supposed to be.

Pre-punch holes for stitching. Such tools are available at craft shops.
From Scratch
First, one has to measure his/her waist and cut the belt blank to be at least 6-9 inches longer so there is plenty of leather remaining for the billet with at least five holes for adjusting the fit.
Next, I measured down from the top of the belt about a quarter-inch and, using a pencil, drew a straight line most of the length of the belt, providing a level along which the stitching holes are punched. Each vertical line of stitching for .357 Magnum cartridges is a half-inch apart. I worked this formula out some years ago when I had a little custom leather business, no longer in operation, but I managed to make a few people happy with my handiwork.
For those wanting to give this a try at home, do the cartridge loops first before adding a belt buckle. It’s easier to do the hand-stitching without the additional weight. (NOTE: If you don’t have the patience, or the interest in doing this, contact a good holster/belt maker, or shop online because there are plenty of folks who build such rigs, and many advertise in the print editions of GUNS and/or American Handgunner.)

Make sure the loops are tight. After applying dye and oil,
try each loop with a cartridge. Nickel plated cartridges
are the best for this.
You can add as many cartridge loops as you like. In my case, this translated to 42 loops (seven complete 6-round loadings), with room for the holster, which, in my case was marketed under the old Smith & Wesson brand, and it fits the Python and the 6-inch Model 19 and can also house a S&W L-frame sixgun. I personally built a belt holster for my 2 ½-inch Model 19 snubby.
I had a buckle left over in a workshop drawer for a 1.5-inch billet, so I trimmed a quarter-inch off the leather top and bottom back from the belt tip about ten inches. After stitching everything together, it fit perfectly. I hand-dyed the belt a nice chocolate brown using a dauber and sponge, allowing it to air dry overnight. The next morning, I applied a second coat, subsequently hand-rubbing the belt front and back with Neatsfoot oil, which soaked in rather nicely. (Tip: Apply plenty of oil to the inside/rough side of the belt for deeper penetration.)
Check each cartridge loop individually once they’re oiled and if you prefer, use nickel-plated cartridges for this and leave them inserted, as they will not get cruddy over a long period, as plain brass cartridges are prone to do.
If you try this at home, I have two pieces of advice: 1) allow twice the amount of time you expect for this project, and, 2) be sure to allow your leather to air dry after dying before applying oil, and be sure you fully oil this leather. It will help prevent drying and cracking, and help the belt last for many years. Oil the cartridge loops, too!

Dave needs to spend more time at the range with new handloads so groups like this are more frequent!
Practice Incentive
Now the bad news, or maybe the good news, depending upon one’s perspective. This has resulted in a self-acknowledgement I need to spend more time with my .357 Magnums. All of them.
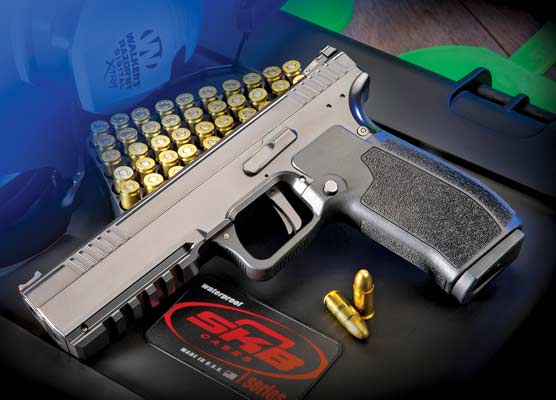
I have been running a load of 16.5 grains of Alliant 2400 behind a 125-grain Hornady XTP or older Speer 125-grain JHP with excellent results. Now, however, with an apparent shortage of 2400, I’m switching over to Hodgdon’s H110 or Alliant Power Pro 300-MP. Again, it’s the “mother of necessity” thing.
And, I’m switching over to 158-grain JHP bullets, which may be how I am currently spending my summer vacation. I’ve fired 158-grainers off and on over the years and had pretty good luck with them. I settled on the 125-grain pills only because they seemed to work very well in both of the S&W sixguns, and in my .38 Special loads for a Colt Diamondback. I’m gathering 158-grainers from several bullet companies for this little project.
At 25 yards, the Python just wasn’t shooting as well as I recall, from a solid rest and two-hand hold. I’m pretty certain the blame is mine, because in my younger days, I used that revolver to win a couple of handgun matches, and it was invariably dead on target. While I managed a couple of nice groups, others were all over the place. Alas, years have passed, and not all of them have been good to me. I think the heavier projectiles will suit my current wild country needs better than the lighter bullets. Watch this space for an update.

Dave damaged an elk antler grip panel on his sixgun,
so he cut a piece of elk antler and repaired it.
More Repair Work
Some years back, Eagle Grips proprietor Raj Singh — one of the truly nicest guys I know in the industry — made for me a set of elk antler grips for a Ruger New Vaquero. Well, since none of my sixguns is a safe queen and they get worked hard on occasion, I somehow managed to chip the right grip panel, and my cursory repair sort of sucked.

Once the repair ‘patch’ was firmly affixed with epoxy,
Dave went to work with sandpaper and a Dremel sanding wheel.
I just happened to have a shed elk antler for repair material, so I shaved off a thin section from about the midway spot on the antler, worked a flat surface on the grip panel and flattened the replacement piece. Then, I attached the new piece to the grip surface with tan color epoxy, allowed it to set for a few hours and went to work with a sander and then a Dremel with a small sanding wheel. The end result was actually pretty decent, though hardly showcase quality.
The way to get a nice polish on any kind of bone or antler surface is to work it with increasingly fine sandpaper. I got all the way to 1500 grit, rubbed swiftly by hand, and then used a Dremel polishing wheel to finish off the project. The repaired grip actually fills my palm rather nicely and quite by surprise, doesn’t look half bad!

Well, not so bad for an old guy with some time on his hands, eh?
Others can do this, too!
This Ain’t Right!
Imagine my disappointment recently when I saw a story from WBMA in Alabama about a grocery store in Tuscaloosa that removed a vending machine for ammunition.
This is a legal enterprise, the story said, but apparently some people squawked about it, anyway. Apparently they have some folks in the Yellowhammer State who just don’t cotton to easy ammunition purchases.
According to WBMA, this vending machine is made by American Rounds, and there are units in stores in Alabama and Oklahoma. The machines are secure, designed to restrict sales to adults over age 21, and they seem to work and comply with any local laws.
The manager of the Tuscaloosa grocery store reportedly told WBMA the machine was removed last month because of “lack of sales.” Now, that right there just doesn’t seem plausible in Alabama, but I may be mistaken.