Subtleties of Shooting
From Retention
Up Close and Personal
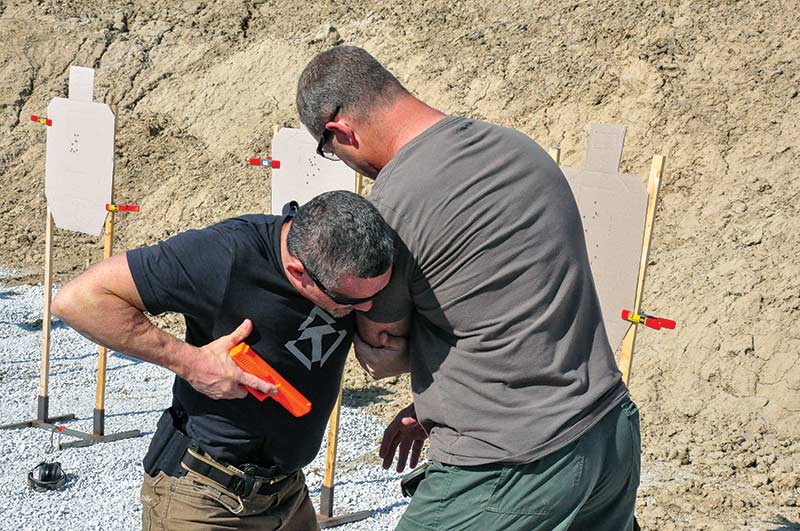
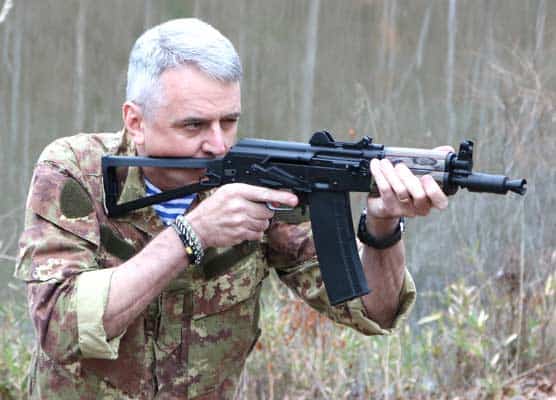
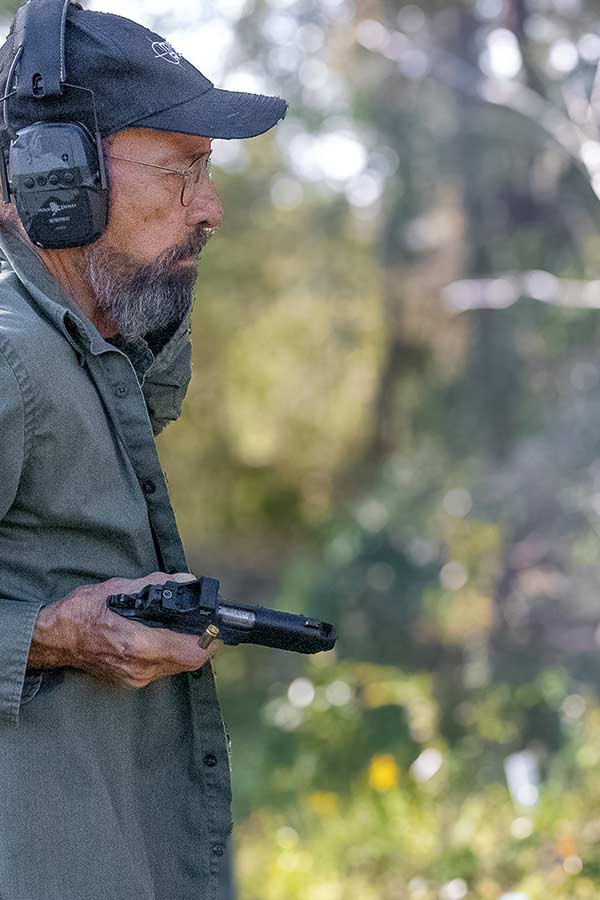
Craig “SouthNarc” Douglas demonstrates his retention
position with a dummy gun. Note the flagged thumb, high
elbow, and pelvic angle of the shot. Photo: Shivworks
When shooting from retention, the devil is in the details … and failures can be devilish indeed.
Many articles, books and videos advocate shooting from retention without touching on the fine points. “Shooting from retention” is inherent to combatives, meaning a physical fight with guns involved and where the opponent is close enough to grab your handgun, and you are trying to keep it out of his reach. This involves pulling the firearm in close on your gun-hand side and firing from a body position index, unable to visually aim.
One problem is that in live fire, it’s practiced on static targets, but in real-life employment you’re likely to be in physical contact with the opponent and moving each other’s bodies. I cringe when I see pictures of someone’s student holding the shoulder of the cardboard target while firing into its chest from retention: In an actual fight, the opponent need only pivot and drop a bit to pull your own hand and arm into your own line of fire.
There is no greater expert on retention shooting than Craig “Southnarc” Douglas, the retired undercover cop who teaches nationwide through Shivworks (ShivWorks.com). Craig teaches shooting downward into the pelvic area for several reasons. One is to keep that spare hand of yours from being pulled down into where you’re firing a bullet. He explains, “I teach the firing arm elbow up as far as it goes to the rear. A downward drop of the elbow to elevate the gun for an A-zone (chest) shot significantly increases the chance of hitting my own other arm.” He adds, “We explain retention shooting as ‘diminishment’; if we don’t finish the problem, our shots release us from the clinch, and then we get on the sights or dot to improve quality of shot placement as we create distance.”
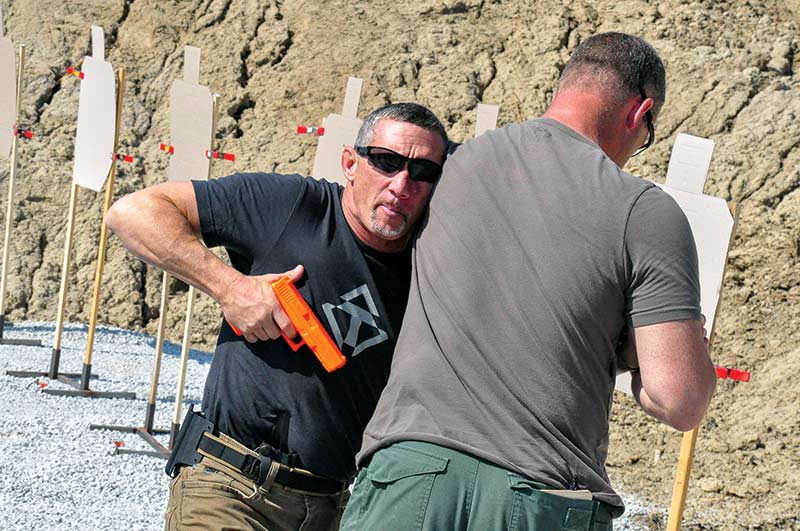
As Craig Douglas demonstrates, contact struggle can twist
both parties to unpredictable angles. Photo: Shivworks
Preventing Injuries
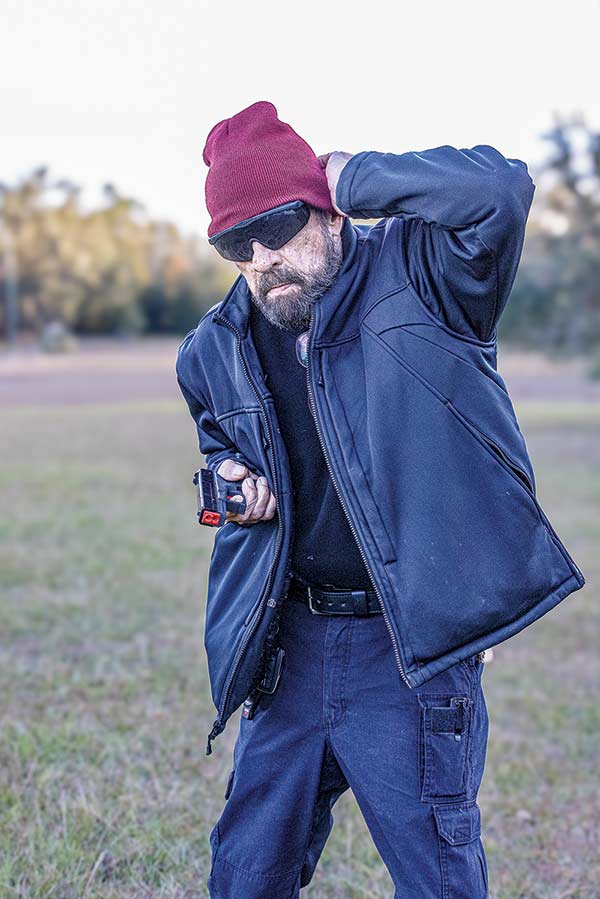
I recommend a Najolia block with the support arm, named after defensive tactics instructor Kerry Najolia. The support arm comes up with the humerus horizontal or a little higher, the elbow pointed at the opponent (or out to the side), and that hand open on or adjacent to the side of your head opposite your gun-hand side. Graciela Casillas has the simplest description of that maneuver I’ve ever heard: “Run your fingers through your hair at the temple, and you have your block.” Effective and safer with a blazing gun in your other hand.
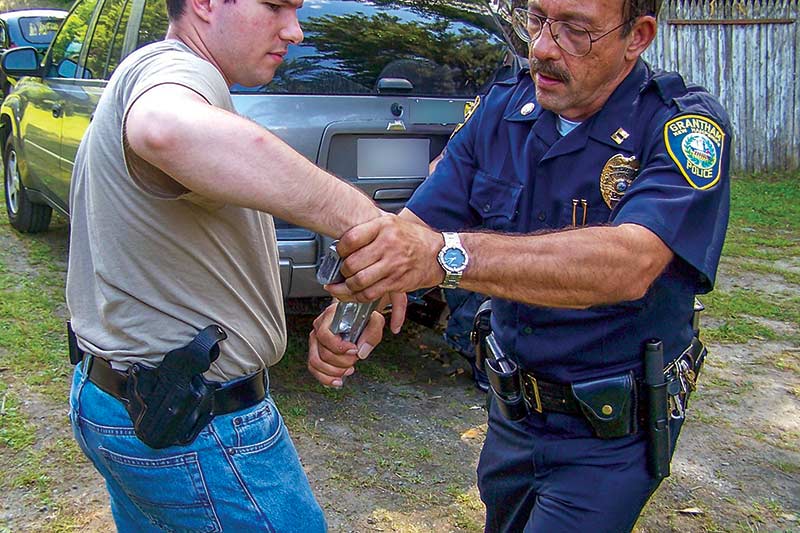
Disarming can be a viable option to retention shooting.
(“If he’s close enough to grab your gun …”)
Design: Semi-Autos
If you go for your opponent’s chest when shooting from retention, your arm will form an “L” with only the bottom leg of that L behind the gun. It’s easy for the whole forearm to move back with the pistol on recoil. Momentum that should be running the slide dissipates through the hand and arm, and the slide fails to eject or return to battery. It’s similar to the dynamic of a “limp-wrist stoppage,” and you can’t afford it. The arm needs to be locked tight.
Craig Douglas recommends fingers of the firing hand tight against the lower rib cage, with the gun hand thumb flagged (held vertically) as a felt index against your chest. This helps lock the frame in place and also rotates the slide outward. The latter is important to keep the slide from binding against clothing, which can also cause a malfunction. Some instructors prefer to rotate the gun 45 or even 90 degrees over on its side. This is particularly critical for southpaw shooting: Most autos eject to the right, and you don’t want a fold of coat fabric to block the ejection port or bounce a spent casing back into the port as the pistol is cycling.
Craig’s “elbow as far back and up as it can get” also takes the arm to the end of its range of movement and prevents the type of malfunction just described.
Design: Revolvers
Let’s not disregard side-spit from the barrel cylinder gap, nor muzzle blast from snub revolvers or any very short-barrel handgun. A .357 Magnum’s side-spit is coming out of that narrow gap at plus/minus 40,000 psi pressure with a flame-cutting effect. Obese people and buxom women seem particularly vulnerable in this regard. In training, try to establish a gun hand index point that will keep the barrel/cylinder gap forward of the body and clothing.

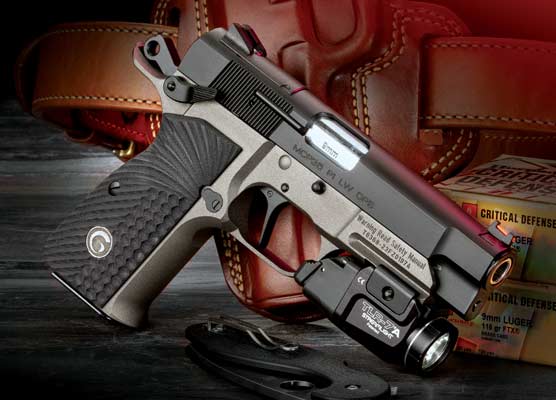
Beware upward gas blast from compensators in retention position. Here, 9mm blast shreds paper well above the Springfield Prodigy Comp.
Design: Compensators
“Carry-comps” are experiencing a resurgence in popularity. They help keep muzzles down by expelling jets of burning gases upward. If such a muzzle is too close to the face in a retention position, that hot stuff goes straight up toward the eyes, and most eye protection doesn’t shield against “bottom up.” Rotating the pistol outboard 90 degrees helps solve the problem. CAUTION: This can direct that gas toward a shooter at your side on a practice firing line. Douglas’ admonition to angle the muzzle down also helps to ameliorate this problem.
Mas demonstrates the Najolia block as applied to
retention shooting. The pistol is an unshootable SIRT for
the photographer’s peace of mind. Photo: Gail Pepin
Training
Mimicking something we saw on YouTube isn’t enough. Follow Craig Douglas’ example. In his classes, the students will fire some 80 rounds from this position, but under close personal supervision from Craig and his staff. In retention shooting, you can’t see where your gun is pointed. A coach watching you is important.
Just live fire from a static position only programs us to deal with one part of the combatives problem, which is a dynamic physical fight with guns in play. Craig teaches that element with unshootable dummy guns in actual hand-to-hand practice with a live opponent, both of you wearing appropriate protective gear.
Only then does it really come home to the student that when it’s done for real, the defender and attacker will both be moving unpredictably, with little to no ability to see who might be behind the homicidal criminal they have to shoot. This is another advantage to Douglas’ admonition to bring the muzzle down. If the bullet directed into the pelvis over-penetrates or misses, it is likely to strike the ground or floor a short distance behind the assailant and greatly reduce the danger to unseen innocent bystanders.
Rotating the pistol 90 degrees vents the compensator blast
sideways, making it safer for the shooter. Photo: Gail Pepin
In Perspective
Abraham Maslow warned us that if our only tool were a hammer, every problem would look like a nail. This is true in a lot of firearms training. Let’s not forget that the object of it all is not “How do I shoot the Bad Guy.” The problem is “How do I keep the Bad Guy from killing me or any other innocent person?” Shooting him is merely one of our options for achieving that greater goal.
Why are we firing from retention in the first place? Obviously, because he is close enough he can grab our weapon. That means, by definition, that you are close enough to grab his weapon.
When you and the Bad Guy are within arm’s reach of each other, I don’t know any currently living Good Guys or Gals who can react, clear their cover garment, draw from concealment, and shoot the Bad Guy in a guaranteed one-half of one second. I do know that in our advanced classes, we show that when they are facing each other squarely, almost every student can get their hand on the opponent’s gun or gun hand in about half a second or less. The trick is you have to know how to proceed from there into deflecting the muzzle (or the point of the knife) and flowing into a disarm. Disarming requires technique and practice — practice that’s less fun than shooting — but it’s sometimes the best answer. That’s why Craig Douglas teaches disarming as part of the repertoire of life-saving skills he shares with his students.
Shooting from retention is a piece of the puzzle, and the puzzle is a very complicated one with many parts. The simple fact is shooting from retention is a life-saving skill that is potentially dangerous to the user if done wrong and, therefore, must be learned and practiced correctly with all the subtle safety details in place.