When The Sights Aren't Right...
Make Your Own!

The original glow sight.
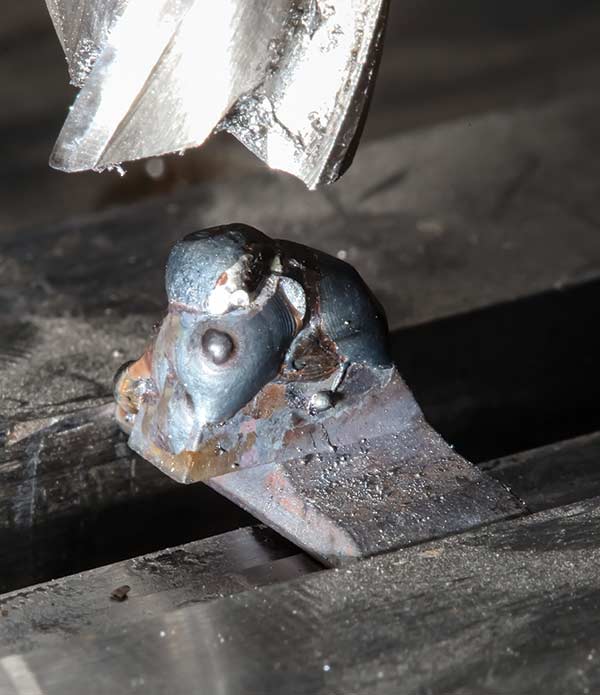
The front sight after adding material with a wire welder. This is the
sort of job where a TIG works better, but they are expensive. Adding
material with a wire welder to a small part like this takes a bit of experience.
If you are going to do it, set the welder to the lowest amps and then practice
on scrap until you get the hang of it. Or better yet, cheat and find someone with a TIG welder.

The front sight clamped in the milling vice set on two parallel bars
to keep it “square.” The amount of area on the sight is small resulting in
clamping pressure that is low. The parallels are not easy to see, but they
were used. Light cuts were taken so the sight did not “shift”.
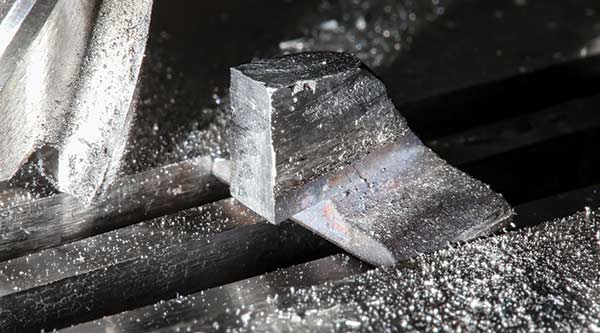
The sight just about done. You can see a few areas that did not get filled
in during the add metal stage. Ray decided to let them be — they would not
impact the function of the sight and adding more metal has a bit of peril involved.
If you look closely at the base of the sight, you can see Ray did the angle on the
top by tilting the sight … by eye. The clamping pressure went down more so the
top angle was a number of very light cuts. Ray left the sight a bit tall for initial testing.
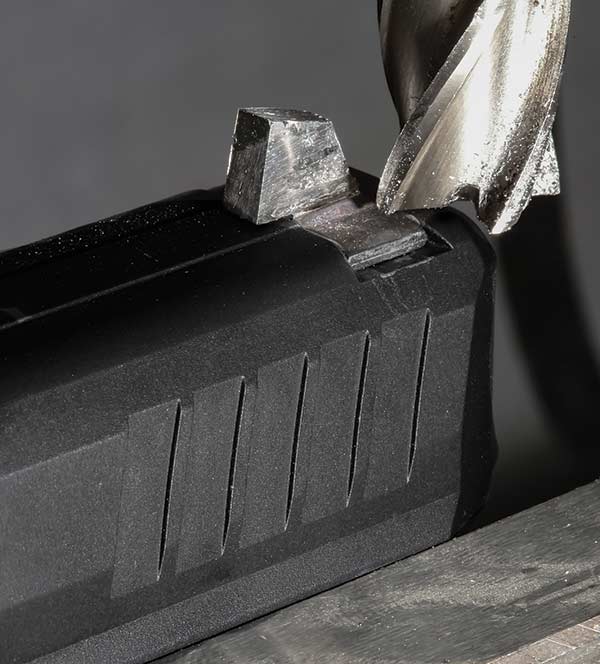
The sight installed on the gun. Ray used the milling cutter as a
measuring tool to center the sight. No, he didn’t use the end mill as
a sight pusher! Most people would likely use an edge finder to do this.

The Dawson Precision sight. Dawson even sent a nice
aluminum punch to do the sight swap.
I like my H&K P30L quite a bit — other than it came standard with glow-in-the-dark dot sights. In my case, glow-in-the-dark dots are less than ideal; nor are lines, white outlines and all the rest. Just give me a nice big flat “no glare” rear sight with a front sight sized so I see lots of light between the outline of the rear and the outline of the front.
I have found over the years and especially as my eyes have gotten older, more light around the front post makes for better groups. Having a wider rear notch and a fat front is a shooting aid. I have also found a taller front with a corresponding rear notch is beneficial for sight alignment.
Old eyes can never have everything in focus, so you have to learn to achieve an even amount of “fuzzy” around the sights. Bigger sights and more light make this easier to manage. Dots, lines and the like just make for a fuzzy, jumbled visual mess, leading to registration errors. I find vertical stringing is my bug-a-boo in this regard.
Getting glasses set up correctly is a definite aid and this link provides a good start on how to get glasses. There’s a great article titled “I Can See Clearly Now” providing an excellent primer on the right shooting glasses setup. Just search for the title, and you’ll find it.
In the case of this gun, if I need it for problems, I will not have my “shooting glasses” on. I will be wearing my daily pair or worse yet, I might be wearing my single-vision sunglasses. Making the sights as friendly to poor vision for a carry gun is a must.
Part of my solution to the above problem was addressed in an easy way — spending money. The not so easy part is detailed in the photos and captions provided here. I own a milling machine. However, making a rear sight from scratch is time-consuming, so I purchased a rear sight from Dawson Precision. Since altering a front sight is easier, I modified a front sight I had in my junk bin.
For more info: DawsonPrecision.com
After Ray adjusted the gun to his liking, he used a diamond knife
sharpening stone to “smooth” out the milled areas. When doing the
last bit of elevation adjustment, go slow, use lots of ammo, and only
take a few swipes with the file at a time.
Ray didn’t have his cold bluing handy, so he colored the sight with
a permanent marker. The sight is not pretty but it is serviceable. After
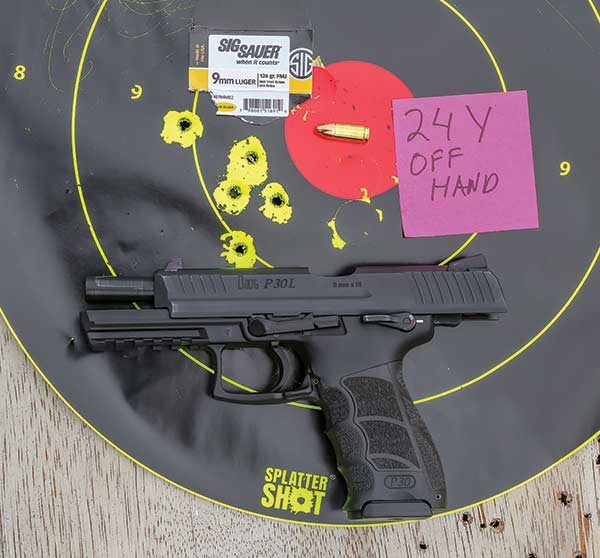
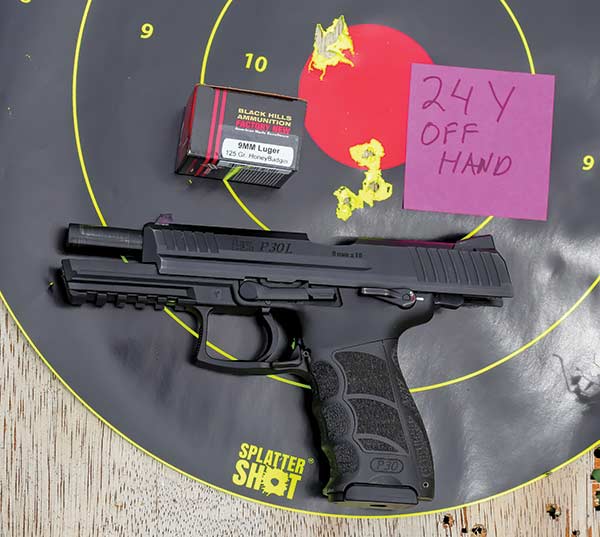
a bit of filing, the gun shoots to point of aim with the lighter-weight
Black Hills HoneyBadger ammo. Before the sight change Ray turned
in groups about three to four times as large as the ones pictured.