Behind the Scenes:
Rats … The Firing Pin’s Broken And We Can’t Find Another
Now what?
During my decades of “hobby gunsmithing” — as I like to call it — I’ve lost count of the number of broken firing pins I’ve fixed, replaced, rebuilt or eventually thrown my hands up in despair — and gave up on. While this recent one has to do with an over/under shotgun, the same basic steps applies to just about any firing pin for revolver, auto, rifle, shotgun and even many .22’s. The real mystery is when the pin is missing and you can’t find a sample, even in a picture. But that’s another story!
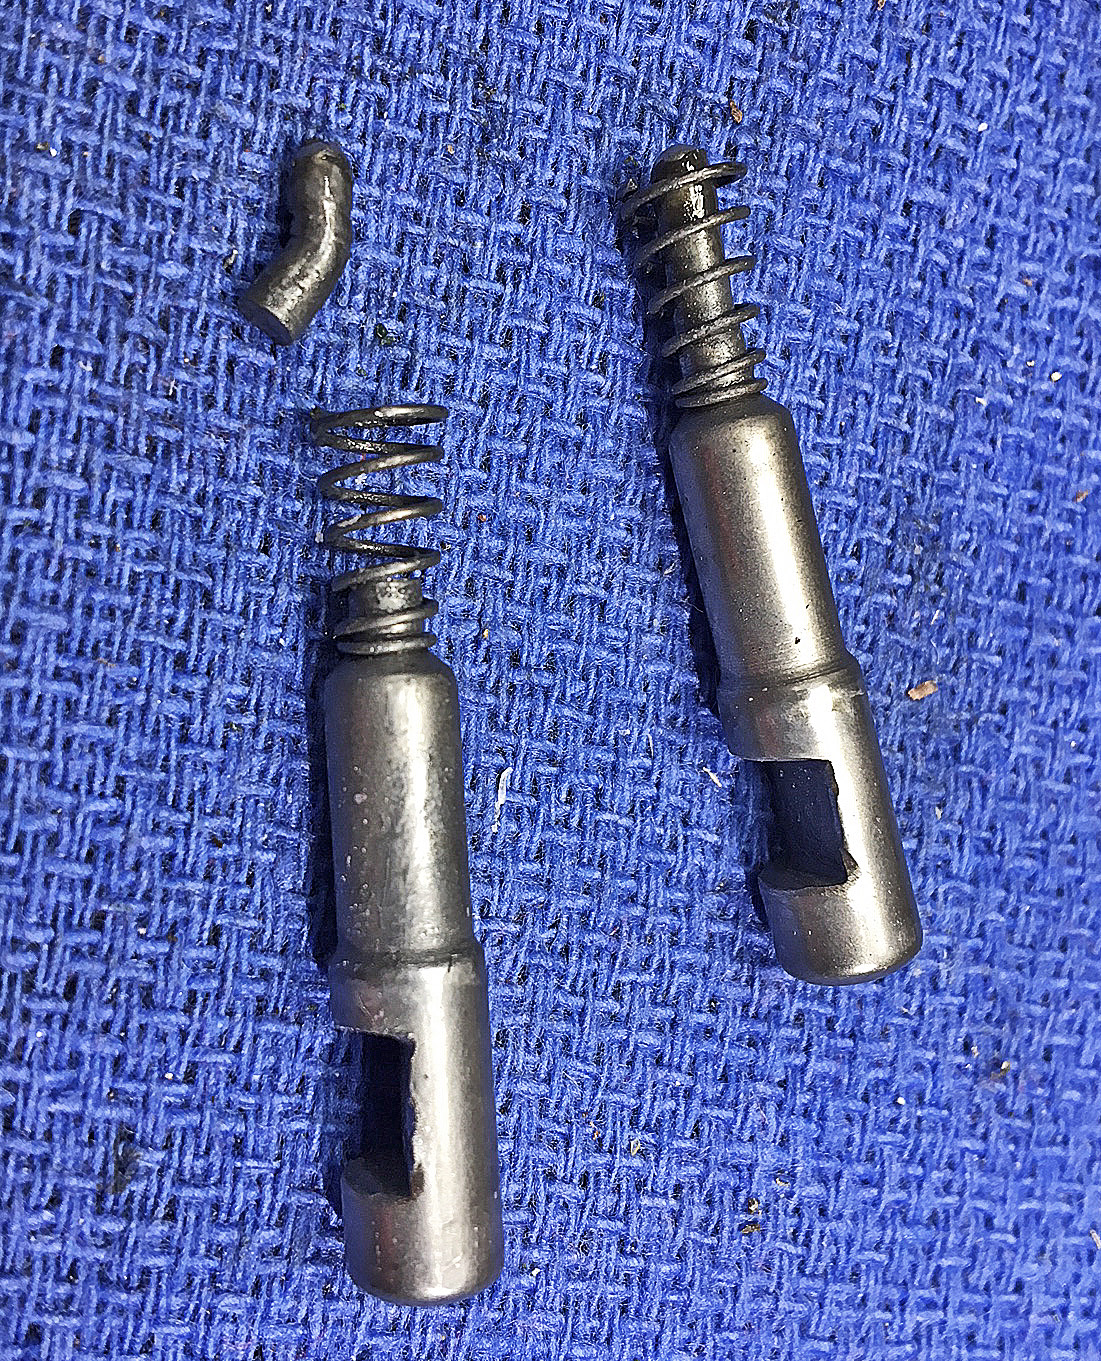
Oopsie — broken shotgun firing pin on the left. The other “good” pin is used as a reference. In this case, Roy was lucky to have a complete one to use for measurements.
This is a friend’s gun and what happened was after firing, the pin didn’t retract fully so when he opened the action, it bent and broke off the firing pin’s tip. Initially he couldn’t figure it out, but just knew the pin seemed stuck “out” as he said. He tried to find a pin on-line with no luck. He told me about it and since I have some experience fixing shotgun firing pins, I figured I could just make one to lend a hand.
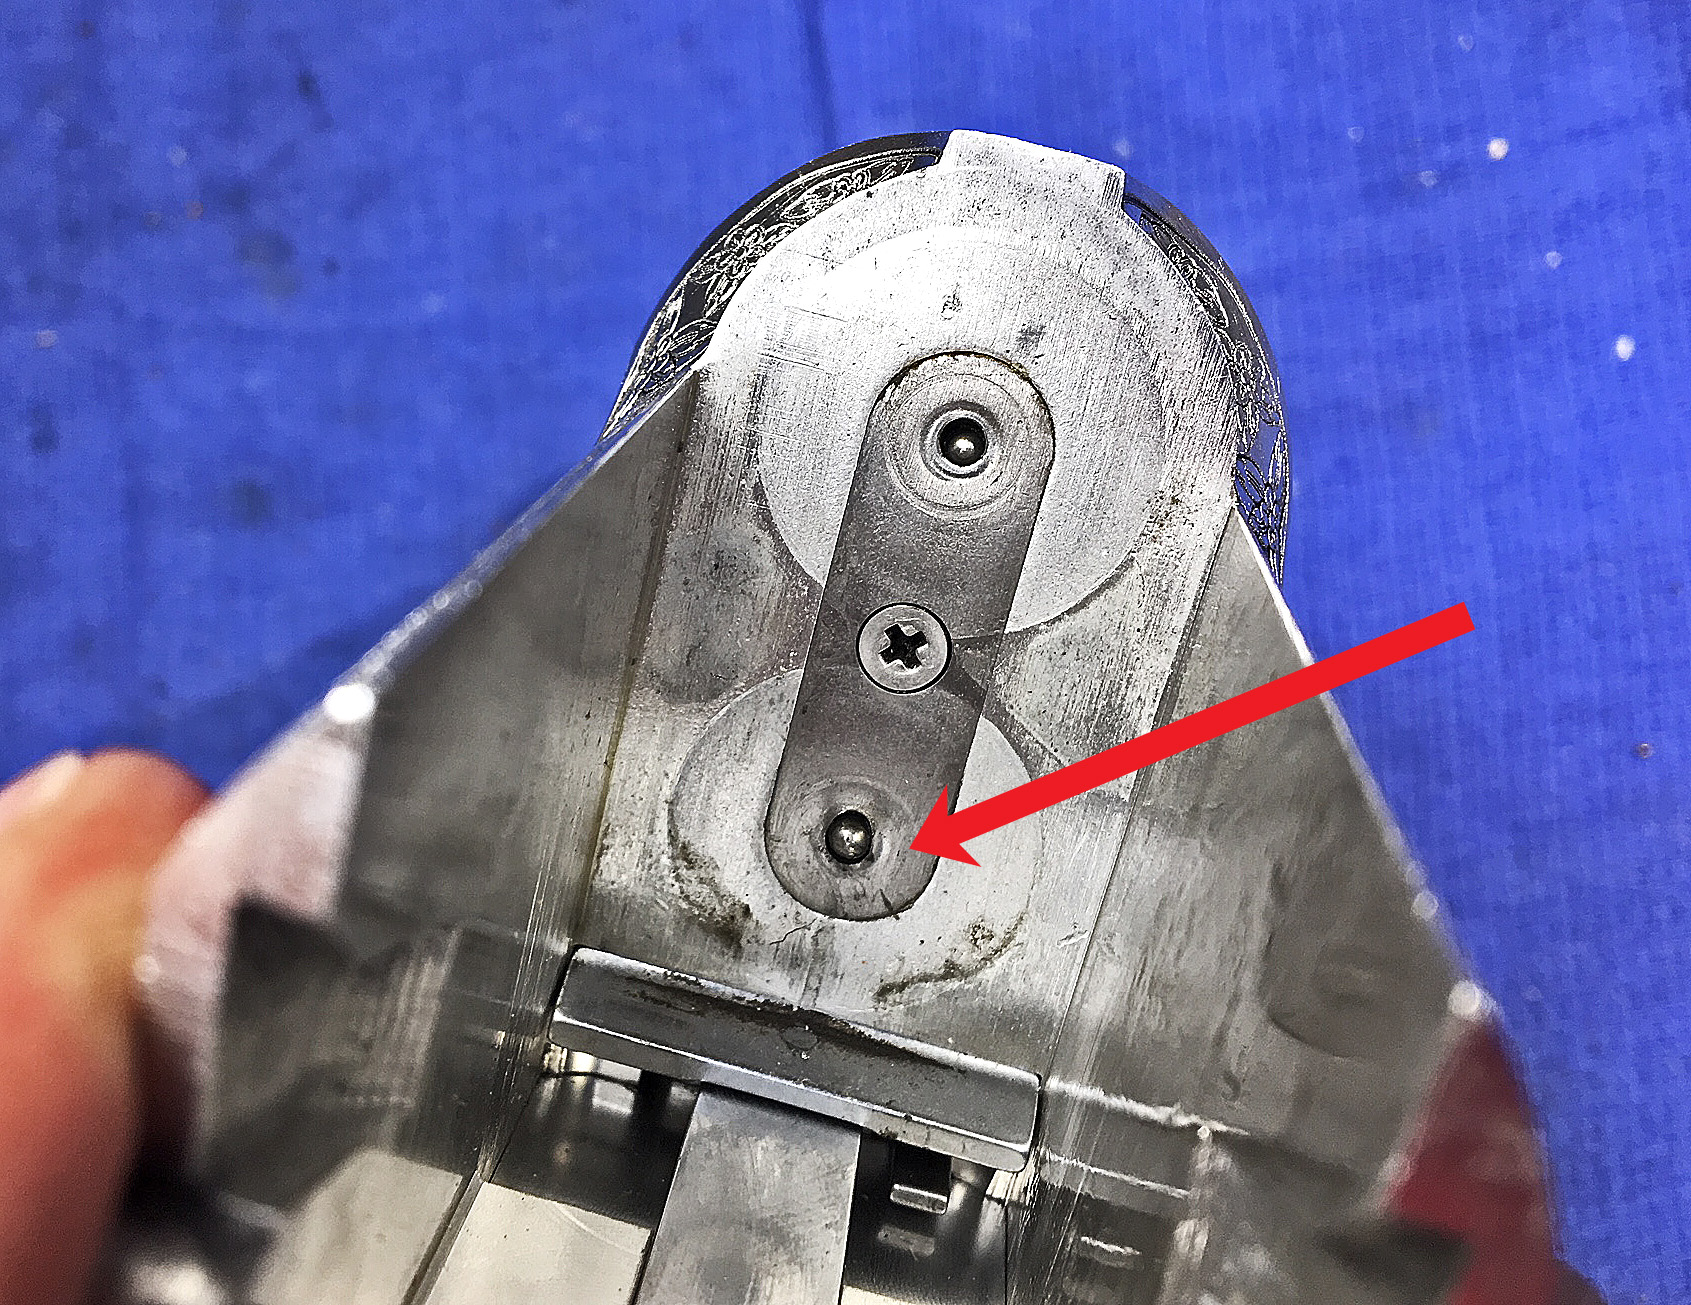
The lower pin end is sticking out and didn’t look broken (red arrow) until Roy took the gun apart and the pin came out in two pieces. Opening the action with the pin still sticking out a bit due to a burr broke it off originally.
Take Down
If you attempt something like this, use that magic “smart” phone and take plenty of pics while you disassemble things. To say they’re worth their weight in gold at times is to sorely understate things! “Oh, I’ll remember how that goes back on.” Nope. You won’t.

Here, the hammers are cocked (see them being held by the sears?) and the rounded ends of the firing pins are showing in the receiver just ahead of the hammers (red arrow). The hammer hits, driving the pins forward and a spring retracts the pins after the shell fires.
Once apart I saw the issue. This is an affordable “big box store” shotgun so the final fit and finish of the parts wasn’t that good inside. The pins showed plenty of peening and wear already and the gun wasn’t that old. A firing pin needs to be soft enough to take repeated blows without shattering, but hard enough to withstand wear and tear. It’s a delicate balance at times. In this case, it looked like the peening on the broken pin had jammed it in the firing pin channel, causing it to stick out, hence the break. But I saw this was an easy fix.
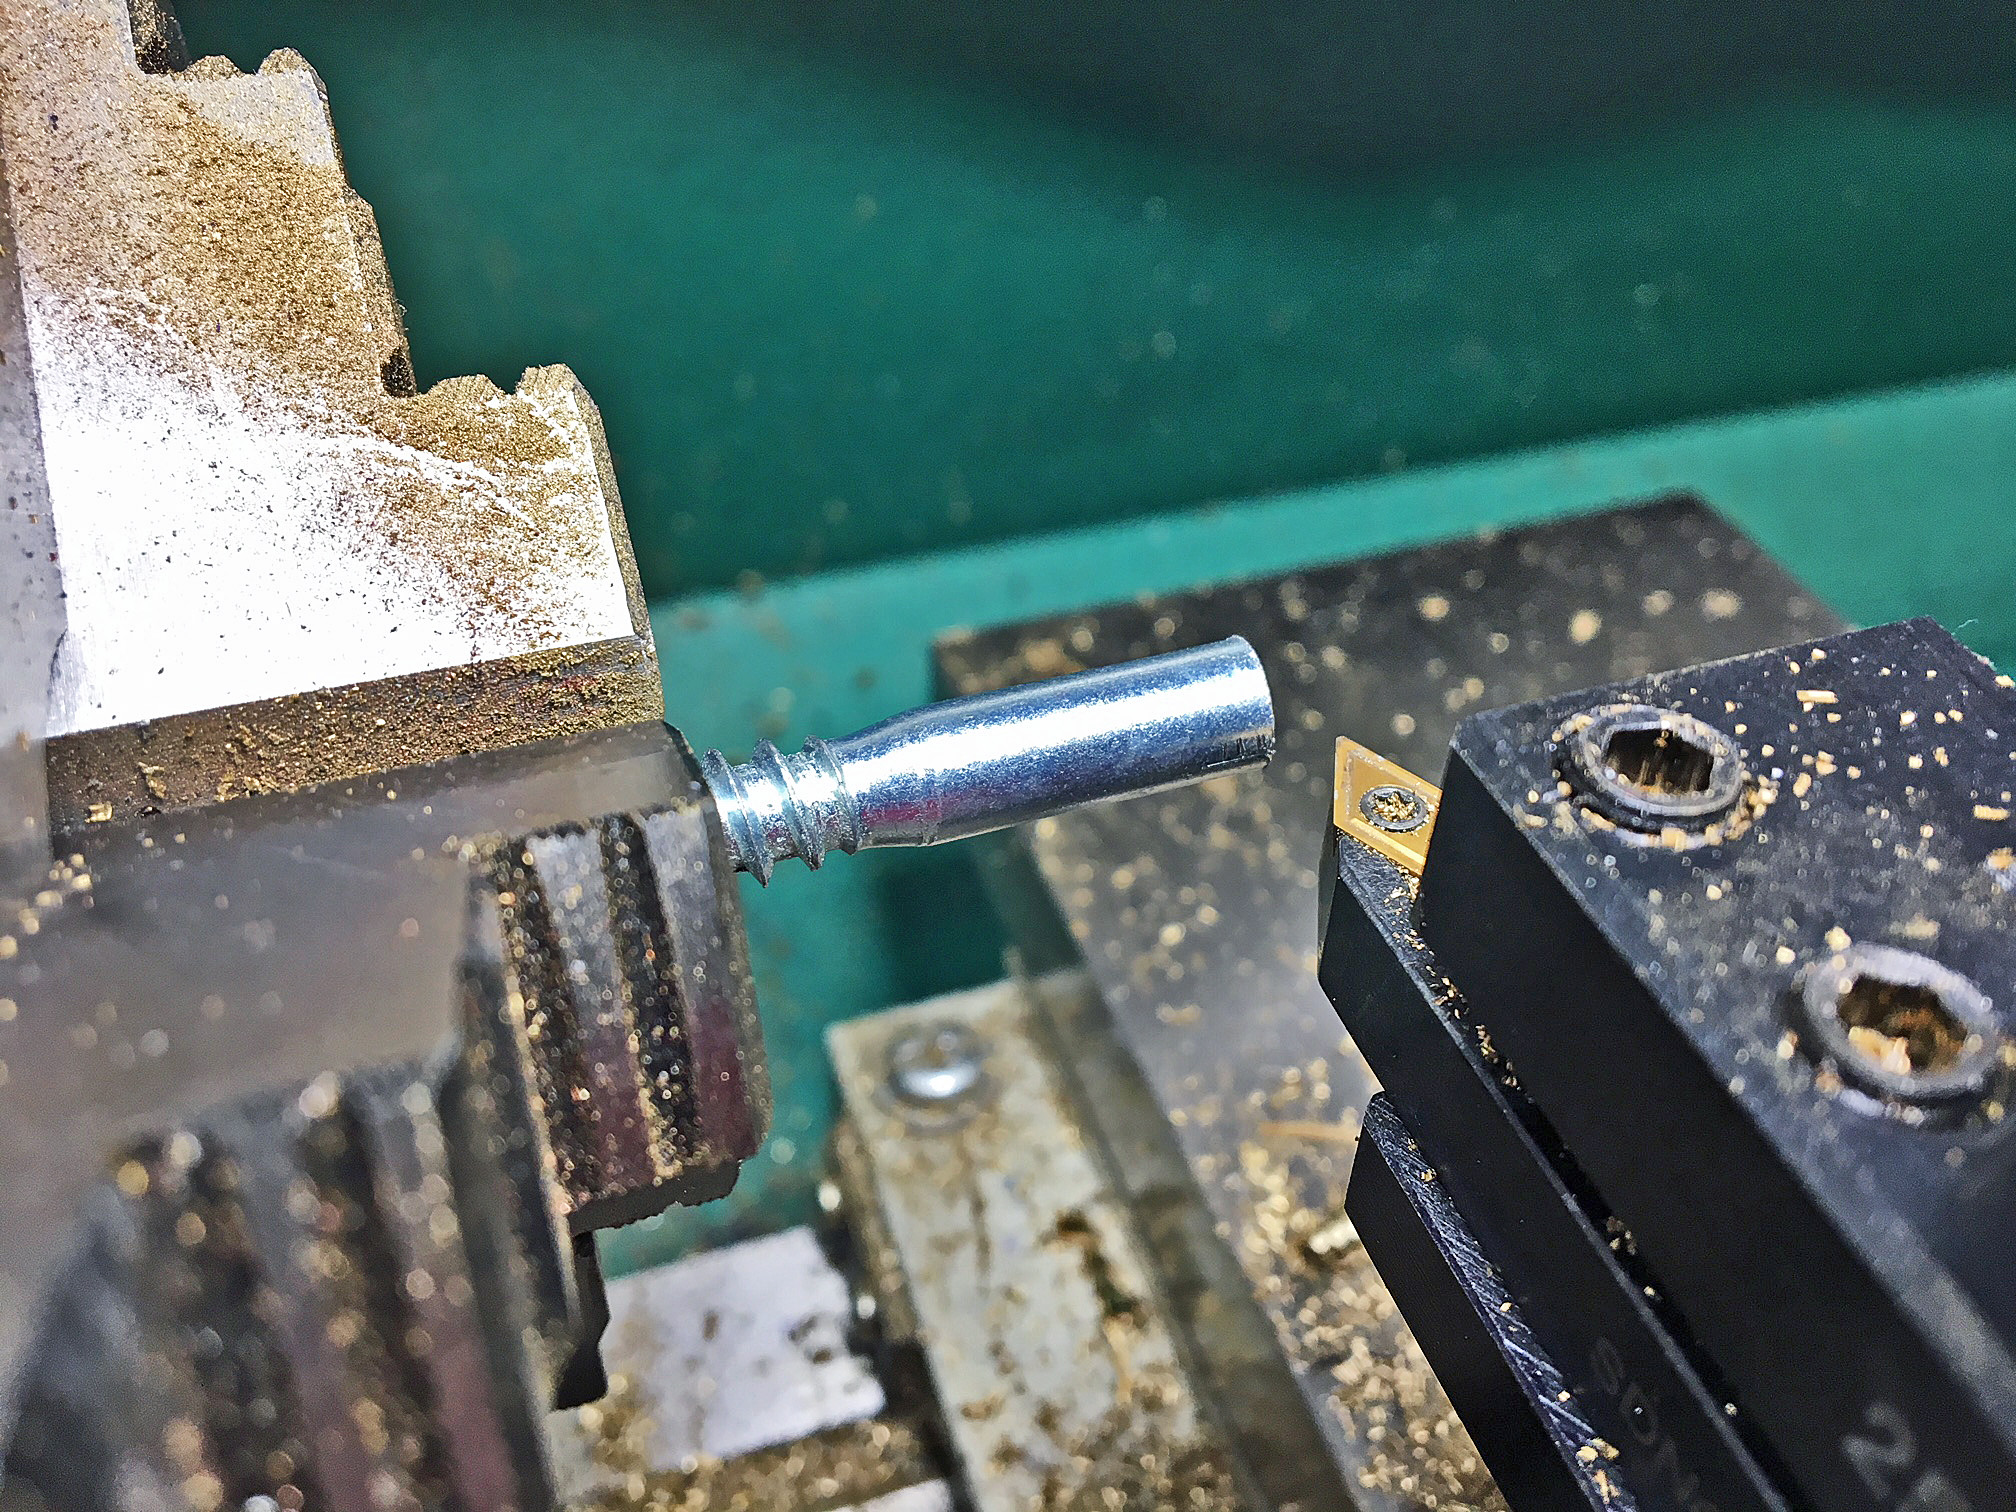
Here, Roy’s about to make the first pass on the cut-down screw to get the outer diameter to size.
A Big Nail Or Bolt?
Yup. Believe it or not, a nail or bolt often makes great raw stock for firing pins of all sorts. I might not use one for a .300 Win. Mag., but for old revolvers, many autos, shotguns, .22’s and such, your spare parts bin is your bag-o-old-nails and bolts and screws! Since I didn’t have a big enough nail handy for this one, I used an old lag screw. Just keep in mind you don’t need or even want an extremely hard bolt. Regular Home Depot bulk bin stuff like nails and bolts are fine.

Getting close. Here, the unbroken pin is held below the one in the lathe to see what’s needed. Roy used a digital caliper to get diameters and dimensions right, but simply holding up and comparing works wonders at times!
I spent a bit of time with a digital caliper, drew up a simple chart for dimensions and turned the unthreaded end to diameter after hack-sawing off the bolt head. Then I carefully turned the other diameters of the various bits. When you turn the final pin end, there’s not much strength there so very light cuts of one thousandth, finished to size with very light file cuts is the ticket.
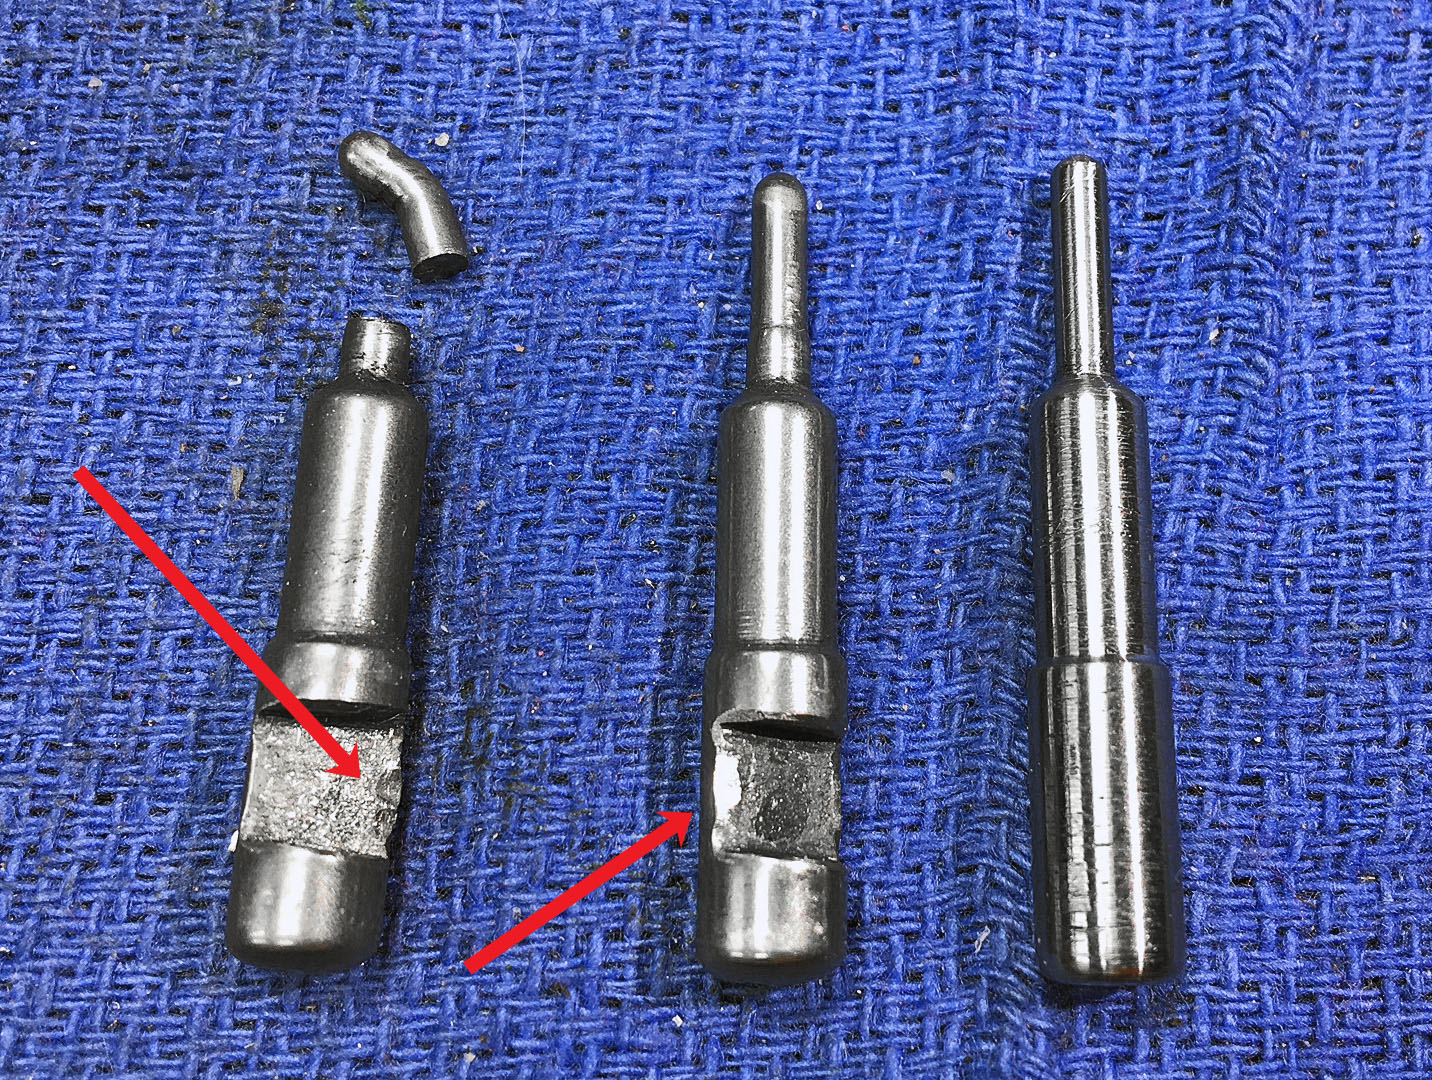
The broken one’s on the left, unbroken pin in the center (see the peening and wear on them due to the soft steel, red arrows?), and the “made from the lag-screw” model is on the right. Now a quick trip to the mill will cut that slot.
Once finished on the lathe, I used my small mill for the cross-cut where the action/receiver pin crosses to hold the firing pin in its channel. It’s wider than the cross-pin since the firing pin needs to move forward and backward at the blow of the hammer. The spring holds it “retracted” and when the hammer strikes it (inside the guns’ action) the pin flies forward, striking the primer, then the spring retracts it so the action can be opened. Unless the pin sticks and gets the end broken off!

The slot’s cut and a bit more work with a fine file rounded edges some and tided things up. It’s ready to install.
Final Stuff
A bit of light hand work in the lathe rounded sharp edges and a touch of 220 grit to 400 grit paper made things smooth. I love it when a project comes together and it worked fine right off. I always learn something, enjoy this sort of work and doubly enjoy the big smiles on the faces of the people I help. And — it helps to keep my “sipping bourbon” stash well-stocked! “Thanks Roy, here’s a present!”
Presto, good as new. Actually, at least one firing pin is better than new! Roy did smooth out the other pin before installing it to assure no burrs would cause trouble down the road.
Something to keep in mind is this is very simple to do. If you have an electric drill you have a “mini-lathe” and can use a file to shape things like this. You can also use a file to cut that slot. I’ve also found old ball point pens can often supply springs needed, and just about everybody has a pile of rusty nails and bolts around. The key is don’t get in over your head, and keep in mind, match the original firing pin length or, if it’s worn, make yours a bit longer so you can shorten it to fit as needed.
Just don’t blow yourself up!
Do you have an experience fixing a broken gun like this? Tell us about it and send a photo or two. We’d all love to see it. Also, go to www.brownells.com if you want to shop for gunsmith tools of all sorts!