Insider: 5-Point 1911 Safety Check: Is Your Gun Safe?
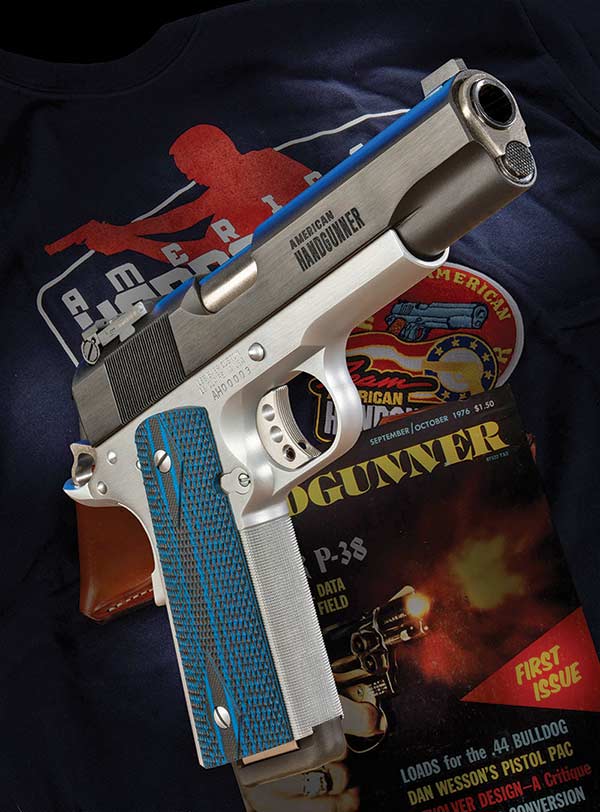
It’s always good to perform this simple 5-step safety check now and again — even on a gun as nifty as this American Handgunner Les Baer model! It passed, by the way.
If I had to wager, I’d wager at least 10% of the 1911s I’ve worked on over the decades have had safety issues. Some were even new guns. If I just think about well-used 1911s, I’m betting the percentage is more like 15% or even 20% — especially gun show “parts” gun amateurs often assemble. Not long ago a friend brought me a foreign 1911 (an Argentinian “Sistema” Colt clone) saying it needed some work. No fooling.
The hammer followed when the slide was released on an empty chamber. The grip safety didn’t function correctly and if you engaged the thumb safety, pressed the trigger gently, then took the safety off, the hammer would fall. It got me to thinking going over this very simple 5-step safety check might be something we should chat about.
Before you do this, clear the gun please. Please?
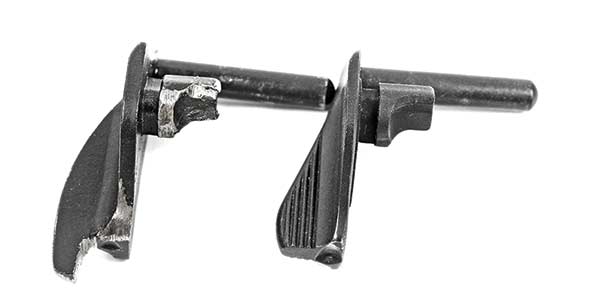
The thumb safety locks the sear from moving by using a camming surface on the safety They can get worn or are simply butchered during a “fitting” job (on the left).
Step 1: Thumb Safety
Cock the hammer and engage the thumb safety. Now pull the trigger with more force than you would use to fire the gun, but don’t be the Incredible Hulk either — just firmly. Now take the safety off. Did the hammer fall? If so, check the “bad” box. Now, hold the (unloaded!) gun up next to your ear. I like to use electronic hearing muffs for this since they give you bionic hearing. Now slowly try to cock the still-cocked hammer back and listen carefully. Do you hear a click? That’s the sear re-engaging in the hammer notch. It means when you pressed the trigger with the safety on, the sear moved a bit because the cam in the thumb safety meant to block the sear is worn or mis-fitted. That’s, as we say in the machine shop, “Dangerly!” Get the gun looked at.
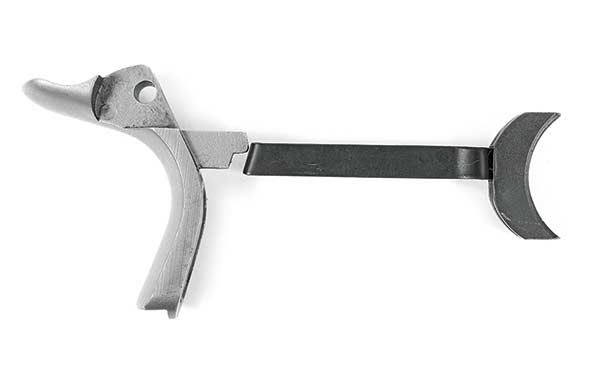
Here’s the grip safety at “rest” blocking the trigger bow from moving back if the
trigger is pressed. The bow would press against the disconnector and the sear
if the grip safety isn’t preventing it from moving.

When you grip the gun properly, the safety lever is rotated up, clearing the
trigger bow, allowing it to move to the rear when the trigger is pressed,
tripping the sear. Bang.
Step 2: Grip Safety
The grip safety blocks the trigger from moving to the rear, pushing against the sear (with some help from the disconnector). Hold the gun so the grip safety is “on” (not depressed). Cock the hammer, thumb safety off and press the trigger. Did the hammer fall? Now (like the thumb safety check), gently try to cock the hammer while you listen. Did you hear any clicks of the sear re-engaging? If not, all is good. If so, it’s fix-it time.
Now, get a firm firing grip, thumb safety off and cock the hammer. Pull the trigger and run the slide, keeping your finger on the trigger. Now release your palm from the grip safety but keep the trigger pressed. You with me? Now, release the trigger. Did the grip safety snap back out where it normally rests? If so, all is good. If not, you know the drill.
Step 3: Disconnector
The disconnector keeps the gun from going full-auto. It sort of kicks the sear back into engagement even if the trigger is held back. Cock the hammer and put gentle pressure on the trigger (not enough to trip the sear). Now move the slide about 1/4″ or a bit more to the rear and you’ll feel the trigger suddenly sort of relax and move back, but the hammer doesn’t fall. Thank you, disconnector. Now continue moving the slide back a bit while you hold the trigger back, then let the slide come back forward to lock. Now, release the trigger. Hear that click? The disconnector is doing its magic and the gun can fire. If it didn’t go like this, the gun isn’t safe. Get it?

Step 4 verifies the half-cock notch. Here it is on a classic Colt-style 1911 design.
Note how the hammer notch “captures” the sear. The disconnector is poking up
about where it would be.
Step 4: Half-Cock Notch
Original-design guns have the classic Colt “captive” half-cock notch. It’s meant to catch the hammer if it slips from your thumb and generally won’t allow a trigger pull to fire the gun from half-cock. It’s not a safe carry method though, as a dropped gun can break the half-cock notch and allow the gun to fire.
Some designs have a “Series 80” notch, which is engaged when the hammer is cocked only a short distance. If you pull the trigger at that notch, the hammer fall isn’t brisk enough to fire the gun. Probably being the key word here, so don’t rely on it. To test either, slowly cock the hammer and that “first” snick should hold the hammer. If not, it’s time to fix things.
Step 5: Firing Pin Safety
If you have a Series-80 style 1911 or one with a firing pin safety, it’s easy to check. It’s a simple mechanism. Arrange things so you can press the trigger while holding the hammer back. Now (with your third hand?) use a punch to press the firing pin forward. It should move freely. Release the trigger and try again and it should hit a block. There’s a lever and plunger system pulling the plunger from inside the slide, allowing the firing pin to move or to lock it in place when the trigger is at rest. So pressing the trigger moves the plunger down, allowing the pin to move forward at the hammer strike.
So there you go, five simple steps to safety with your 1911. Please, remember to keep your wits about you as you do this and the muzzle pointed in a safe direction at all times. Questions? Drop a note to [email protected] and Tom will get it to me. If you’d like to hear about other things like this, let us know what you want demystified. Stay safe, and take a new shooter shooting!