1911 Take Down Magic
Detail Stripping Without Tools?
1. Unload first and double-check things, then cock the hammer and
put the safety on so the slide doesn’t move. Then invert it, muzzle up,
pressing the recoil spring plug slightly to rotate the bushing, then
remove the plug. So far it’s standard take-down for cleaning.
2. Push the safety off, run the slide back to line up the cut-out in the
slide with the slide-release, then push the slide release pin from the
opposite side and remove the slide-release lever. Again, normal take-down things.
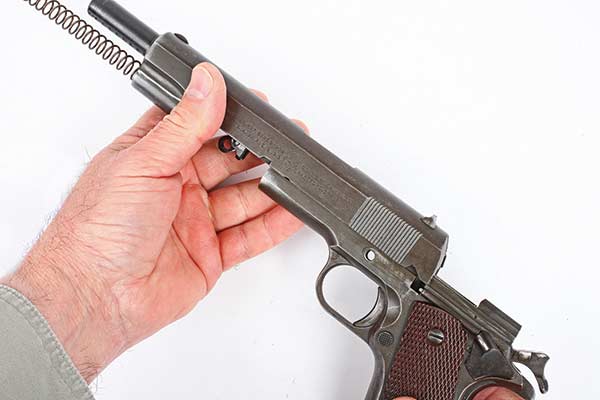
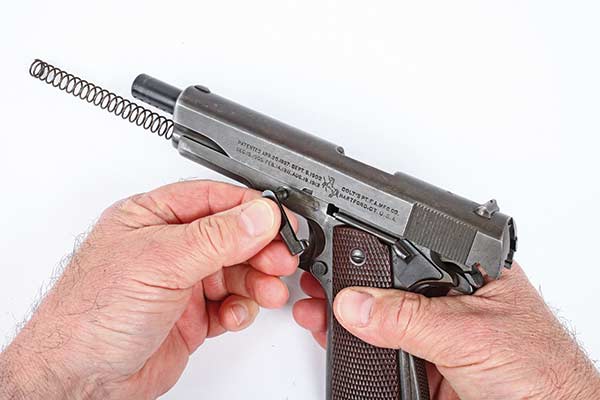
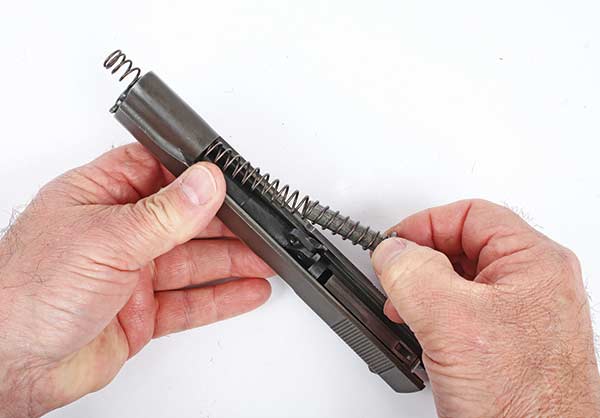
3. Push the slide assembly off toward the front of the frame,
capturing the spring as you do it. This should all seem very
familiar to anyone who has been around a 1911.
4. With the hammer back, work the thumb safety out to the left.
The lever needs to be pointing upward somewhat. You might have
to fuss with it a bit and twist it up and down a bit, but stay the
course and it’ll come out.
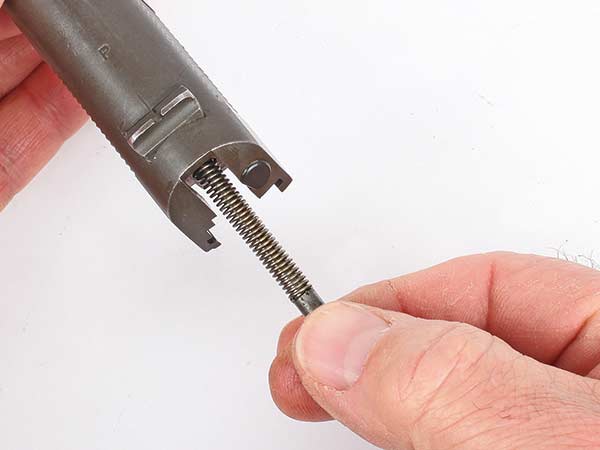
5. Remove the thumb safety and slide lock plunger assembly (on the slender
spring) from the small tube between the safety and the slide-release location.
Sometimes there is a slight kink in the spring to keep it from flying out so you
might need to really pinch it to get it out. Note which end goes in first.
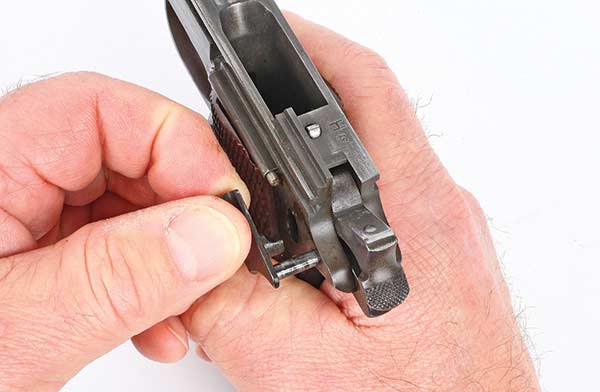
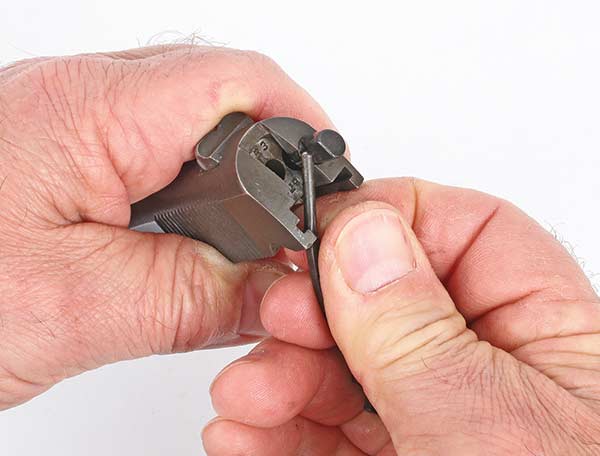
6. Use the thumb safety cross pin to push out the
hammer pin (un-cock the hammer first).
7. Withdraw the pin with your fingernails noting
how there is a slight “cap” on the pin.
8. Now remove the hammer. A bit of “jiggling” might
be in order to get it out neatly.
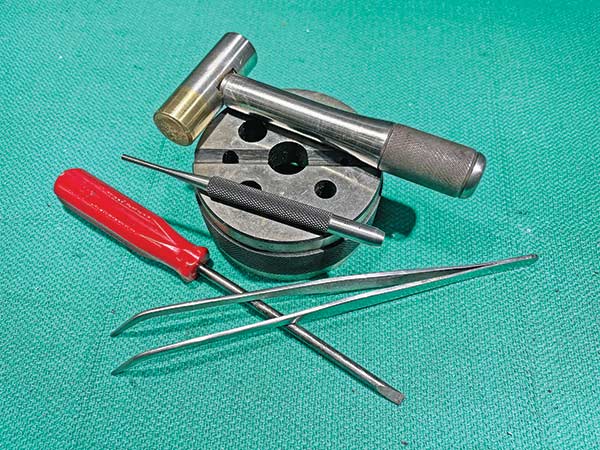
For we mere mortals, detail stripping a 1911-style auto usually means a couple of punches, a screwdriver and maybe a light mallet and a bench block to rest things on. But, John Browning, being the pesky, brilliant gun designer he was, built a secret right into every 1911 out there.
You can take them completely apart using nothing but the parts of the gun itself as your toolbox — right down to the very last tiny spring and pin.
Is this some parlor trick or sleight of hand at work? Nope, not at all. Read on to have your mind amazed at the fact any man could think all this up. I like to imagine the inside of Browning’s brain looking a lot like the screen on a CAD/CAM computer with little images of parts moving around seeing if things fit. In his case, they always did.
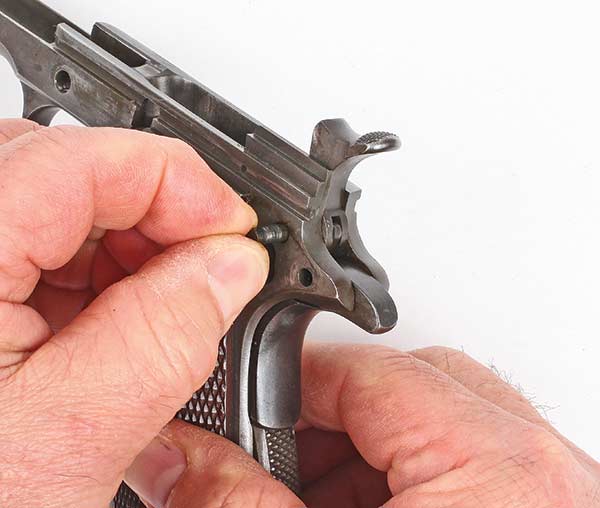
9. Use the hammer strut to push out the mainspring housing
pin (that’s the hammer spring) on the bottom of the grip.
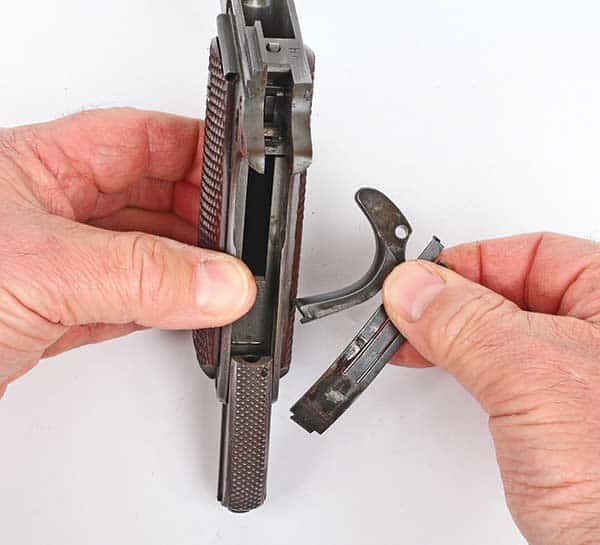
10. Remove the mainspring housing, grip safety and the three-fingered sear spring. The sear spring won’t come out until the mainspring housing slides down.
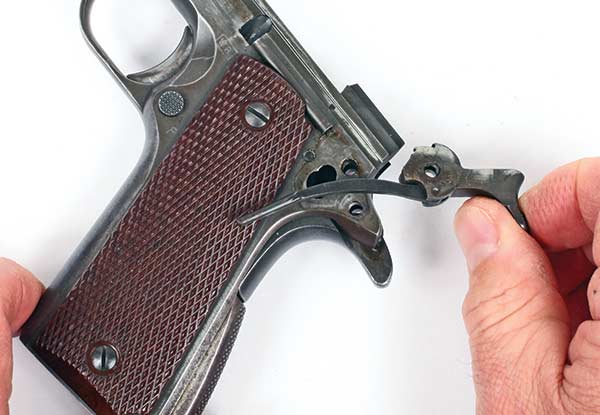
11. Using the hammer strut again, push out the sear and
disconnector pin, then remove it, allowing the sear and
disconnector to be removed from the frame.
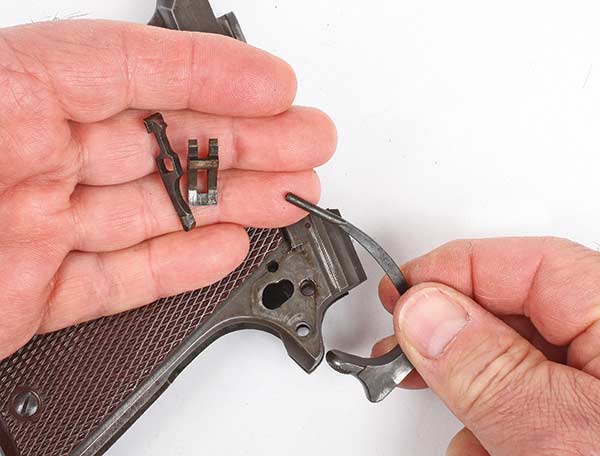
12. You might need to sort of shake the frame a bit to get
them to fall free. When reassembling, make sure you get the
two parts aligned with one another correctly — there is a
wrong and right way.
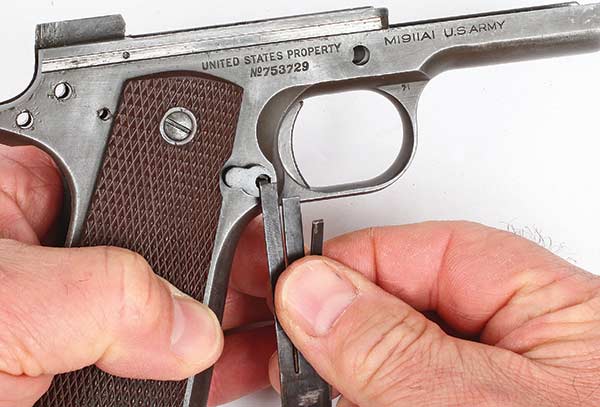
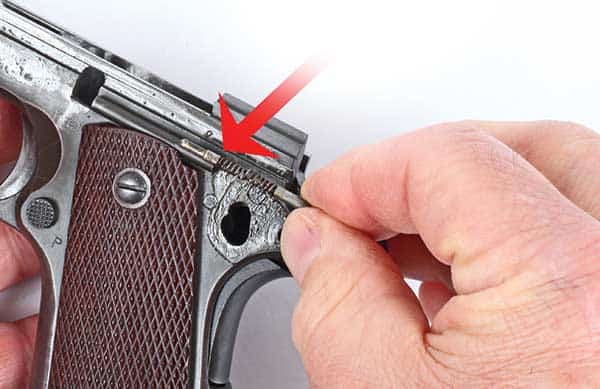
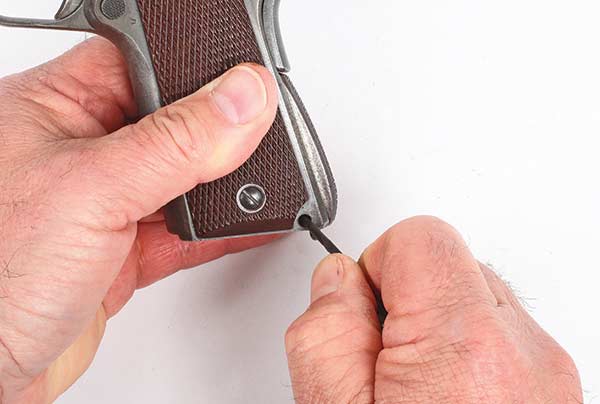
13. Use the angled end of one of the long sear spring fingers as
a “screwdriver” to rotate the magazine release screw head. This turns
a sort of tiny cam allowing it to rotate from a cut-out in the frame. It doesn’t
“unscrew” as you expect it to. Once free the assembly can be pulled from
the right side of the frame as a unit.
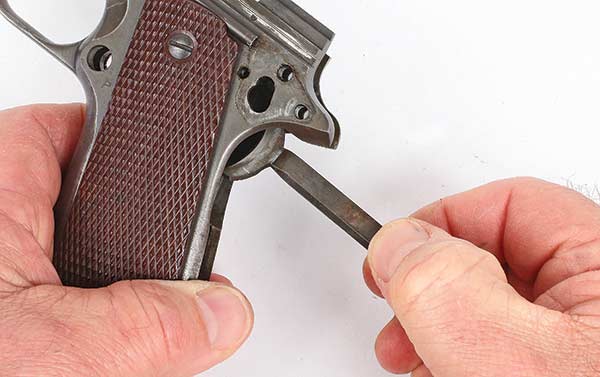
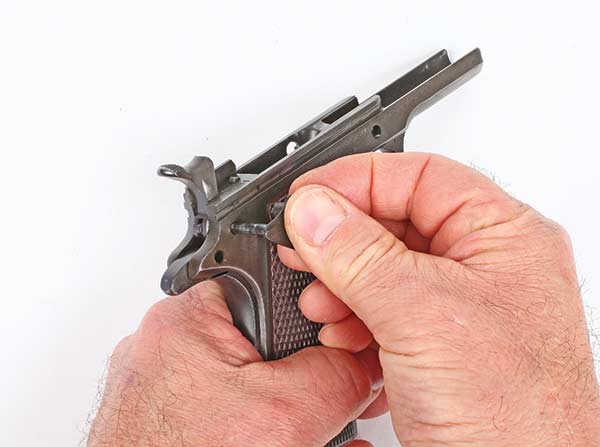
14. Now push the trigger back into the frame from the inside
of the trigger guard, then slide the trigger out of the frame by
grasping the rear of it by the trigger bows — the thin rails
attaching to the trigger face itself.
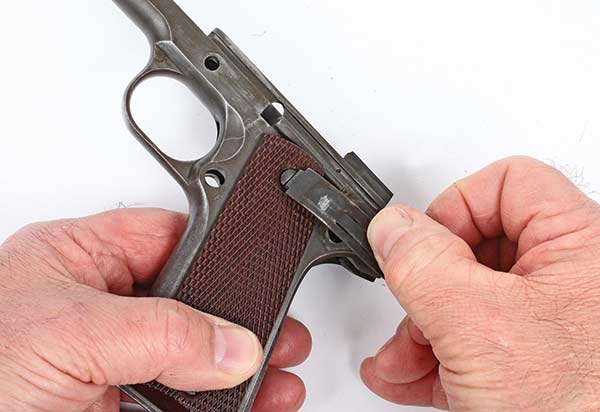
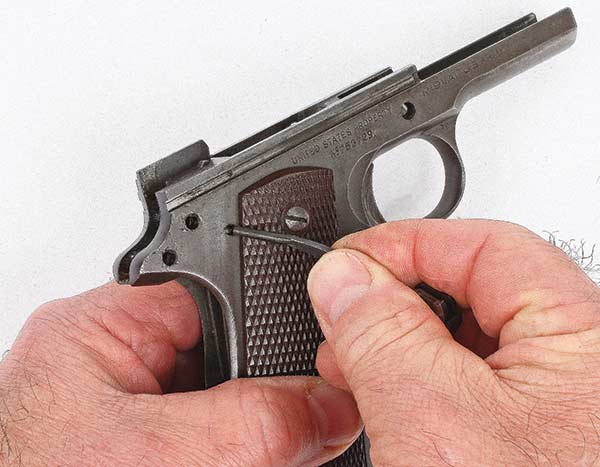
15. Use the bottom-angled portion of the sear spring as a screw-driver blade and remove the grip screws. Don’t attempt this if the grip screws are very tight. This takedown routine is just to show how it can be done, but you do need to use caution and common sense not to break any parts! The screws can easily become buggered up or the sear spring can be twisted or break. Grab a screwdriver for this step if you need to — don’t be too proud to ask for help from a “real” tool!
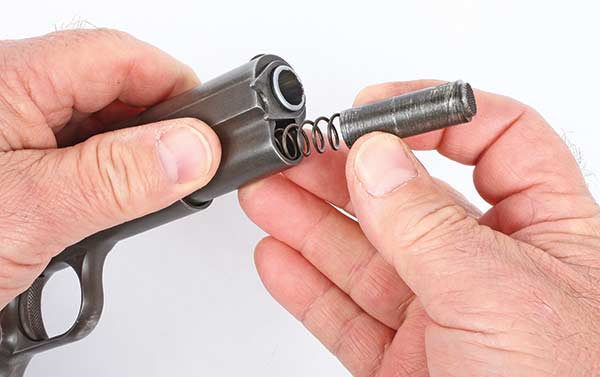
16. Take out the recoil spring and guide in the slide.
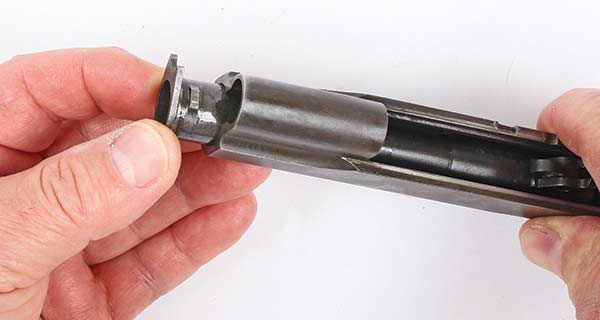
17. Now the barrel bushing, by twisting it in the opposite
direction you’ll be able to take out the plug.
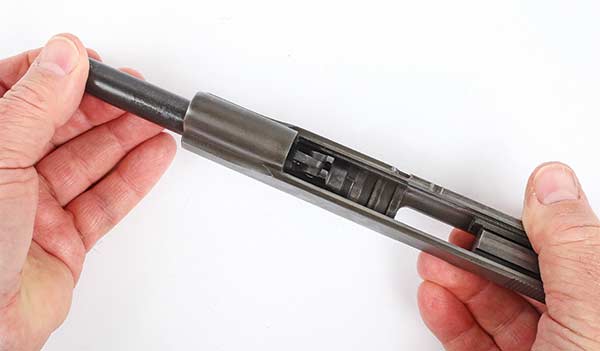
18. Next, the barrel slides out forward, just as you’d do for cleaning. Make sure the swinging link is down.
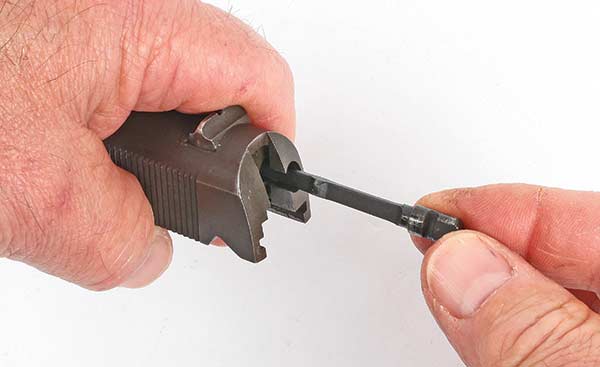
19. Use that handy hammer strut again to push in the firing pin.

20. Then slide the firing pin retainer plate down and out. Keep your
thumb handy here so the firing pin doesn’t do a rocket launch across
the room to some never-neverland resting place.
21. Now the firing pin and spring come out easily with no trauma involved.
22. Use the hammer strut yet again to pry out the extractor
(gently!), so you can get your fingers on it.
23. Then remove it by pulling it straight out. It’s okay if it’s a bit
grabby to pull out as a “tightish” fit helps to put the proper
pressure on the case rim to extract them.
24. If you really want to, you can use the thumb safety cross pin to
push in the mainspring plunger (in the mainspring housing), then use
the small end of the safety lock and slide lock plunger assembly
Use caution as it’s under a good deal of pressure! Be warned, it’s
tough to reassemble without using a vise so Roy would bypass
this unless you’re simply determined.
(on the slender spring) to push the crosspin out.
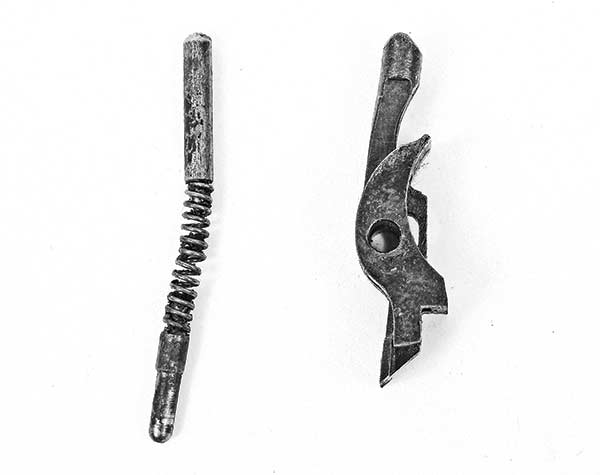
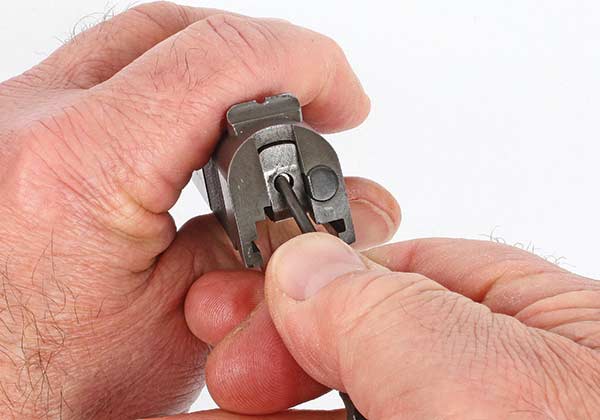
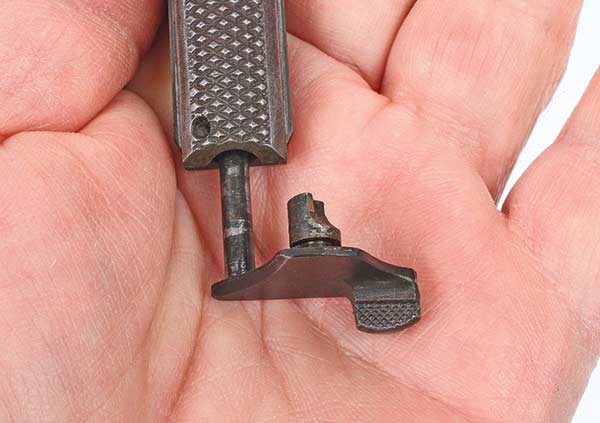
25. A handy reference. This is how the disconnector and sear fit into one another for reassembly, and how the safety and slide lock plunger spring look when correctly assembled.
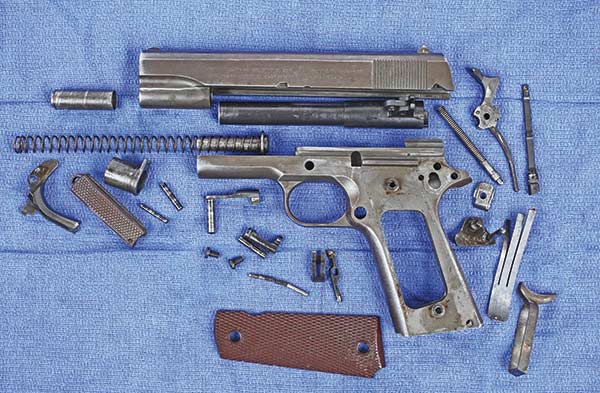
26. All the “bits” laid out nicely just before you collect your bet
winnings — since you were able to take-down the 1911 using just its
own parts! If you get stuck getting things back together, do it
all in reverse. Or find a YouTube video!
Easing Into It
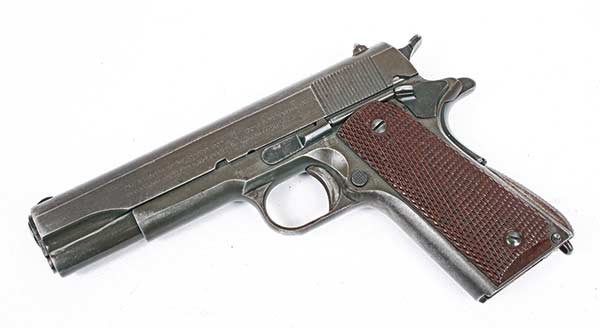
Use some common sense and don’t over-stress parts. It’s one of those “just because you can doesn’t mean you should” situations. If your grip screws are really tight, you’ll break things. So be prepared to use the correct tools if something doesn’t want to cooperate at first. I find this whole idea works best on well-used original 1911 designs. Modern tightly fitted guns will fight you and lash out expressing their displeasure at your intrusions this way. An old, well-worn 1911 like this WWII-era Colt is “just right” as they tend to be a bit loose and cooperative.
We’re just having a bit of fun here, an exercise showing it’s “possible” to do it. But, I certainly don’t recommend you do it routinely. So be warned, don’t over-stress the bits — or overstay your welcome.
Let’s take a step-by-step look at just how to amaze and astound your friends with your brilliance. I’m thinking a good lead-in might be, “Hey, wanna bet I can completely detail strip a 1911 using no tools at all? Right down to the last pin?”
Spend the winning money on ammo — if you can find any!