Barrel Fit Basics
What's Done Where And How To Look For It
The barrel is the heart of any M1911. Not only is it a functional part
of the gun’s feeding cycle, a well-fit barrel is capable of truly impressive accuracy.
The heart of any M1911 is the barrel. Unlike most rifle barrels, this doesn’t just mean the quality of the bore is important — it is. But since the barrel is an integral part of the gun’s cycling, the outside of the barrel is every bit as critical. If the barrel isn’t “fit well,” it won’t return to the same place every time, which means no matter how beautiful the bore is, it will be pointed in a different direction every time the slide cycles. Particularly poor fitting means the gun won’t run at all.
So, when you hear about a match barrel, the important part is less how shiny the bore is as where the fitting points are and how well they are fit to the gun.
“Drop-in” barrels are usually designed to reduce the external tolerances so the barrel fits tighter but don’t usually have all the same fitting points as a traditional match barrel. While it’s an improvement, and may be the only choice for some shooters, it’s not the same as a fully fit barrel.
While everyone does it a little differently, I was taught the “hard fit” technique by Wayne Novak, who learned it from AMU armorer John Miller. Let’s talk about where a barrel should be fit and some basic ways to tell if it’s done correctly.
The fitting points can be summed up in four categories in this order: back, top, bottom and front.
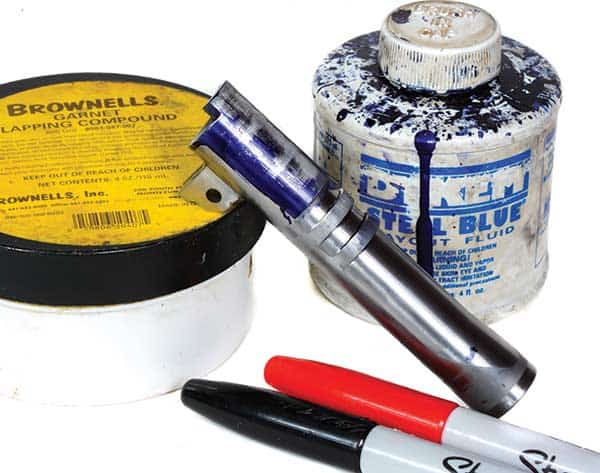
Tools of the trade: Lapping compound and marking fluid are both used to hand fit barrels. Dykem is an old standby, but many gunsmiths prefer a Sharpie because it dries faster and doesn’t produce the fumes Dykem does.
The first part to be fit is usually the hood, which should sit firmly against the breechface (left). Light on either side of the hood is acceptable, as it’s not a critical fitting point. Light between the barrel and the breechface, however, is a bit of a warning sign (right). This pistol will shoot better without the play.
The first part to be fit is usually the hood, which should sit firmly against the breechface (left). Light on either side of the hood is acceptable, as it’s not a critical fitting point. Light between the barrel and the breechface, however, is a bit of a warning sign (right). This pistol will shoot better without the play.
Barrel Hood
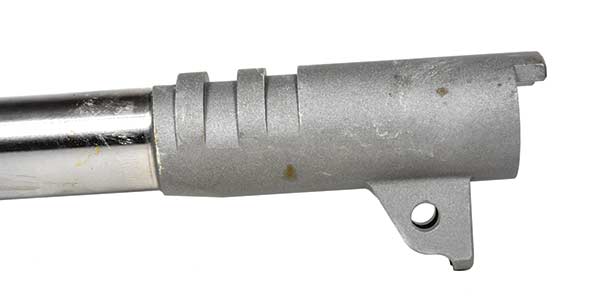
The first part of fitting a barrel is getting it into lockup, and this means first filing or stoning the barrel hood that protrudes from the rear of the chamber area. It should begin the fitting process oversize in both width and length.
Generally, this starts with narrowing the sides, then shortening the hood so it will move upward along the breechface. In this step, as with every step, it’s critical to keep the barrel oriented up-and-down correctly so the barrel doesn’t sit at an angle in the gun, and to keep the rear of the hood square to the breechface so it bears on it evenly. There’s a school of thought saying the width of the hood is less important than the length. I tend to agree with this, so it doesn’t particularly bother me to see light on either side of the hood, just not between the end and the breechface. A gun that’s been shot will usually have a print on the breechface showing where the hood moves up and down on it, and a strong, even print is good evidence the hood is fit correctly.
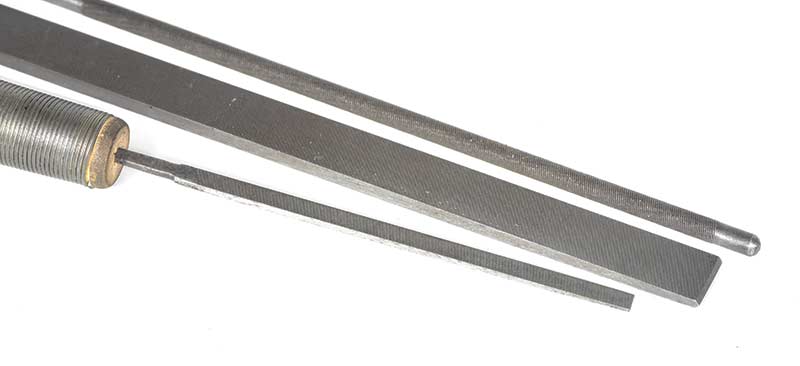
Much of the fitting work is done with files, including (front to rear)
a “safe” file for the upper locking locks, a fine Swiss pillar file and a
round file used to clean up the lower lugs.
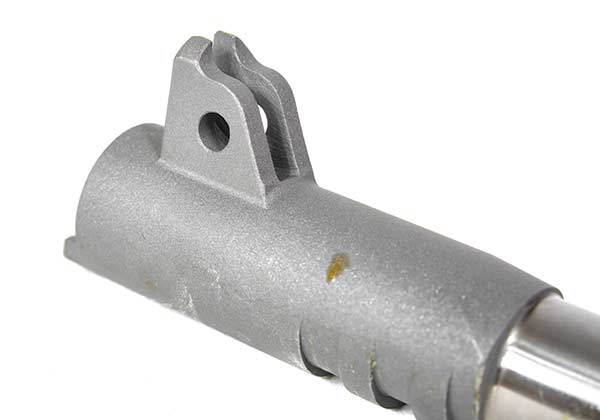
On many match barrels, the rearmost locking lug is left shallow so vertical
lockup can be adjusted during fitting. Removing material inside the rear
lug brings the barrel up further into the slide and is done with a narrow
file with “safe” edges.
A range rod is a time-honored way to check vertical alignment. The end of the rod will slip into the firing pin hole when the barrel is high enough. This, of course, assumes the hole is correctly located. This rod is from Brownells and has different-sized protrusions on either end for .45 or .38 Super/9mm firing pin holes.
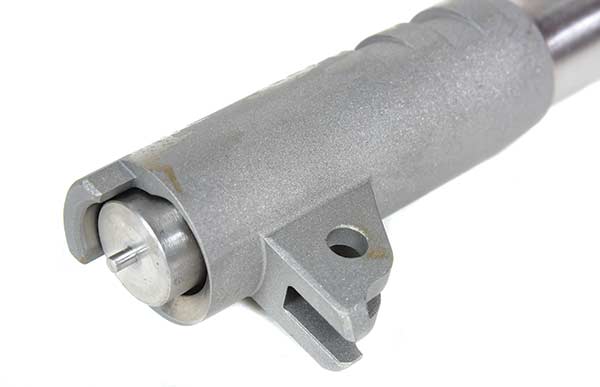
Match barrels have extra material on the critical lower lugs
so the lugs can be fit to bear solidly on the slide stop cross pin.
Upper Locking Lug
Once the hood allows the barrel to move upward, the rear upper locking lug — the top of the barrel — is filed until the barrel can move all the way up into full battery, something usually checked with a range rod (a fired, de-primed case is an old trick as well, but won’t work as well with pistols having .38 Super firing pin holes). Often, fitting the top lug includes final fit on the barrel hood as well. The barrel should unlock with light thumb pressure before moving on to the next step.
There’s a misconception fitting the barrel upward into the slide locking lugs is the most important part, so much so some people recommend getting a long barrel link to push the barrel upward, moving the lower barrel lugs upward and away from where they should rest on the slide stop. This is incorrect: While the upper lugs need enough engagement with the slide to adequately lock the breech, an M1911 barrel is most consistently locked in place when the barrel lugs rest equally on the slide stop — hence the importance of a barrel with extra material for fitting on both sets of lugs.
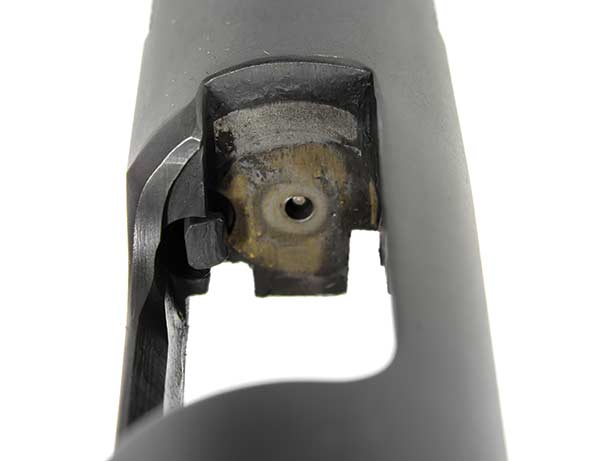
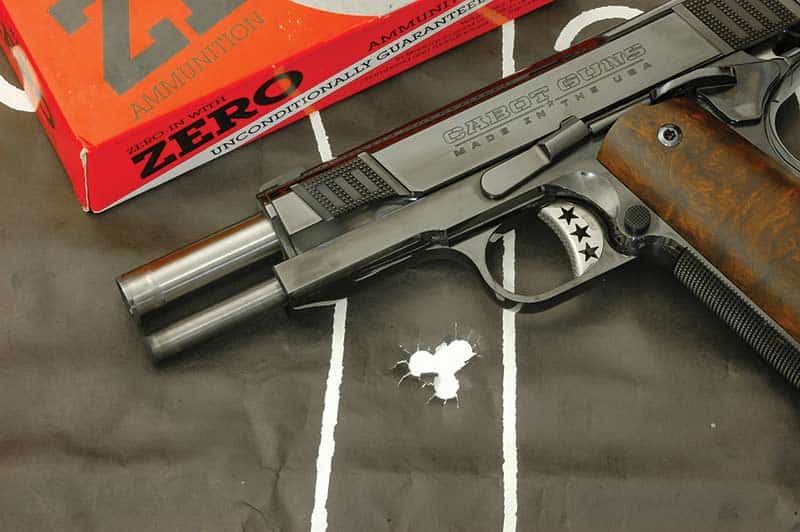
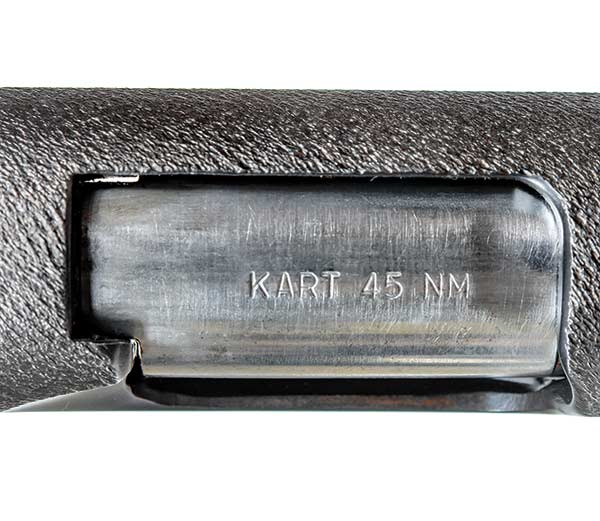
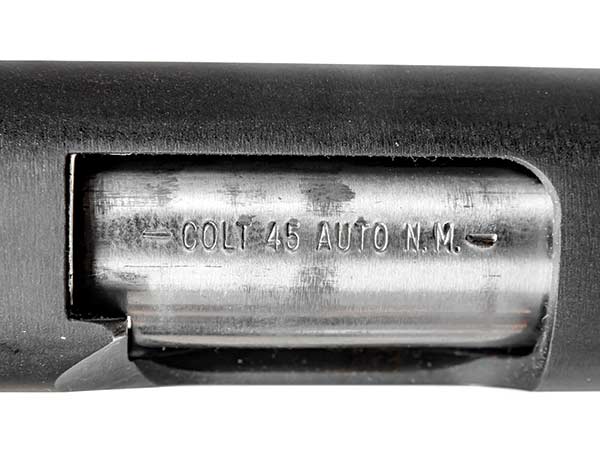
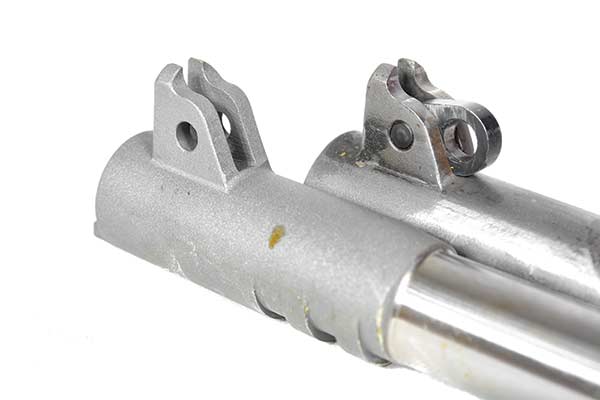
An M1911 that’s been shot will show wear marks on the breechface
from the barrel hood. This Springfield has a hard fit Kart NM barrel and
shows a clear print from the hood. It also averages 1.75" at 25 yards
with ball and hollowpoints (above).k can pivot around it.
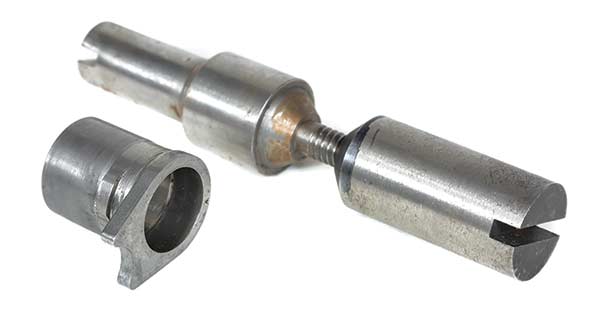
An untouched match barrel (center) with one already fitted (right).
In addition to cutting the lug for the slide stop, the lug also has
to be relieved so the barrel link can pivot around it.
Bottom
Now to the bottom — when the barrel-to-slide lockup has been finished, the barrel is locked into place in the slide and the lower locking lugs are cut through the slide-stop hole while the barrel and slide are installed on the frame. This is another step where it’s critical to make sure the barrel is not locked to one side, which is not good. With the slide-stop “seat” cut into the lugs, the lugs are shaped and smoothed so the barrel and its link will pivot smoothly around the slide-stop cross pin without hitting any high spots left on the lugs.
Looking at the slide stop usually gives the game away about whether a barrel will hit or not: A correctly fit barrel will leave a distinctive wear mark looking like the mirror image of the barrel lugs. The closer the mark is to the full profile of the lugs, the better it will shoot and the longer the fit will last. Uneven or very small marks are less desirable, and flat spots pounded into the cross pin could mean the gun is not unlocking correctly. After cycling the slide by hand, a barrel with good lug support should not move at all when you push down on the chamber area.
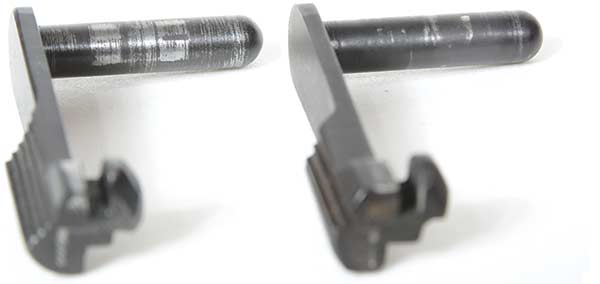
This slide stop shows marks of a fit barrel (left) with that of a stock pistol
(right). Looking for the slide-stop marks is an easy accuracy check you
can do at the counter of a gun store without ever firing a shot.
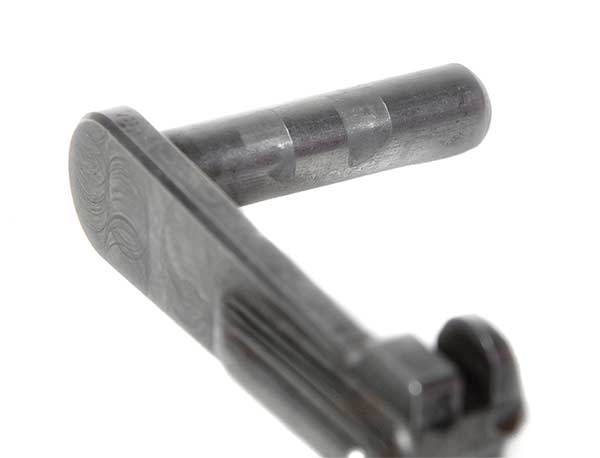
Correctly fitting a barrel will create a print on the slide stop that looks
like the mirror image of the barrel lugs. The closer it is to the full profile
of the lugs the better it will shoot — and it doesn’t get much better than this.
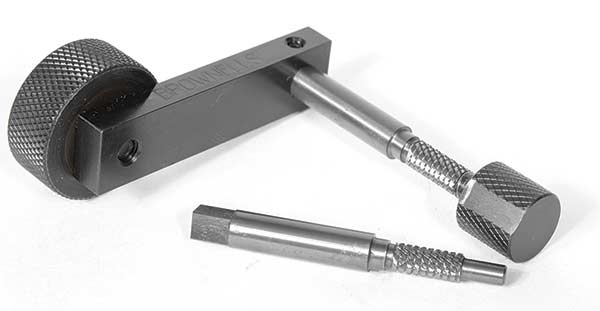
Barrel lugs are usually cut with a cutter inserted into the slide-stop hole.
This lug-cutting tool from Brownells comes with two cutters: a smaller,
coarser one and another for a finer finish. After cutting, the lugs are
lapped in against the slide stop.
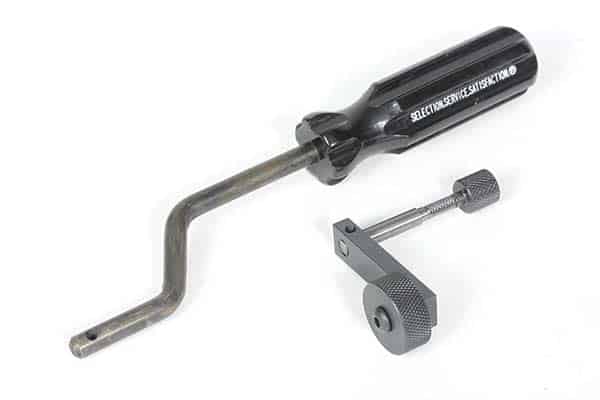
The slide has to be pushed forward for the lugs to engage the cutter;
the bent screwdriver-looking tool is a slide pusher that makes the
process much easier. Both tools are from Brownells.
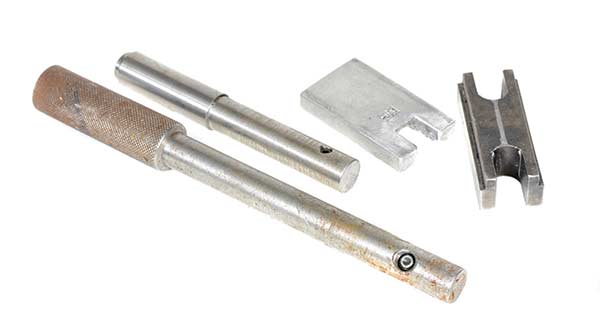
During every stage of barrel fitting, the barrel has to be correctly
oriented in the slide. The two square tools are alignment blocks
(one from Kart, one from Brownells), while the two rods are used
to lock the barrel into place in the slide.
While it’s possible to fit a bushing with nothing but sandpaper and a file, this
bushing fitting mandrel from Brownells makes it much easier to turn down
the outside diameter of the bushing. You can use it in a lathe or drill press.
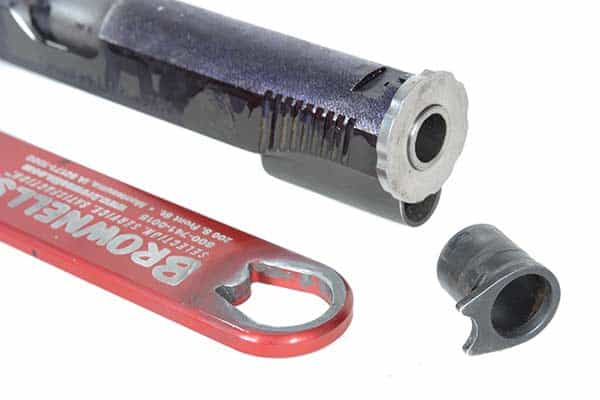
During barrel fitting, you usually use a work bushing (such as this
round one from Kart) to keep the barrel aligned. Lapping in the bushing
you’ll actually use requires a wrench such as this one from Brownells,
but the bushing should be removable by hand when you’re done.
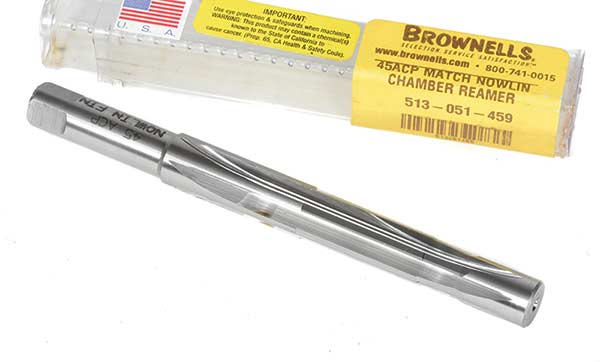
Once the barrel is fit, the chamber needs to be checked, and
if necessary, cleaned up or cut deeper using a reamer.
Bushing Fit
The front part of the barrel fit consists of how well the bushing fits both in the slide and on the barrel itself, and it’s usually done last (a looser work bushing is used during fitting to keep the barrel aligned in the slide). One of the classic ways of fitting a bushing is to turn the barrel down in diameter about a half-inch or so behind the muzzle, which reduces friction because the bushing doesn’t fully seat until the gun goes into lockup. Match guns may be different, but on a defensive gun, you should be able to turn the bushing in the slide without using a wrench, though you may need to push the slide backward a bit to do it. (Did you remember the bushing fits tightest on the barrel when in full lockup?) Coned or “bull” barrels should also fit tightly at the muzzle, but in this case, the cone is fit contemporaneously with the back and top of the barrel, instead of last like the bushing is.
A correctly fit barrel should show zero discernible motion in the chamber area once locked up, and you should be able to remove the recoil system from the (empty) gun and have it both lock and unlock easily under its own weight when you move the gun from muzzle-up to muzzle-down and back.
If you can do it, congrats, you’ve got a shooter.
For more info: Brownells.com, KartBarrel.com