Grip Making DIY
Precious Metal Or Wood — It Doesn't Really Matter

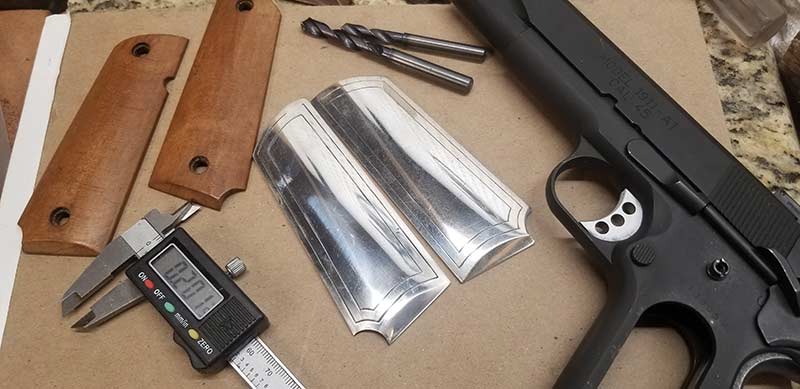
Garrett made this set of highly figured and stained maple
grips using these same techniques — except for the casting part!
I’ve never seen a factory grip panel I’d label anything more than “adequate.” I get it, you have to play to the middle and please the masses, meeting a price-point, but this doesn’t mean you’re stuck with what you’ve got. We all like to take our guns and make them our own. While it would be easier to troll the internet with your credit card and magically make fancy custom grips show up at your door — I hereby offer some options.
Given the choice to go big or go home I rarely choose to go home — mostly ’cause my wife is waiting with her honey-dos, and gun stuff is more fun. Often, when I swing for the fence like this I end up biting off more than I can chew. But it’s where the magic happens! I’m just crazy that way I guess. So pay attention, dust off your hands and ramp up the can-do atti-tude here. You honestly can do this.
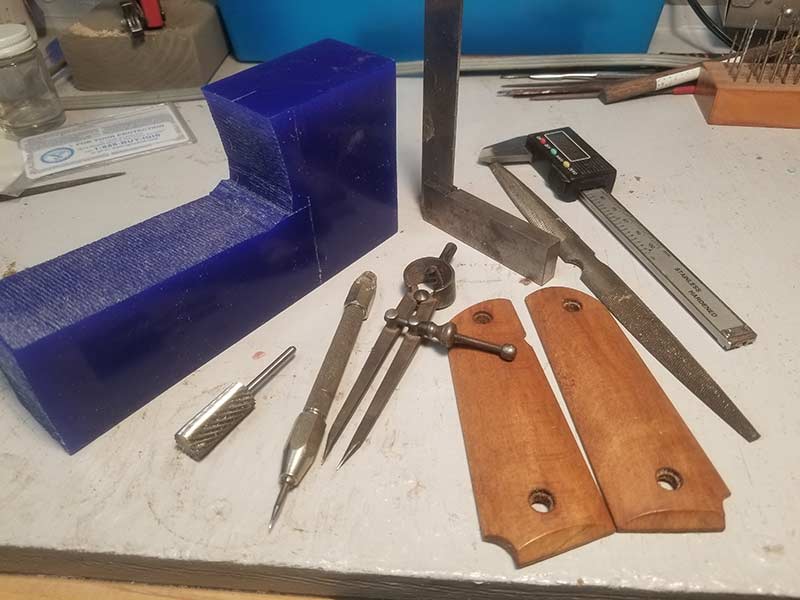
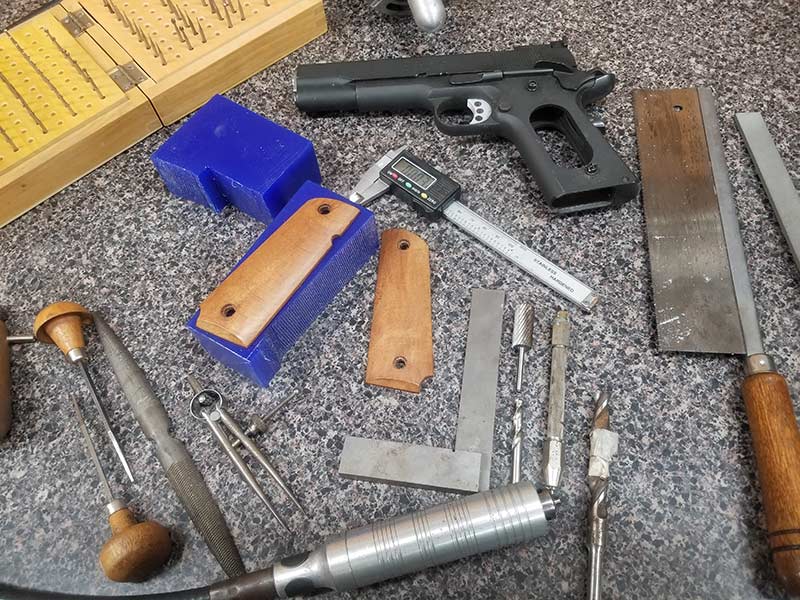
Almost the entire project can be com-pleted with a file, calipers, dividers,
a scribe, a factory set of grips and some various grits of sand paper.
A power buffer is useful, as well as a drill press.
What’s It Take?
Sure, our samples are fancy sterling silver. But almost the entire process is the same if you’re using wood, horn, synthetic or some other exotic mate-rial. And believe it or not you probably already have all the tools and skills you need to do the job. You don’t have to be a professional jeweler to hit a homer here, friend. Anyone with basic tool skills can do this.
Power tools and specialty equipment do make the job easier. But don’t shy away if all you’ve got are files, sand-paper, a drill and a good supply of elbow grease.
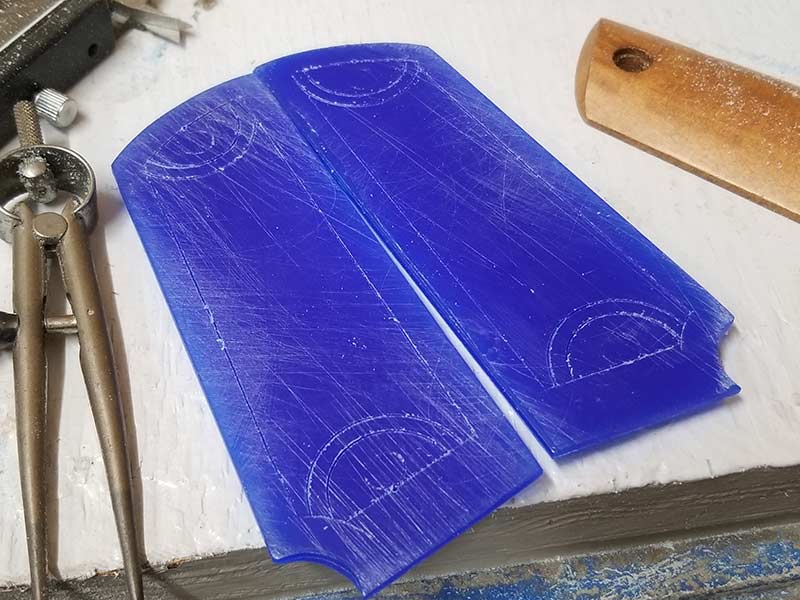
Layout lines, using dividers, help to locate grip holes and hone
the layout so it’s easier to see in the mind's eye.
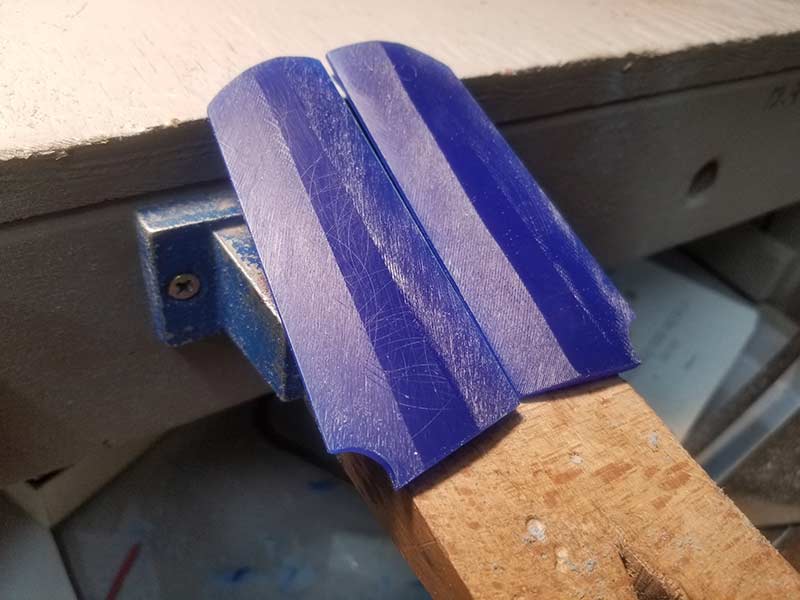
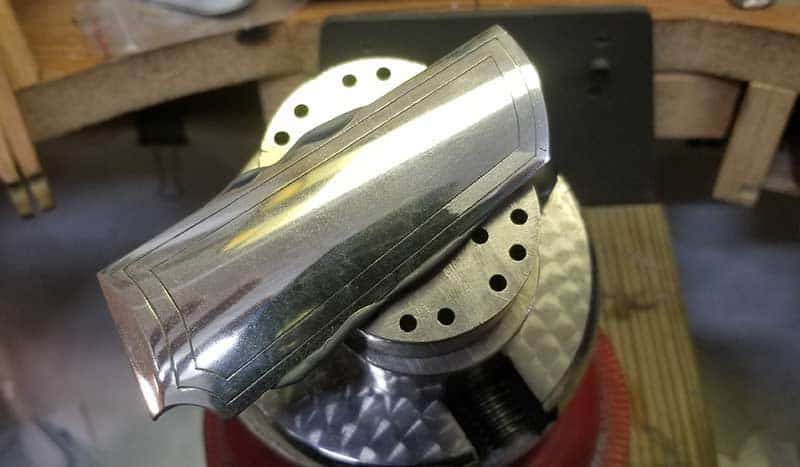
Bevels are filed-in to help establish edge thicknesses and the overall profile.
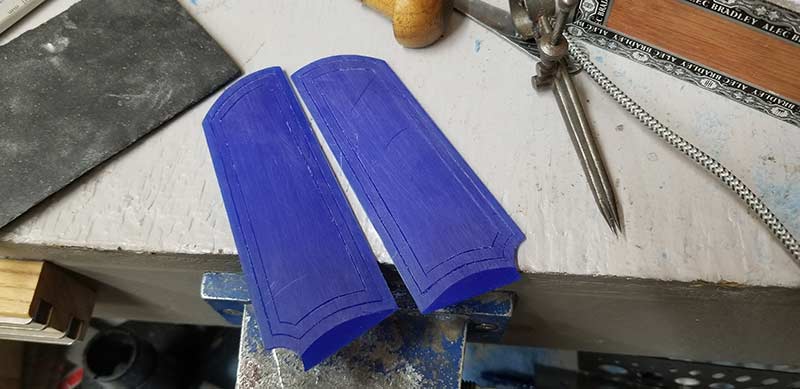
The edging decoration location is marked out.
After sanding with 400- grit, paper, lines are laid in to reference our design.
Getting Started
Choose your weapon, as it were, and source your materials. In my experience eBay is a gold mine for blanks cut to size specifically for making all sorts of grips, in just about any material you want. You won’t find ivory, but you can find some pretty darn good synthetics mirroring the old world appeal. I like to measure the factory grip to be sure whatever wood or crazy other stuff I’m ordering will fit the bill. If you measure twice, you won’t even have to cut once!
While I have made grips for other guns, 1911 grips are my favorite. They’re flat-backed, so you don’t have to worry about matching some crazy contour to ensure a tight fit. Simple is good when you’re starting out.
Since I wanted to “go big” I’ll be carving wax for a casting here. But the carving process is almost identical for wood and you can apply the same skills. In fact, most tools made for wood also work wax wonderfully. Don’t be afraid to use what you have. The best and most powerful tool for the job is your creativity.
I love working wax because it welcomes so much more imagination with so much less effort than other mediums. I can use an old wood-carving knife to whittle the wax surface and create, say, a flint-knapped texture. Or I can sand them smooth before casting so later I can polish them to a brilliant shine — or anything in between.
Another benefit to wax is it’s so cheap it’s almost free. You can pick up a block big enough for five sets of grips at www.riogrande.com somewhere in the neighborhood of $15–$20. I buy the Matt wax brand. It carves and machines really well while also remaining flexible and forgiving. So don’t be afraid of messing up.
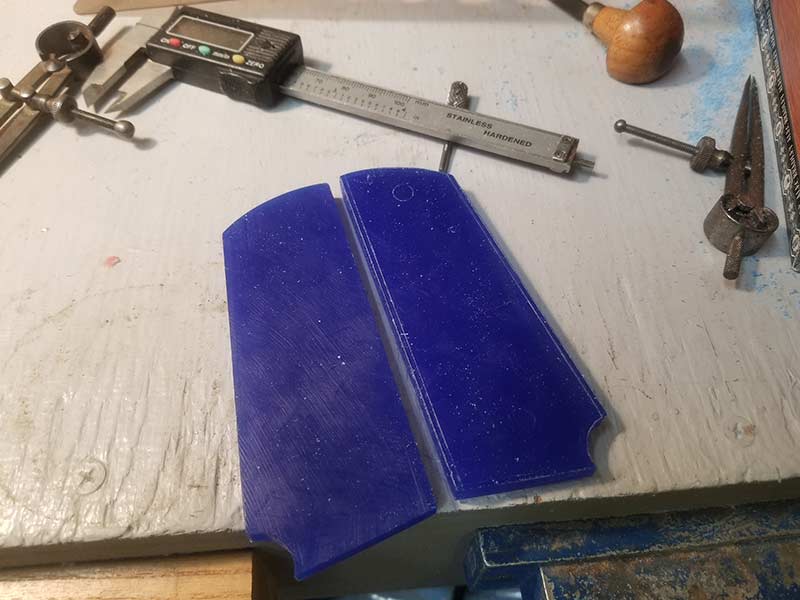
Paring down the wax to a useable size is helpful when laying
out the grip outline. The casting wax works with cutting tools easily.
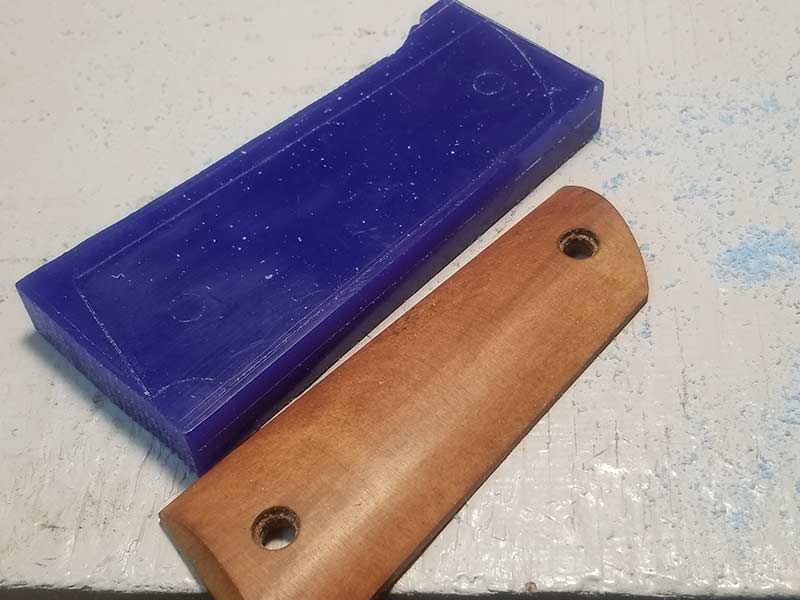
Once the single piece of wax is profiled and cut in two, the backs
are flattened and made coplanar with the front. The project is
beginning to "look" like what it's to become.
Roughing It
I’m not talking “sleeping on a rock here” but roughing out what you’re going to build. Grab your gun, grip blanks and a pencil or sharp scribe. Take the grips off the gun and orient the grip on the work piece. I find it much easier to use a factory or sample grip as a starting point and build to suit from there.
I lop off a big hunk of wax to become our model for casting. Since our grips mirror each other I only need one piece. While I’m at it I also cut it twice as thick, plus a smidge, as one finished grip. More on this in a second.
I lay the sample on the wax and trace the outline into the work with a sharp scribe. It’s at this point modifications can be made. I like the grip edge to land just shy of the corner of the flats on the pistol, so I choose to make mine wider, but do what suits you. When you’re satisfied with your outline it’s time to remove all the material “that isn’t the grip.” Like the old timer said, when asked how he knows how to carve a cigar-store Indian statue: “Easy, son, just cut off everything that doesn’t look like an Indian.”
A small hand saw makes quick work of the big chunks, and a coarse file brings it to final size. I check for square often to ensure everything is even.
Remember how we left it extra thick? Using dividers or calipers I scribe a center line on the edges, run my saw down the line and presto — two mirroring grip panels. Easy peasy.

Dividers — using the factory grips as reference — are used to scribe
a reference line for thickness on the edges of the grip panels.
Lose Some Weight
If I were working wood or any-thing that would be my final material I’d pause on shaping to drill holes for bushings and screws. Again, the sample grip is mighty handy for locating the holes to be drilled. It’s always easier to drill into a flat surface as opposed to a curved one.
One unfortunate result of the casting process is shrinkage. When the metal is poured into the mold it has to be liquid, obviously. But as it cools and solidifies it contracts, resulting in the finished casting being ever so slightly smaller than the wax model.
The first time I made silver grips I drilled holes before casting — I’d for-gotten about shrinkage. This resulted in frustration and wallering out the holes to accept the bushings. But my daddy didn’t raise no dummy! I’m not going to make the mistake again, and neither should you.
After filing, sanding or milling the back of the grip flat and parallel with the opposing surface, it’s time to keep shaping. We have a lot of extra material and this wax won’t shape itself. I scribe along both long sides to denote how thick I want the edges of the grips to be, then using a wax file at a shallow angle (any coarse file will work) I file a bevel about a third of the way into the surface of the wax model. Wash, rinse, repeat for the other side.
The result is a faceted surface. The middle surface is still flat and parallel to the back while the adjoining surfaces slant downward toward the edges, terminating at the thickness line we established earlier. Now all that’s left to do is file off the corners of the facets and blend everything together, making the final rounded profile. This is really where it starts to take shape. Wax — like wood — responds well to scraping. I have an old wood-carving knife I use to scrape the heavy file marks out of the surface. I take it one optional step further and sand the wax with 400-grit paper. This isn’t necessary at this point but remember, any marks in the wax will be in the casting so a smoother finish now means less work later.
While Garrett’s final result is great, keep in mind you might use
different stones, symbols, different materials, different etchings
and designs — the sky is the limit!

These “flint-knapped” textured silver grips were cast and shaped
by Garrett using the techniques described in the article. A nice
look and surprisingly “grippy” to use!
Getting Creative
Almost anything a person can imagine can be done in wax. There are some limitations here but for the most part any carving, engraving or texturing will work. As a jeweler, I happened to have some synthetic rubies lying around from my old jewelry store days, so let’s incorporate those. A border-texture would be a nice contrast to a high polish as well.
I use dividers to outline a border, then using a round graver I deepen the lines. If we were to cast these as they are they would be extremely heavy, and in silver, heavy equals expensive. I used a 5mm ball burr to relieve the back of the grips making sure to leave the perimeter flat so it will lay flat when on the pistol. After the ball burr I move to a rounded scraper made from an old spoon handle. Remember, no fancy tools required!
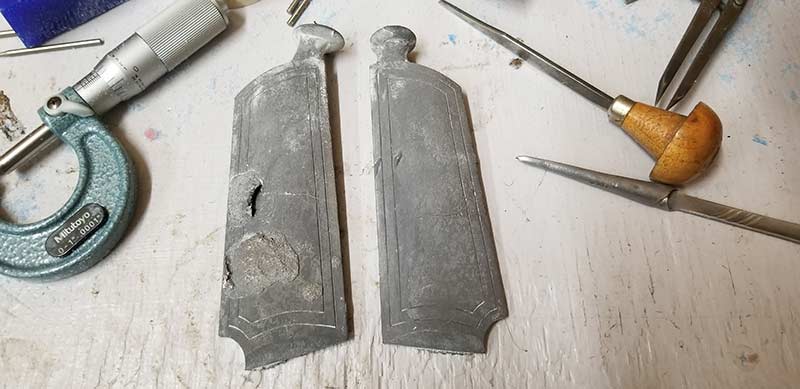
Rough castings are usually covered in oxidation and extra material
to be polished off, as well as buttons to be removed. Looks scary
but it’s not, honest!
Casting
Casting can be quite a bear and a bit of a crap shoot at times. If you’re attempting this at home I would recommend finding a casting house or talking to a local jeweler who has equipment and experience in casting precious metals. Casting equipment can be very ex-pensive and getting good results takes lots of time, patience, troubleshooting and dialing in of all variables involved.
Trust me when I say you’ll want to farm out this part. But some simple advice from the caster will help you to craft the wax mold so you’re still doing the creative part. If that’s the road you choose to take you’ll still have plenty of work ahead.
I’m lucky enough to have access to good casting equipment, and just enough experience to get by. But enough about casting. Let’s wrap this sucker up.
Getting close here. Now there’s hand work,
holes to be drilled and stones to set
After removing the buttons and sanding to
2,000 grit, the first buffing is complete.
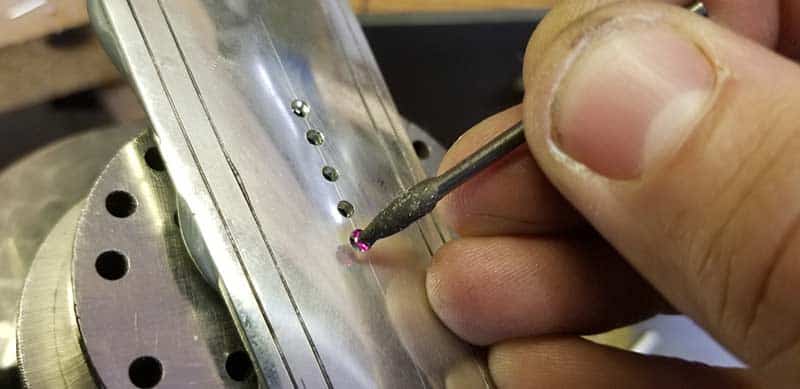
After locating the mounting holes for the synthetic rubies,
Garrett uses “jeweler” tricks and tools to mount the stones.

After buffing, the residue needs cleaning. Acetone or even
rubbing alcohol and a toothbrush works great to get the grit out.
Making It Shiny
Casting leaves a bulbous tumor of metal called a button sticking off the piece. It’s ugly, but useful. Holding grips so slim for finishing can cause tremendous frustration and hand cramps. So I clamp the button in a sturdy bench vise to hold the work in place as I file off any little extra bits and sand up to 2,000 grit. Using a hacksaw, I get rid of the button and can file and polish the real estate it used to occupy.
I like to do what I call a preliminary polish on the buffer at this stage. This will show any scratches or pits
still needing to be sanded out. In drilling and stone-setting the metal will pick up light scratches anyway. So I don’t get too attached to my surface finish right now.
After careful measurements of my 1911 I can select drills and locate where holes need to be in the grips, and it’s off to the drill press we go. Drilling silver is a snap, and it feels much like drilling aluminum. After drilling, some adjustments might be necessary to get the fit just right. I tend to reach for a round file for this job. Just remember to go slow and double check your measurements. It’s easy to take material off and essentially impossible to put it back on.
We can finally try out the grips on the pistol — and my, oh my, are they pretty! But don’t get too tied-up admiring your work as there’s more to do.
I examine the surface and sand out any scratches before going back to the buffer for the second round of polishing. It’s at this stage I have to repress my inner giddy schoolgirl. I just get so excited to see them finished!
After applying some texture and flush-setting the stones, it’s finally time for the very last polish. I work up through heavy, medium and fine polishing compounds on progressively finer buffing wheels. After a bath in the ultrasonic cleaner and several blasts from the steam cleaner, the grips are complete! I drop them on my Range Officer and couldn’t be happier with the result.

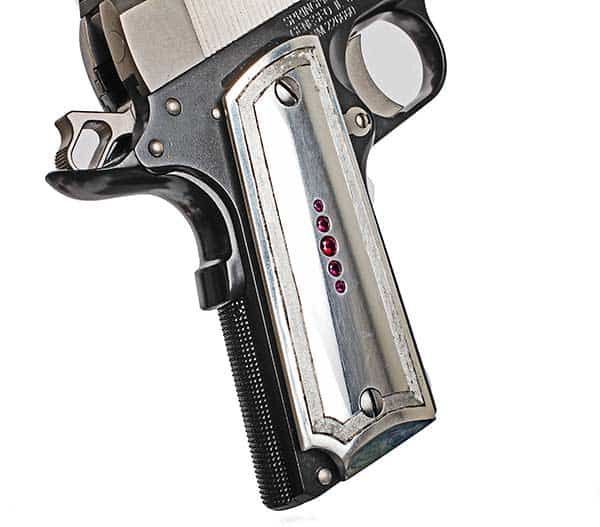
The stones are set, the final buffing applied and the
edging texture is done. The grips are now complete!
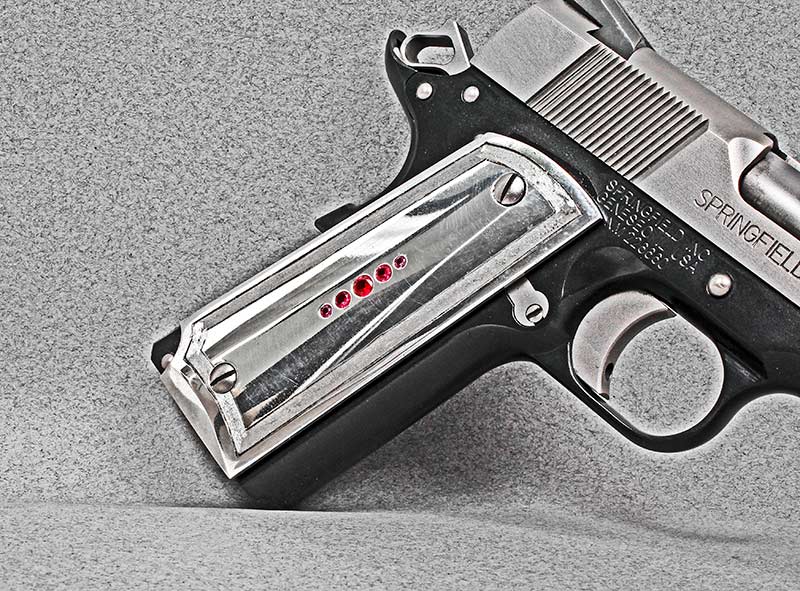
The “almost” final result is a set of silver grips — cast, shaped, fitted
and polished by Garrett. Believe it or not, this is well within the DIY
skills of most people and the same skill set can be used to make grips
from wood or other material.
The Afterglow!
The new grips sure dress up the old gun, but I felt they might be better suited on a gun with a richer finish. Until one can be found I’ll sit back admiring what I’ve created, reflecting on the fun I had in the process. I hope you can see how this same basic set of operations also work to create grips from other materials.
Every time I make a new set of grips I learn something in the process. This makes the next set even better. It’s not an overly difficult task, and you can knock out a set of wood grips on a
Saturday afternoon. If you have a power sander, it’s even easier. It’s a relaxed way to have fun, be creative and make all your range buddies jealous.
“Huh? You made those? No way!”
Yes way.
For more info:
www.riogrande.com