Restoring a Classic
Shoulder Holster
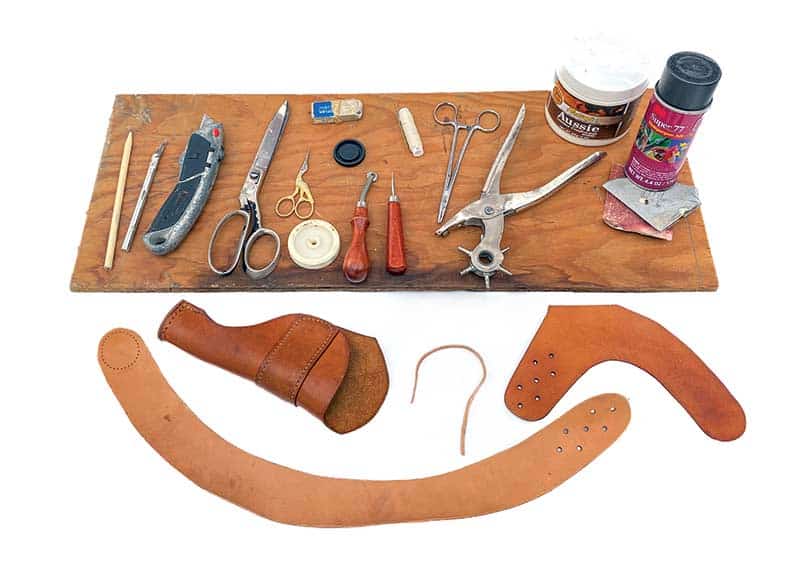
The basic tools for the project and the replacement leather already cut. The leather tools are inexpensive and in stock at your local Hobby Lobby store.
Vintage Holster Use
For years, I toyed with the idea of making one of the old-style revolver holsters, salvaging the spring and harness hardware from a poor-condition bargain box find. Old leather can look nice but often becomes brittle and unusable with age because of poor storage or imperfect tanning when new. Using any vintage holster is a sure way to destroy it. Your sweat can turn dry doomed leather black and brittle with one wearing.
If the leather’s surface cracks when the material is bent back on itself, it has dried out and will not stand any use. If the leather is pliable but seems to be turning to powder on the surface, it is seriously weakened by red rot and is also unusable. I consider holsters over 50 years old to be collector’s items or sometimes pattern pieces if they are in really poor shape.
My DIY Shoulder Holster
I credit St. Crispin, patron saint of leatherworkers, with getting my first DIY vintage shoulder holster rebuild project going. Digging in the bargain holster box, I found a miraculously well-preserved Brauer Brothers Manufacturing Company shoulder holster pocket weirdly denuded of straps. Here was the nucleus of my project with the hard work already done. All I need do was make and attach the missing straps and harness.
The pocket delivered to me by saintly intercession was an archetypical style from a famous maker. Based in St. Louis, Mo., Brauer Brothers Manufacturing Company got into the holster business at the tail end of the Old West and expanded quickly. They were manufacturers of leather goods, shoes in their case, and already had the skills and machinery to manage the mass production of a complex leather product line with scores of different patterns. In the early 20th century, they were well known for above-average quality holsters marketed under the “BRAUER BROS. MFG. CO.” and “Moose Sporting Goods” brand names. Their reasonably priced holsters were very popular and equaled the quality of competing mass-produced holsters made by Bucheimer and Hunter.
Brauer Brothers Manufacturing Company made leather holsters for a century for just about everything up to and including GLOCKs. They also had notable law enforcement sales and military contracts. I guessed my bargain box find dated from the 1940s or ’50s, but its classic design goes back at least to the 1930s and remained popular through the whole era of the double-action revolver’s supremacy as a self-defense arm.
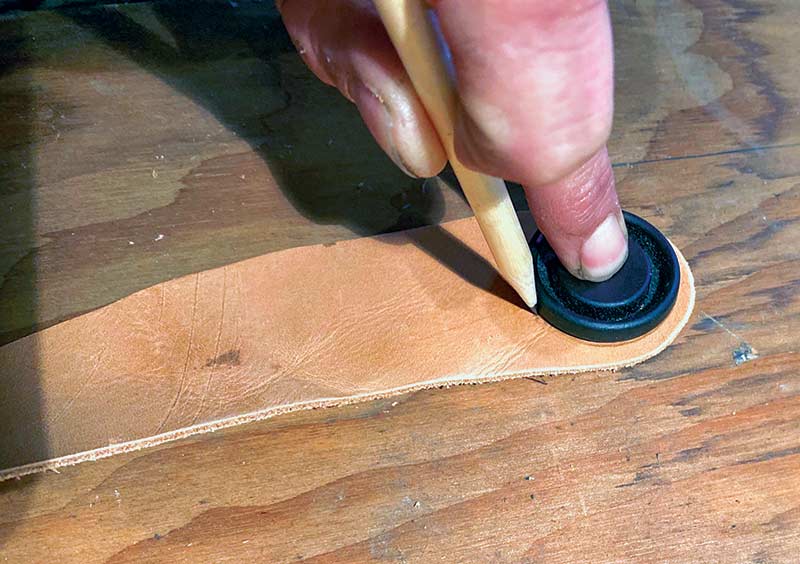
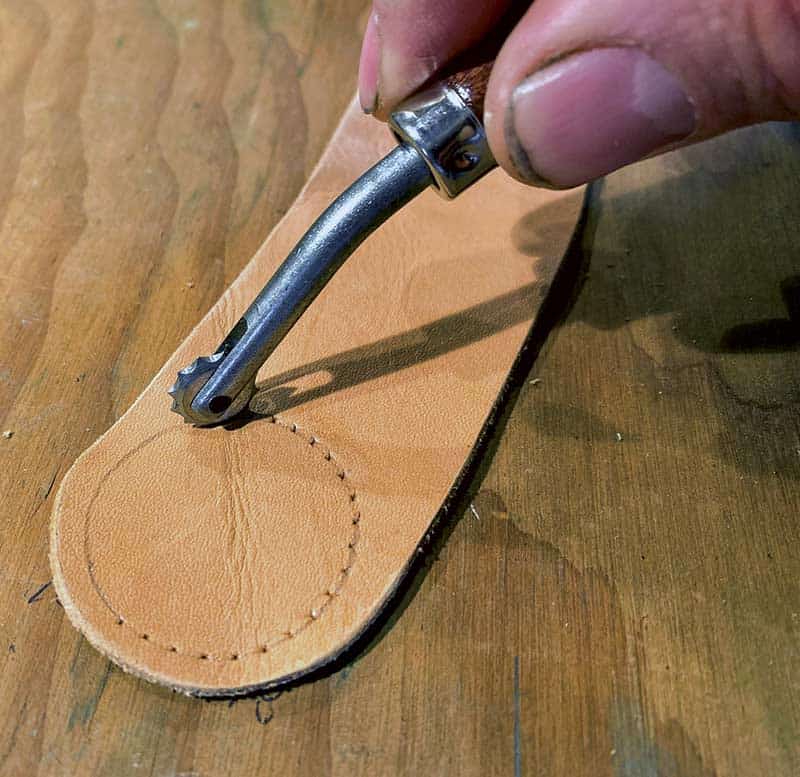
Patterns are all around you! This cap from an old 35mm film container was
the perfect size for the ring of stitching that joins the shoulder strap to the holster.
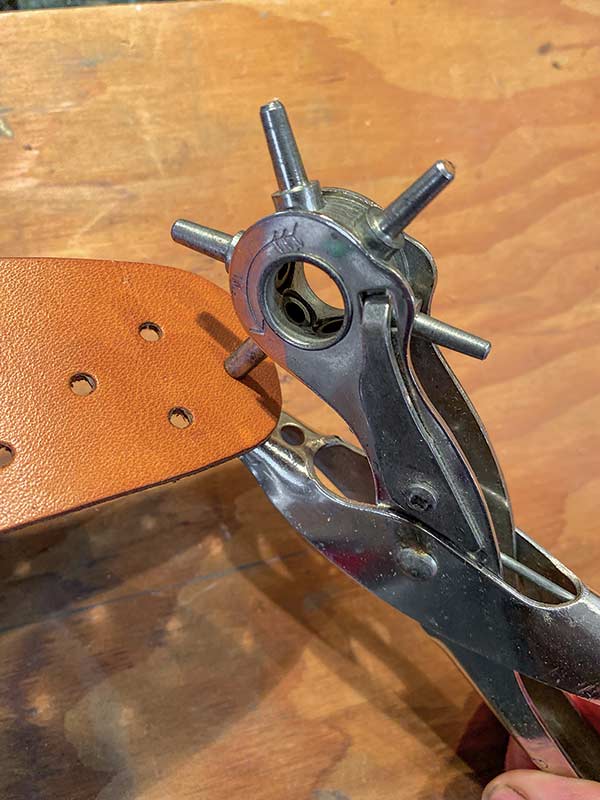
This handy hole punch tool ($15 at Hobby Lobby) will
handle just about all of your small hole punching needs.
Restoration Planning
The first step was to make a pattern for the missing leather portion cut away from the top of the holster, which included the shoulder strap connecting stubs. Having another complete holster in my collection, I traced the shape of the missing “U” shaped portion onto a piece of paper and then oriented the partial holster on top of the tracing until it matched the complete holster. I marked the overlap line and extended the pattern below it to include enough leather to make sewing it on the pocket convenient. Then I wrote on the pattern face “Flesh Side Up,” so I wouldn’t lay the pattern down the wrong way on the new leather and cut the piece out backward. Don’t laugh, it’s easy to make this mistake.
With the pattern drawn and cut out, I laid it on the backside of the holster pocket and, with a sharp pencil, marked the bottom edge of the pattern onto the pocket back so I could index the new piece of leather in exactly the right spot for correct sewing. Pencil marks need to be dark enough to see. Unless it’s wet, supple leather tends, over time, to raise the depressions your pencil presses into it, causing them to disappear. This is especially true of marks made on the rough (flesh) side.
A smooth plastic pulley is handy for rounding and burnishing
the edges of newly cut leather for a finished look.
Stitching wheels come in various stitch-per-inch sizes. You can buy a tool
with interchangeable wheels for $10, or just a fixed wheel like this one for about $6.
Measure Twice …
The pocket appeared to be full-grain leather of 8- to 9-oz. weight measuring 0.132″ thick. Leather thickness is commonly expressed in ounces, with each ounce equally 1/64″ (0.0156″) of thickness. I made my new strap base from a scrap of matching vegetable-tanned skirting leather left over from another project. If you had to buy that piece of leather, it seems a good online price for a 6″x10″ piece is about $11 delivered. Skirting leather is the cut over the shoulders of the animal and is considered the best material for holsters.
You get a better cut on leather when you work from the skin side, and it’s also much easier to mark on the skin side. I spread out the new leather skin side up on a scrap of plywood and made sure my paper pattern was laid on it with my “Flesh Side Up” marking facing down. Once marked, the leather was easily cut with a sharp utility knife. All the lacing holes were located by placing the complete original holster over the replacement piece and marking the center of the holes with a pencil point so they could be punched with a standard leather punching tool.
The curved leather strap that goes over the top of the shoulder was patterned directly on a piece of new leather hide by laying the original on top of it and marking the outline with a pencil. Take care when you lay out the original over the new leather that they both have the same side facing up, or the new part will be the reverse of what you want.
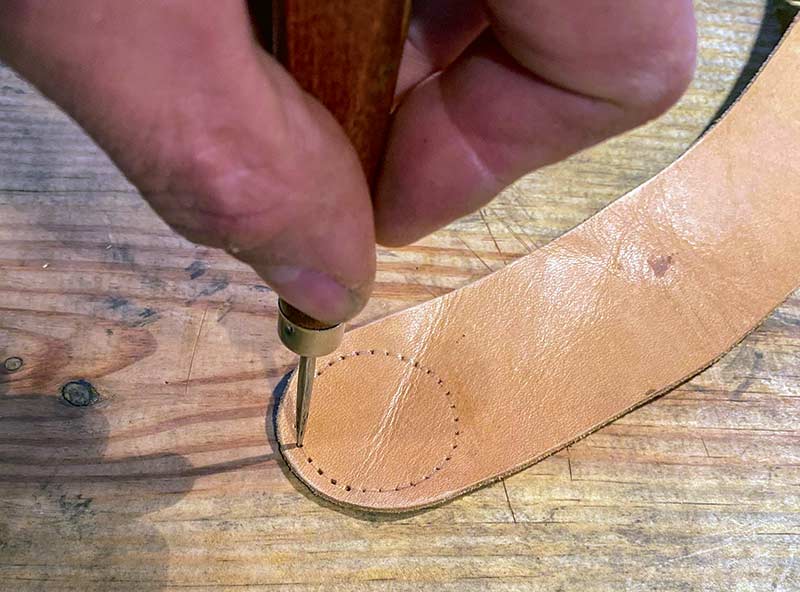
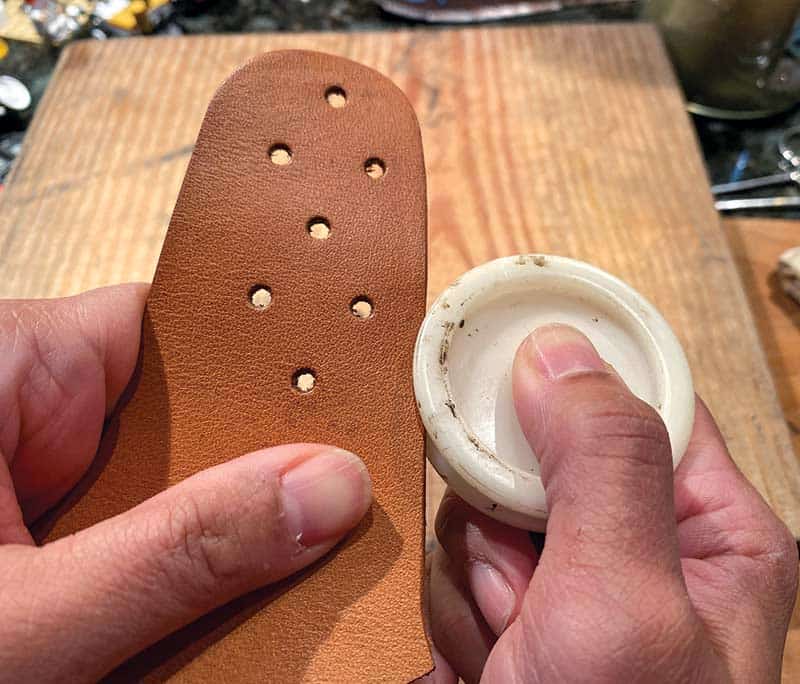
Poking the holes through the shoulder strap with a hand awl.
Shoulder Strap
The complete original holster in my collection had a shoulder strap made of supple, sueded cowhide sanded on both sides and slightly thinner than the full-grain leather used in the holster body. It measured 0.10″ thick, which translates to a 7-oz. weight. Because this strap is curved, I needed a piece of suede at least 6.5″ x 21″. Online searching yielded only pieces that were too small or half hides that were absurdly more suede than I could ever find a use for.
I believe suede was originally chosen because it is very soft and supple, which allows it to conform comfortably to the body. In addition, the suede’s velvety surface gives it a little better grip on the shoulder to resist sliding off under movement and the weight of the gun. When regular leather hide is used for this shoulder strap, the flesh side is on the inside (bottom) for this reason. Frustrated in my search for matching suede, I opted to use some equally supple but thinner, 3- to 4-oz. full-grain leather. A 4″ barrel .38 Special revolver only weighs about 2 lbs., so I wasn’t worried the leather would stretch.
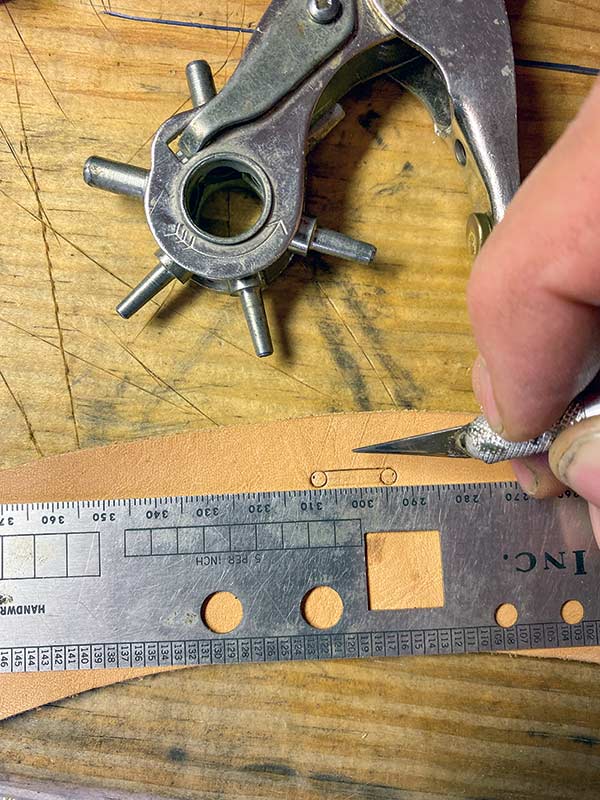
To cut the slots in the shoulder strap for the harness strap, Frank first
located and marked their ends with the hole punch. Then he made connecting
cuts between them for a very neat, even, slot. Slots with round ends are less
likely to tear out than slots with squared ends.
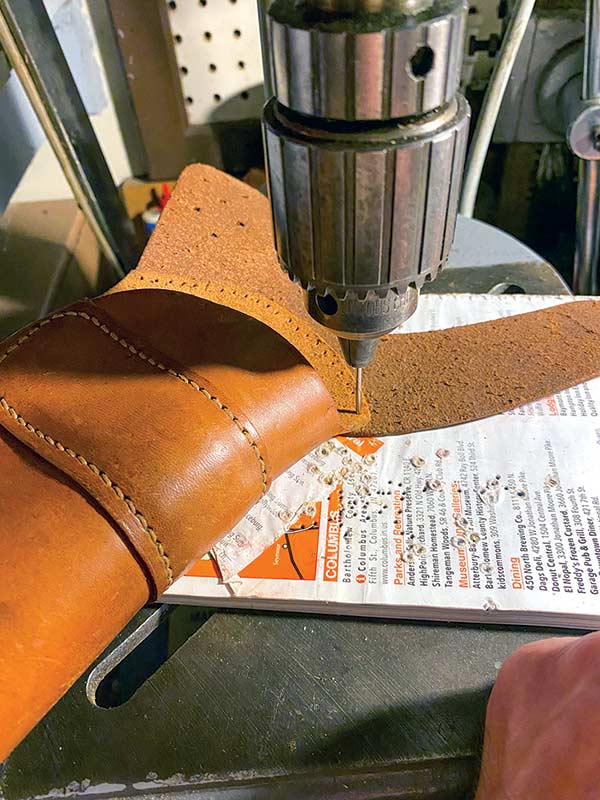
With the holster pocket glued to the new leather strap base, they
stayed in alignment while Frank used a drill press and a big needle
to poke nice straight holes through both pieces of leather at once.
Poking Holes
Once both replacement leather parts were finished, I was ready to locate and sew them onto the holster pocket. Saddle stitching with waxed thread through thick layers of leather is very hard on the fingers if you don’t pre-poke the holes. This can be done with an awl or poked and stitched at the same time with a special tool aptly named a stitching awl. I usually prefer to mark my stitch lines with a pencil and then roll a stitching wheel over the lines to mark the holes, and then poke all the holes with a heavy needle installed in the chuck of my small bench drill press. The advantage of this method is the holes are round, not oblong like they are when you use an awl; they are straighter because the needle doesn’t wander off course much on its way through the leather; and the drill press has so much leverage, making the holes is no more difficult than lining the leather up correctly.
To keep the parts correctly oriented with each other during the sometimes lengthy hole-poking operation, I use a spray adhesive to join the parts. If I’m concerned the parts will shift before I poke all the holes and cause misalignment between the holes in the top and bottom pieces, I’ll first poke and stitch a few holes on opposite ends of the pieces to anchor them together before I poke the rest of the holes. I did this for the circle of stitches that connect the shoulder strap to one side of the “U” sewn to the holster body.
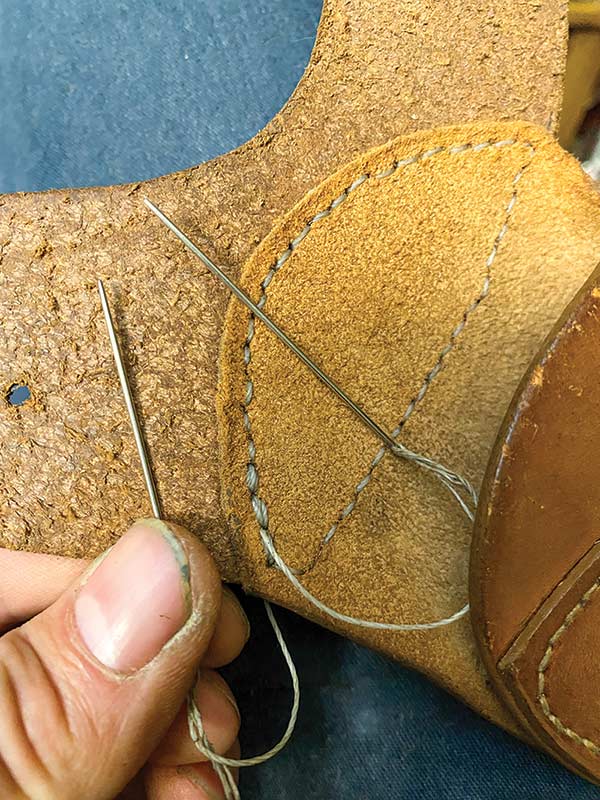
Saddle stitching (lock stitching) is the normal way to hand sew leather.
The Harness
I noticed my original Brauer Brothers holsters all used basically the same harness system. It was a 3/4″x48″, white, non-elastic strap adjusted with the small, thin, nickel-plated, stamped steel, tri-bar friction buckle commonly used on the back of vests to adjust their fit around the waist. The ends of the harness strap were folded over and secured to the tri-bar buckle on one end, and the leather shoulder strap on the other, with just a nickel-plated dome head split rivet pressed through all three layers of strap before having its prongs bent in. It doesn’t seem like much, but it was clearly durable enough.
The older holsters had a cotton harness strap. The newer ones used a synthetic strap that probably resisted deterioration from sweat and friction better. This minimalist harness may not have been the most comfortable, but its thin straps and hardware don’t protrude noticeably through the back of a suit jacket. The white harness strap anchors the leather shoulder strap supporting the gun at two points. From the higher anchor point, just behind the peak of the left shoulder, it runs across the back, around the opposite shoulder, comes out under the armpit, and goes back to the lower anchor point on the leather shoulder strap behind the left shoulder blade.
To my amazement, I could not find any 3/4″ wide cotton or synthetic strapping or 3/4″ tri-bar buckles at my local brick-and-mortar stores. They are still available, but I had to go online for them. An eBay seller (icraftforless) had the original style, 3/4″ stamped steel, nickel-plated, vest buckle/adjustable suspender slides with the teeth at $10 for 10 buckles delivered. Another eBay seller (craftworlddepotinc) had the old style 3/4″ cotton web strapping at five yards for $8 delivered. For modern harness, I found at StrapWorks.com 3/4″ flat stamped steel, nickel-plated, three-bar, slide buckles for 30 cents each, 3/4″ Mil-Spec 17337 black nylon web strapping for 38 cents per foot, and 3/4″ black, white and tan elastic for 54 cents a foot.
By the way, the flatter and thinner the buckle, the flatter the strap will lay across the back. If a non-elastic strap is used, the original style vest buckle (or perhaps a stamped, flat, steel, tri-bar buckle) is the best choice to minimize printing of the strap through the back of your jacket. If an elastic strap is used, a better choice of adjustable buckle would be the sheet metal sliding bar type because of the serrations on the bar and its mechanical locking action that increases when the strap is pulled.
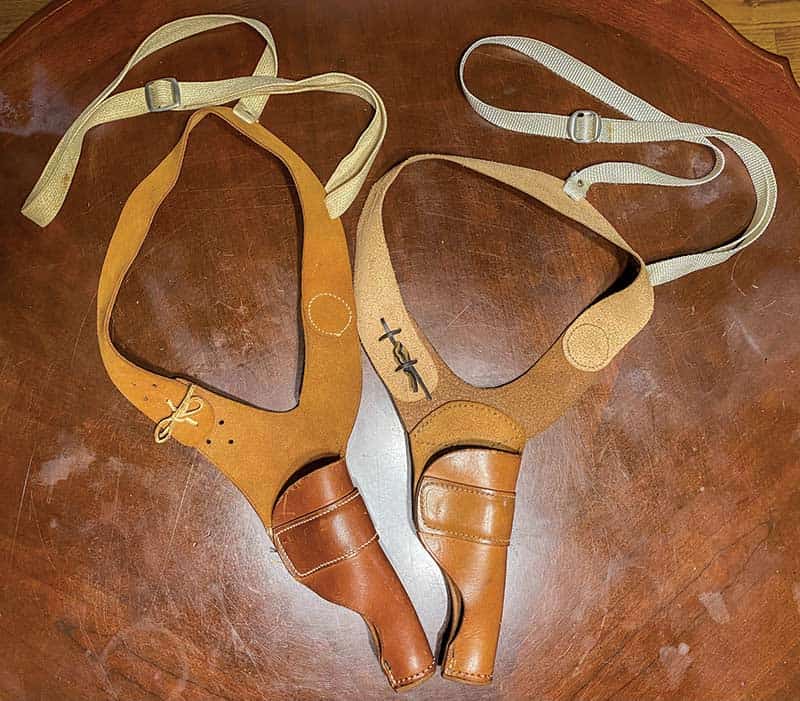
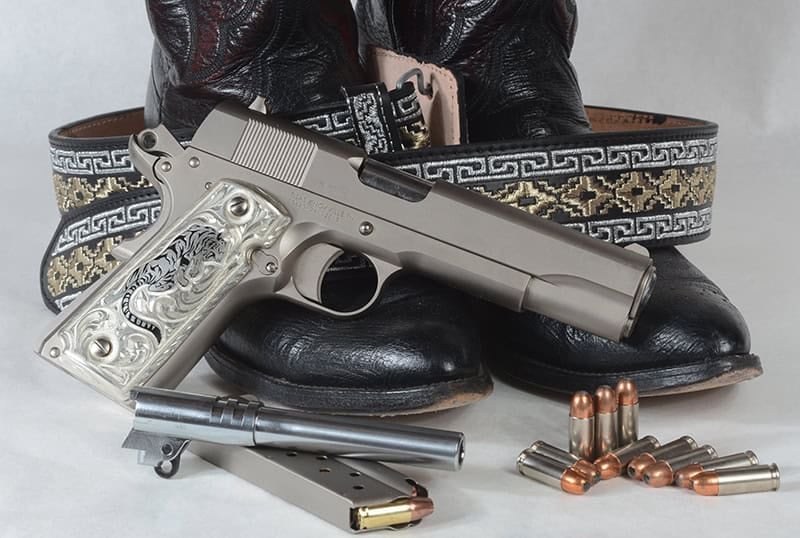
A complete, original Brauer Bros. Mfg. Co. holster on the left and Frank’s
rebuilt holster on the right. These unlined models were probably made in
the 1940s or 1950s and had cotton harness straps.
A Good Investment
Because I had a parts holster with a good harness strap on it, I opted to install it on my project. If I hadn’t, the cost of the new straps and hardware wouldn’t have exceeded $20 with shipping. I already had the leather working tools and plenty of leftover leather from previous projects to work with, so this repair cost me only my time and not much of that. This was half a Saturday’s work, excluding the time wasted looking for the harness strapping and hardware in town. The big takeaway from this story is you shouldn’t pass over a shoulder holster you could use just because it’s missing the harness straps because those are the cheapest and easiest parts to replace!
While my holster pocket needed more than just the harness, I am really glad I bought it. As restored, it’s now my favorite for carrying my 4″-barrel Colt and S&W revolvers. This type of vertical holster is very stable on the body. The harness strap across the back keeps the holster from falling forward when you bend over, even if the toe of the holster isn’t strapped to your belt. The horizontally oriented spring also grips the cylinder firmly, keeping the gun from falling out of the holster when you bend over.
It begs the question, why on Earth did they stop making these?
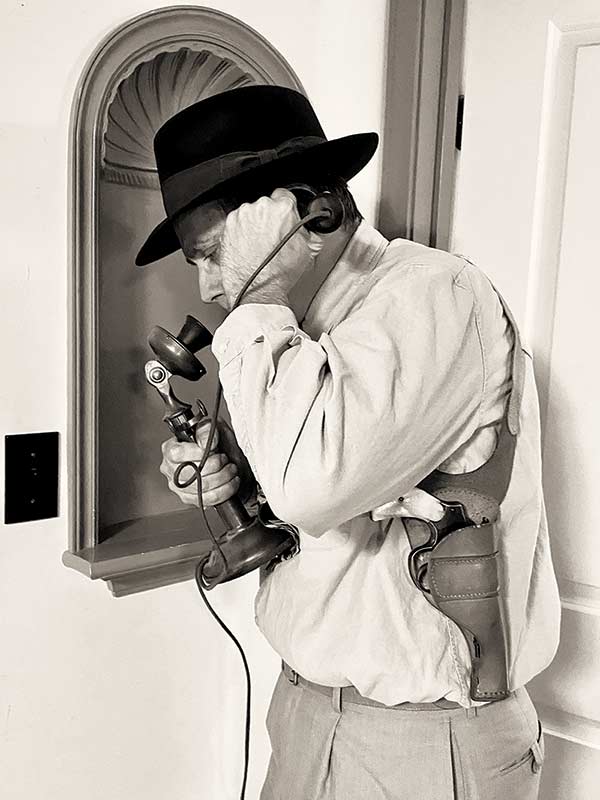
“Boss? It’s Frankie. We checked all the gin mills and dime-a-dance halls
and couldn’t find that deadbeat Irishman McHale. I persuaded the night
clerk at the flophouse he sleeps in to let us in his room. If he shows up,
we’ll be waiting for him.”
If you like old guns, you probably also like old holsters. I’ve collected a nice assortment of vintage leather over the years from digging through the box of used holsters you see at just about every gun show. You know the box I’m talking about. Written in marker on the outside, it will say something like, “Any holster in this box $15.”
Interested as I am in historic guns, that box has also offered up a fascinating array of holsters from famous (and not so famous) manufacturers now gone and for guns long obsolete. Personally, I lament the decline of the spring retention vertical shoulder holster for concealed carry. These fast-drawing but complex-to-build holsters have gone out of style and hardly any makers still offer one. Only Triple K and Bianchi come to mind. The currently available holsters also use a long, top-to-bottom style spring retainer rather than the front-to-back style spring found on the older designs. The current style is great for automatics, but I think the old front-to-back springs worked better with revolvers since they gripped the gun firmly around the cylinder making it less likely to fall from the holster if you bend over.