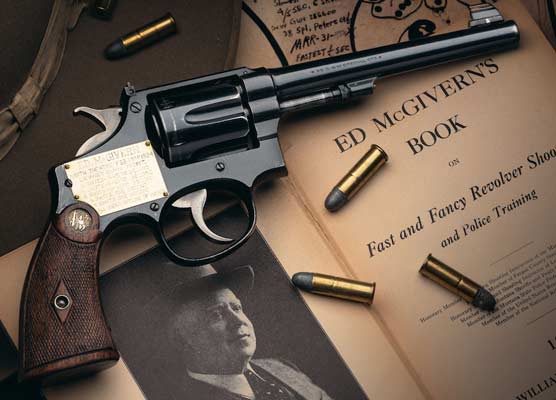
Revolver Resurrection
Can This S&W Hand Ejector Be Saved?
Can this 100-year-old S&W Hand Ejector be saved from the
disfiguring rust that destroyed its collector value? Yes, it can.
Many a time, I’ve found what looked to be a beautiful vintage gun at a nice price, asked permission to pick it up and had my excitement abate when closer examination showed its finish spoiled by heavy pitting on the metal. Those guns are just shooters and sources for spare parts to serious collectors, but sometimes it’s worthwhile to restore them. Professionals like Doug Turnbull have made a reputation and a lot of money doing such work.
You might be surprised what you can accomplish in your garage with patience, a few good files, clamps, a vise, some scraps of wood and aluminum for padding the jaws and to use as sanding blocks, sheets of 180-, 220-, 320- and 400-grit quality sandpaper, a punch set, cold blue and a gunsmith screwdriver set.

As if 0.010"-deep rust wasn’t damage enough, the dreaded Dremel
tool was clearly applied at some point to grind tortured waves across
the once level top strap. Oh, the humanity!

The pitting was heaviest on the left side of the top strap,
rear sight channel and the side and top of the frame above the crane.
Slow Death & Malpractice
This century-old S&W Hand Ejector was a great-looking shooter thanks to a vintage rust blue re-blue that left it with a slightly matte finish instead of the usual factory high polish. I suspect the matte finish resulted from not carding off the rust in a timely manner, but perhaps it is the desired result. It didn’t detract from the gun’s looks. Then, careless storage caused deep rust pitting along the frame’s top strap and left side above the crane.
This was bad enough, but someone compounded the damage with an injudicious clean-up attempt using a Dremel rotary tool-type sander! It’s very easy to do more harm than good on your gun with any type of power sander. If guns could act on their own, I’m confident they would wage total war on Dremel-style rotary tools, which they rightly view as an existential threat.

If you aren’t familiar enough to put it back together blindfolded,
take a picture of it with your cell phone before you take it apart.
Cosmetic or Structural?
Some of the pitting on this gun was deep, up to 0.010″, but it didn’t threaten the gun’s strength and safety in any significant way. You will find people on the internet who advise rust pitting needs to be removed entirely and welded, or it will gradually weaken the metal to the point of failure. Don’t get worked up about that nonsense. In the most extreme cases, it’s true, but any gun that far gone would have to be pretty valuable to be worth the trouble to weld up. If I lived as long as Methuselah, the cosmetic pitting on my guns wouldn’t present any problems that weren’t purely visual.
In addition, welding on guns presents problems of its own. Metallurgy and heat-treatment issues can affect strength, safety and the final metal finish. Welding has its place, but it is generally impractical and inadvisable for cosmetic repairs. Because it’s really easy for an inexperienced welder to destroy a firearm completely, take the time to become a great welder before you ever attempt it

Minimize the odds of messing something else up by removing the parts
that will be in the way or subject to damage. The Real Avid gunsmith
screwdriver set has hollow-ground bits to fit each screw slot and apply
maximum torque without destroying the screw heads.
Use What You Have
As this S&W restoration demonstrates, you can accomplish much with the careful removal and re-sculpting of the metal you still have to work with. Evaluate each rusty gun on its unique cosmetic flaws and decide what can realistically be accomplished, how much effort it will require and if it is worth the time. This revolver frame had deep pitting on the relatively easy-to-file flats of the top strap, but it also had quite a bit in the complex curves where the barrel mounted. To file out the pitting there, I needed to remove metal all around this area and reshape it to something that resembled the original profile enough no obvious asymmetry would catch the eye.
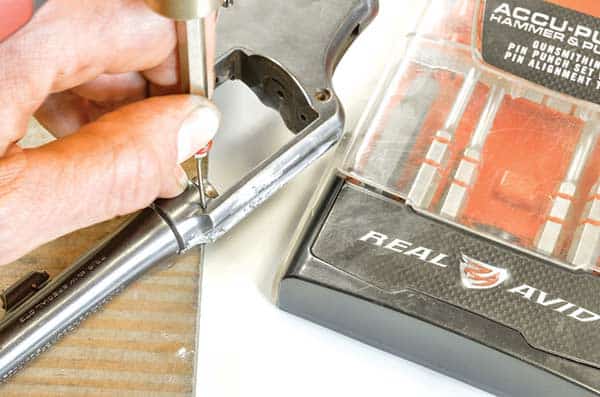
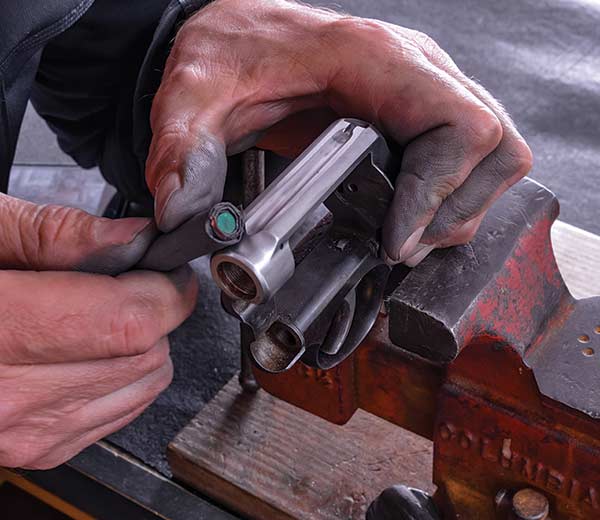
Real Avid’s gunsmith punch set was handy to remove the
barrel-retaining pin on this old S&W. Frank needed to remove
the barrel as it was in the way and at grave risk for damage by
a file overstroke if left in place.
Take care when clamping to protect the gun from getting marred in
the vise jaws and don’t overtighten. It is surprisingly easy to crush
these old, tapered barrels.
Fooling the Eye
To minimize the asymmetry, after I removed the metal defaced by the rust pitting, I also removed a comparable amount of the unpitted metal on the other side. Had I not done this, I could never have balanced the right and left sides of the top strap flanking the rear-sight channel. A greater concern was removing the pitting on the left side of the top strap because this surface has to blend in flat with the left side of the frame above and behind the recoil shield. I was careful to slope my file cuts to minimize the metal removed above the recoil shield. I had more latitude to remove metal where the top strap connected to the barrel socket on the front of the frame by the pinhole because it’s the junction of a flat surface with a curved one. It’s easier to trick the eye at a complex juncture of curves and angles.

You must secure the work so it can’t move. The only thing that should
be moving is the file against the metal it’s cutting away. Here the grip is
protected by blocks of scrap aluminum. The vise can be turned as needed.
Sight-Channel Sculpture
The deep pitting on the left side of the rear-sight channel also presented a small challenge. I didn’t want to carve out the whole sight channel and extra 0.020″ (0.010″ on each side), so I cheated my file toward the pitted side. I cut the left side wall of the rear sight channel a little bit more vertical over the deep pitting for about an inch, tapering back to the normal half round on the end where the top strap curves down to join the front of the frame over the barrel.
If this sounds a bit like sculpture, it is. Differences of 0.010″ aren’t easy to spot by eye, and those 0.005″ or less are indiscernible for most people without a measuring tool. A successful restoration blends in the repairs, so they aren’t noticeable. This skill doesn’t come easily to everyone. My father was born with it, but it took me time and practice. Now we’ve discussed the artsy-fartsy side of cosmetic restoration, let’s look at the practical side of things.
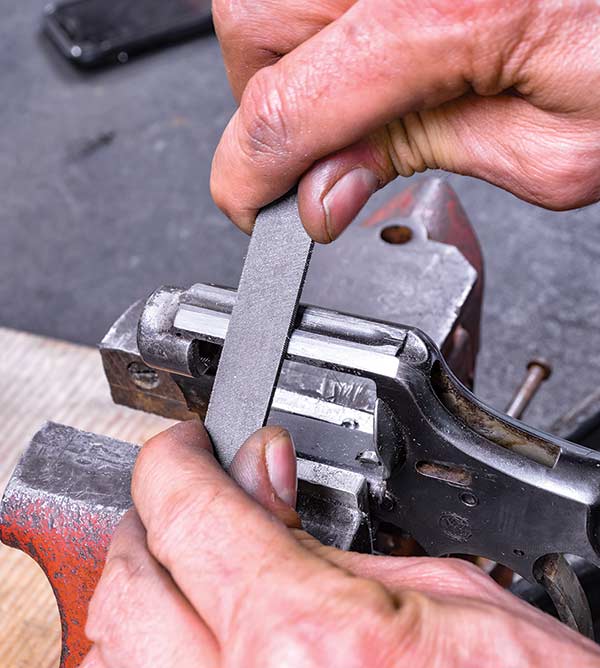
Almost perfect draw-filing technique. The file should be a right
angle to the top strap when filing. The same file teeth are drawn all
along the surface of the metal, creating a very fine cut.

Shaped Swiss files were helpful to cut the pitting
off the surface of the contours.
Haste Makes Waste
For the repair to succeed, you must not *%@# it up! Remember the Dremel tool disaster. I have messed up a great many things in my life, and more often than not, it was because I was in a hurry. Don’t be in a hurry. With care, disassemble the gun to remove parts that will be in your way during the restoration and bag them up to prevent loss. I had to remove the barrel, cylinder and hammer.
Screw removal is where many projects first go off the rails. Don’t botch up your screw heads! Nothing says “incompetent amateur” like buggered-up screw heads. One of the most valuable tool investments I ever made was a Real Avid gunsmith screwdriver set. Make a gunsmith’s screwdriver set your next purchase. By the way, the front side plate screw holds the S&W cylinder in place. After removing the hammer, I reinstalled the side plate so I’d have an even surface to clamp in the padded vise jaws.

Frank used a round file in the rear-sight trough. He ground the
end to the teeth and rounded the point so he could cut into the
sidewall with the tip. The rounded tip also prevented gouging
the back of the trough by the notch.

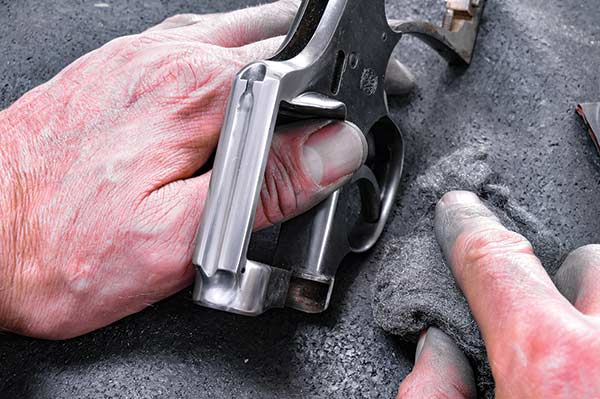
Use a rigid but non-marring block to do the polishing and be
as careful with your hold as you were when filing to preserve
the edges of the metal.
Barrel Removal
Removing the barrel of an old S&W is easy as long as you remember to drive out the retaining pin first. Use a brass drift to start it and get the end of the pin below the frame before you try to use a steel punch on it. Once the pin is out, hold the barrel in the vise jaws between a piece of soft copper or aluminum on one side and a block of wood on the other. Don’t crush the barrel. You don’t need heavy clamping force. Apply just enough to keep the barrel from turning left with it oriented, so the boss for the front of the ejector is in contact with the soft metal padding the left vise jaw. Remember, “righty-tighty, lefty-loosey.” I was able to turn off the frame with no more leverage than the wooden handle of a wire brush I had on the workbench.
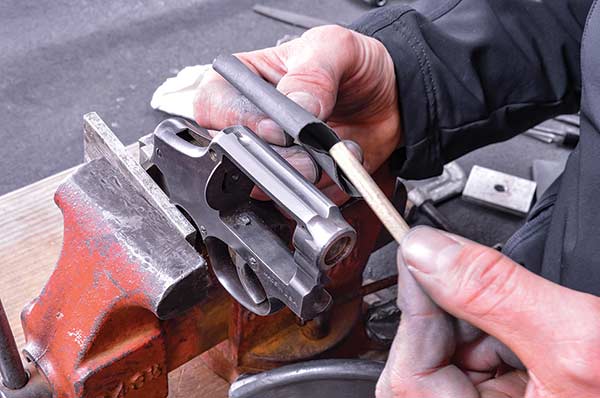
A ¼" wood dowel wrapped in a single layer of sandpaper is good
to smooth out the metal surface inside the rear-sight trough.
A ¼" dowel wrapped with several layers of sandpaper allows
the sanding block to bend around the curves slightly.
Don’t round the edges that are supposed to be sharp!
Sand carefully parallel to the surface.

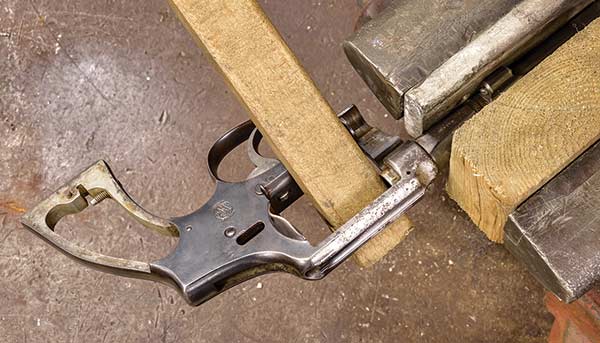
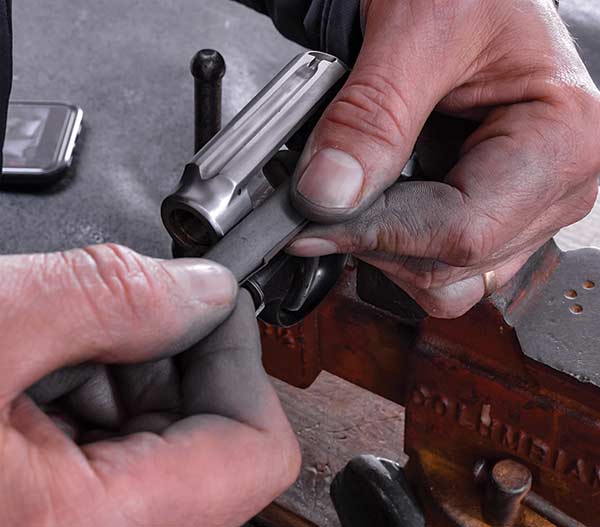
Note how the barrel’s ejector-rod boss is in contact with the
aluminum block. The block will stop the barrel from turning without
marring the finish. Don’t overtighten the vise. You could crush the barrel.
Filing Tips
You must also have good tools. In this case, you need a few really good, sharp files. My favorite file for draw filing is a 6″ Nicholson mill bastard file. Nicholson makes excellent files, which is why they cost more. Other files might be suitable too. Test them and find out before you use them on your project. Shaped little Swiss files are invaluable for getting into tight spots and working on curves.
To use the file correctly, the object you are filing needs to be held steady. You can get a long way with an ordinary little bench vise and some wood, copper or aluminum scrap material to place between the gun metal you’re filing and the hardened vise jaws. Don’t ever clamp the gun naked in the vise; the jaws will deform the gun metal. When I needed to work on the side of this S&W frame, I clamped it solidly to the workbench with a C-clamp and some aluminum blocks. If you don’t secure the gun, it can shift under the force of the file, and you can end up gouging the surface.
The smoothest file cuts are obtained by draw filing. To do this, you hold the file in both hands (one at the tip and one on the handle) at a 90-degree angle from the surface being filed. The orientation of the file to the work looks like a roadway intersection. Cut by drawing the file toward you without any side-to-side movement. Pull the same small section of the file blade along the entire length of the work. Any shifting side to side can result in the file teeth making parallel slices in the work surface.
Since files only cut in one direction, don’t rub the file forward and back against the work as they do on the internet. You’re likely to clog up the file teeth and gouge the work surface. For the smoothest cuts, clean the metal shavings off the file with a file card and brush them off the work every couple of strokes. I always assumed draw filing got its name because the file is drawn toward the body for more control.
However, you can also “push file” by reversing your hold on the file handle and tip. Sometimes it will be advantageous to push rather than pull. Examine the direction of the file teeth if you are ever in doubt about which direction you should be going.

Brownells had just the right cold blue for the job. Three applications
of Oxpho-Blue took about 15 minutes to match the color.
Polishing
The next step is polishing after metal removal and shaping with the files. Metal polishing is done with progressively finer sandpapers and sanding blocks. Remove the file marks with the 180 grit. Then remove the 180’s sanding marks with the 220-grit paper, and so on until you do a final polish with 0000 steel wool. I like to use wet or dry sandpaper and saturate the surface with cutting oil. I find this improves the cutting action and reduces clogging of the paper. Make rigid sanding blocks from pieces of flat plastic or wood. They won’t mar the metal finish if they tear through the paper.
While sanding, be just as careful of the contours and edges as you were when filing. Maintaining a flat surface on the half-inch wide front side portion of the frame where the barrel mounts was a lot harder than doing the long flat sides of the top strap. Take care to keep the sanding block parallel to the surface. For the contours where the top strap joins the front of the frame, I wrapped the sandpaper thick around a dowel, so I had a little bit of “give” as I pressed down to smooth around the curves. I advise against using power polishing tools; many a good job is ruined by rounding edges with power polishers. It’s actually hard to screw it up by hand.

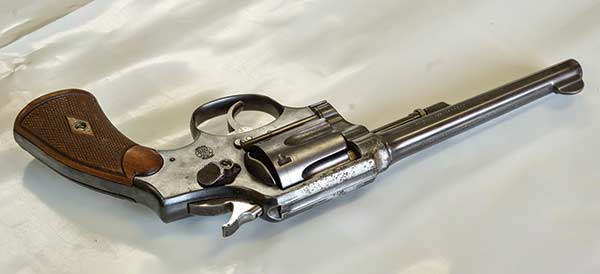
Voila! Almost like new after a day’s work with simple hand tools.

All the parts taken off, cleaned and ready to reassemble.

A dramatic improvement in the sight-channel area for little cost.
Bluing and Reassembly
With all the metal work done, the next step was the bluing. I probably would have polished it out completely and rust-blued it again if this was my gun. I bet I could have made it look darn near factory new. A more economical alternative is Brownells’ Oxpho-Blue. This paste-style cold blue works virtually instantly, blends well and is tolerant of imperfect removal of surface oil from the metal. You rub it on for a minute or two and then wipe it off. If it’s not dark enough, do it again. It took three applications to get it to match the original finish color nicely. I used oil to neutralize the bluing action.
With the metal and finishing work done, I got out the bags of parts I’d put aside, cleaned them and reassembled the revolver. With the barrel and frame threads cleaned and greased, the barrel indexed with minimal force. When the front sight looked vertical, and the pin hole appeared to line up, I checked the latter with a piece of steel wire the same diameter as the pin. If the wire slides through to the other side, it’s time to take the gun out of the vise and eyeball it. Confirming the indexing was perfect, I put in the barrel pin.
When all was said and done, I was able to remove almost all the pitting. There was one pit along the rear sight channel that was just too deep to chase after. This project took a full day’s work: 80% of the time spent on metal finishing and none wasted correcting mistakes or searching for lost screws. If you multiply this by your gunsmith’s shop rate, you can understand why there aren’t too many people rushing out to get this kind of work done. It probably wasn’t economically sensible to restore this particular gun, but the heart wants what it wants.
For more info: Brownells.com, RealAvid.com