Tool Of A Thousand Uses!
A Shop-Made Scribe
Roy has made scribes out of copper, brass, aluminum, mild steel —
even Damascus stock. You’re only limited by your imagination.
This simple scribe was inspired by YouTuber “Clickspring” — you really need to check out his amazingly well-done videos. With simple tools like a small mill and lathe, he’s built a complicated mechanical clock and all the tools needed to build it. The videos are simply a delight to watch. One of his first tools was a cleanly designed metal-tipped scribe, and it immediately struck me I needed one. I had always used “whatever was lying around,” but since making this one, I find it’s in constant use in my shop. It’s also a great, easy-to-make gift for your friends who are DIY people.
As a long-time hobby gunsmith and general “project” guy, I’m fortunate I have a small lathe and mill courtesy of Grizzly. A project like this can be easily done on a very small bench-top lathe like the ones sold by Grizzly, Harbor Freight and other companies. In a pinch, you could probably get by with a decent drill, too, if you don’t ask too much of it — and use files. You don’t need a mill or drill press, but if you decide to drill a cross-hold for a hook or a hanger, it would be handy. If you wanted to create a hex shape, then a mill would be needed. To keep things simple here, we’ll just use the lathe.
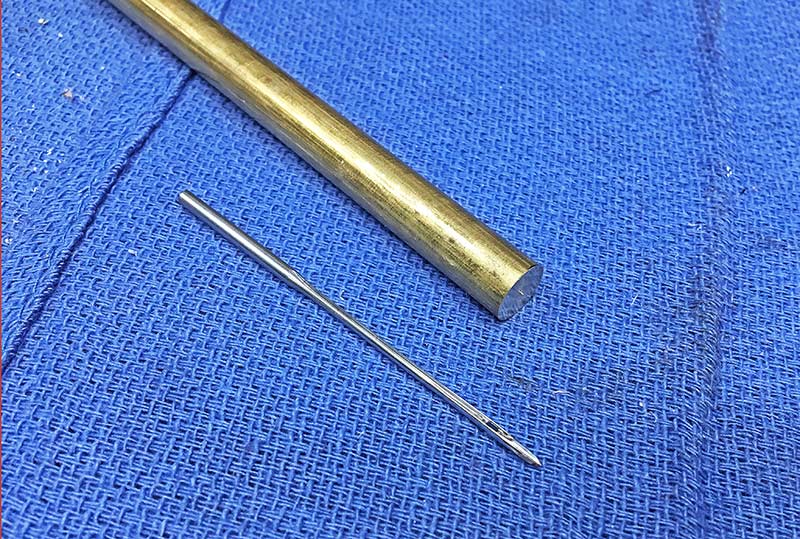
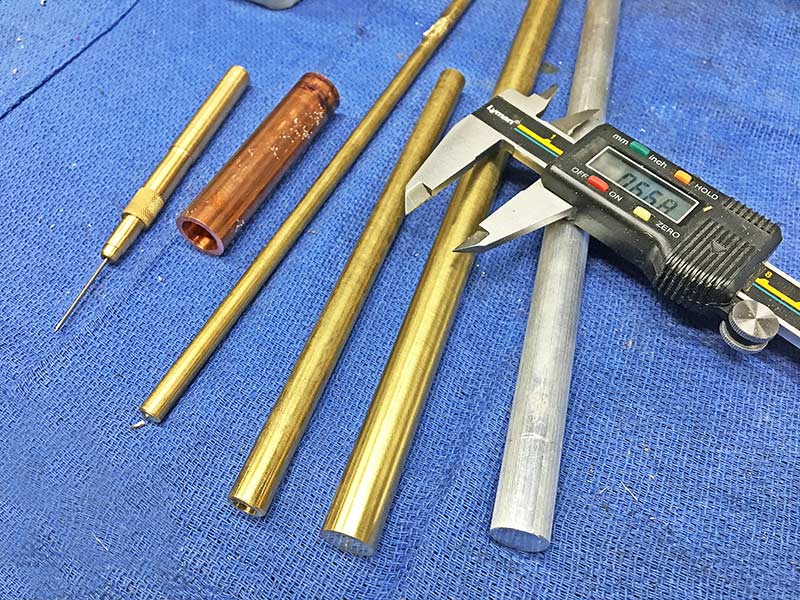
For this simple scribe we’ll be using brass round stock about
8" long and heavy-duty sewing machine needle.
Raw Goods
Since you’re only limited by your imagination, now’s the time to decide the materials you need. I chose brass, but keep in mind copper, aluminum, bronze or even mild steel, Damascus, etc., would work just fine. I like a bit of “heft” in the scribe, so brass, copper or steel seems to just “feel” better than aluminum. You can find plenty of options to buy metals online at places like eBay, Amazon and others.
Since this is a custom project, you can fit the diameter to your hand. Mine is about 0.38″, and I find the weight and thickness to be comfy. A pencil is about 0.27″, give or take, to give you some reference. I find thinner models — I’ve made some 0.25″ ones — tend to be a bit fiddly and hard to hold. The one in the pictures here has a brass body about 5″ long, and I have a shorter one about 3.5″, which is handy for detailed work.
I’ve even made some up to 0.5″ thick for some ham-handed machinists I know, and they love them. I made one for a welder friend with a piece of 0.25″ sharpened drill rod as the point, and the brass body was about 10″ long and a full 0.5″ in diameter. He keeps it on a lanyard around his neck and tells me it’s in constant use. He laughed and said it also scares people away!
You’ll also need some old sewing machine needles. You can scrounge ’em or simply buy a small package at a sewing store. Get some heavy-duty ones, though. The size is up to you — but a nail isn’t hard enough.

Roy’s fortunate to have a medium-sized Grizzly lathe so the
first step is true things up in the 3-jaw chuck in preparation
for some turning operations.
Roy turRoy turned one end to bened one end to be the “butt” end, oppositethe “butt” end, opposite the scribe point, lendingthe scribe point, lending a bit of eye candy witha bit of eye candy with some light stepped cuts.some light stepped cuts. He later changed hisHe later changed his mind on this design.mind on this design.

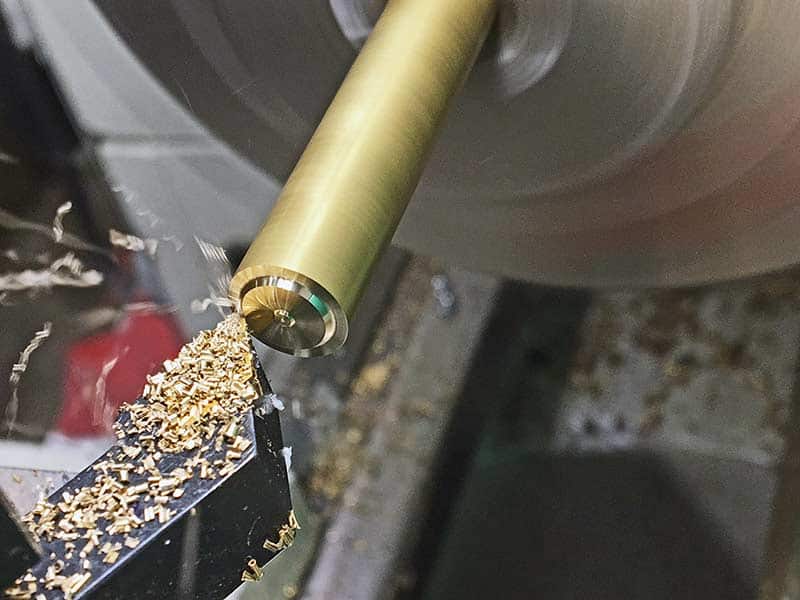
A center drill goes into a chuck in the tailstock of the lathe. This “center-drills”
a small starter hole in the end of the work three-jaw chuck.

The center drill touches the work, leaving a neat starting
point for a drill so it doesn’t wander around.
First Steps
Okay, making sure you’ve got your shop or safety glasses on, the first step is to do some simple preliminary machining to face the end opposite the point. Sort of follow along with the photos on all this. You could also leave the raw stock long, cut and fit the scribe end, then cut and dress the tail. But if you put knurling into it at the scribe end, you’d risk messing it up, hence the reason I cleaned up the back end first. You can do anything you want, but this is simply how I made this one.
Swapping ends in the chuck, I squared the face, then installed a center drill in the tailstock chuck. This allows you to drill a small “starter” hole for a bigger drill bit. Use cutting fluid to keep things going smoothly.
Next up, measure your needles and find a drill bit offering a very snug fit. In my case, the shank of the needle was 0.098″, so I chose a Number 39 drill measuring 0.099″. That 0.001″ difference will allow some Loctite or glue to hold things nicely. You can fudge up or down according to your needle size.
When you drill, just keep in mind how deep you need to go to hold the shank. A 0.5″ deep hole is plenty and gives the glue a good place to grab. If you ever need to change the scribe, you can heat the joint with a propane torch for a few seconds, and the Loc-tite or Super Glue will release neatly.

Measure the diameter of the needle you’re going to use
for your scribe. This one was 0.098" but they vary and the
exact size doesn’t really matter. Roy found getting heavy

There are “numbered” drill sets machinists use. Roy found the Number
39 drill was 0.099" allowing for a slip-fit for the needle, and room to glue.

Careful drilling made an eventual home for the body of the scribe needle.
When using a thin drill like this, it’s best to sort of “peck” at the hole,
pushing the drill in just a bit at a time, then clearing the hole of chips.
If you try to drill continuously the drill may wander from true.
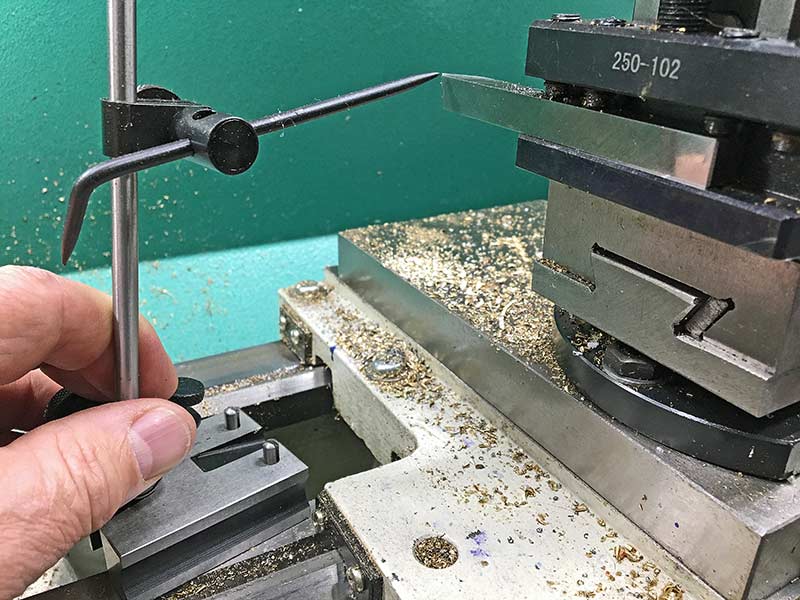
A special height/scribe gauge allows fast truing of the
cutting tool to fit the work you’re going to turn.
Shaping
I like to use a simple measuring tool to ensure my turning tool in the lathe is at the center of the stock. I align the tool’s tip with a taper in the tail stock, then adjust the tool holder until the tip of the cutter is right at the pointer of the measuring tool. It takes the guesswork out and keeps a job moving along nicely.
You’ll find standard High-Speed Steel cutting bits will cut brass much better than carbide, but either will work if all you have is carbide. You’ll likely need to do a bit more final polish if you’re using carbide though.
All we’re looking to do at this point is to turn some graduated steps into the scribe end to give a bit of taper to please the eye or to choke up on if you’re doing precision work. You can shape yours according to your own artistic eye.
Once the steps are turned, a file — use carefully, please — will blend and smooth the step transitions a tad. This is just to make it look nice, and you could sure leave them as stronger steps if you like.

High-speed tool steel cutters cut brass cleanly. Here, Roy makes a
few stepped cuts at the scribe end to give the end some shape.

A single-cut file works great for smoothing and shaping on the lathe.
Here the steps are softened some, mostly just for looks. It’s “half-art, half-function!
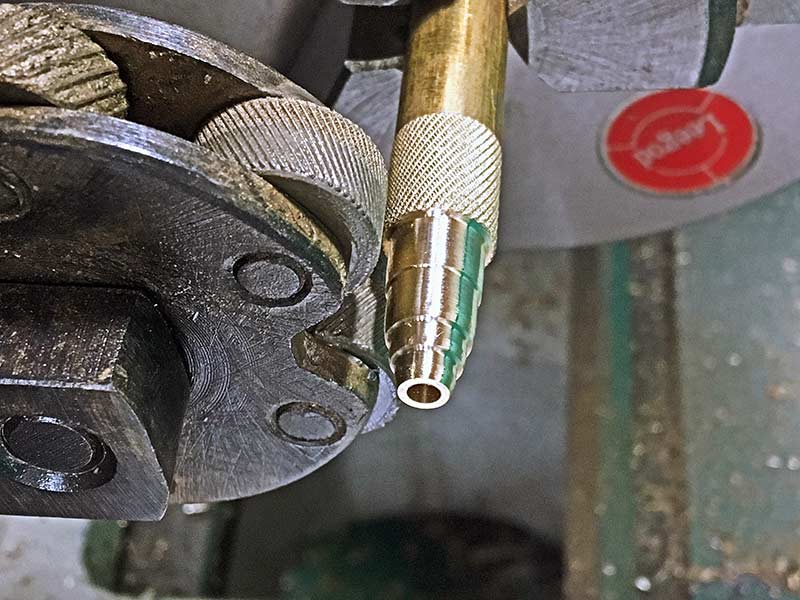
Knurling lends a handsome gripping surface and really helps
to make the look of the scribe pop.
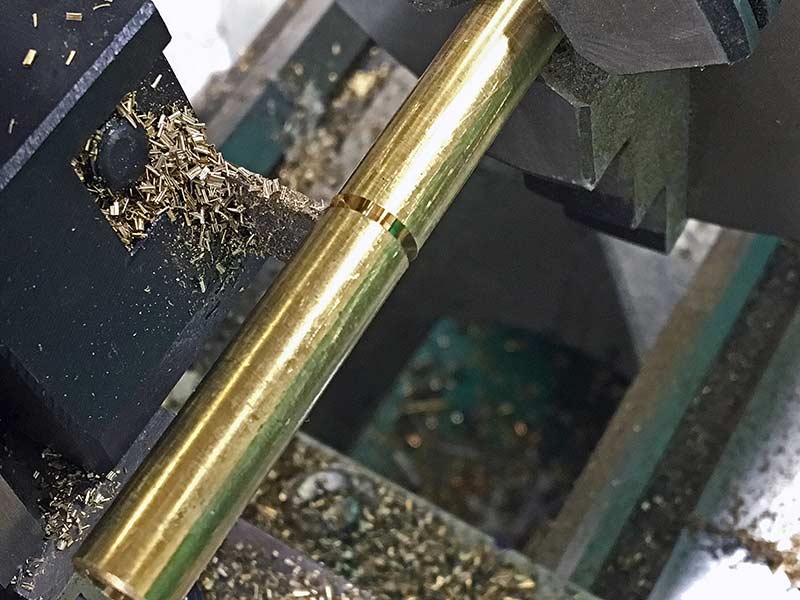
Roy uses aRoy uses a cut-ofcut-off tool heref tool here to nip ofto nip off thef the butt end. It’butt end. It’s not as not a mistake — it’mistake — it’s a smalls a small “design change.”“design change.”

While “parWhile “parting”ting” can cause somecan cause some anxiety for manyanxiety for many,, practice soonpractice soon shows it’shows it’s easy tos easy to do. Ydo. You just needou just need to be brave andto be brave and go for it. It’go for it. It’s muchs much more accuratemore accurate than using athan using a hacksaw too.hacksaw too.
Knurling
Many people are afraid of this next step, and even those who own hobby lathes tend to stay away from knurling. But to me, it adds so much versatility and looks to a project it pays to just dive right in and try it. The concept is the hardened “knurling” wheels are pressed against the work (brass, copper, steel, whatever) and as the work turns the wheels form a raised diamond pattern in the material. There are some tricks, though.
A knurling wheel will only deliver a clean, complete knurl on specific diameters of stock. Too small or too big, and the knurl will overlap. But there will be specific steps in size where whatever knurling tool you have will leave full, complete diamond points. While there are mathematics you can use to compute it; it’s also fun to just try it on different diameters until you find the sweet spots. And even what I’d call “poor” knurling is often good enough for hobby jobs.
Keep in mind, you’re not cutting the material but swedging it (pushing it around) to form the diamonds. So you want lubricating fluid while you do it (like WD40) not cutting fluid like you’d use to drill a hole. You want the knurling tool to be able to slip over the surface as it molds it. I honestly didn’t learn that until recently, and it explained why my old knurls were sharp and nasty at times — I used cutting fluid. Duh.
The knurling lends a firm purchase to the scribe, especially if your fingers are oily or greasy. Plus, it just looks good and ramps any DIY project into the “professional” level.
While we’re here, let’s talk about “parting off.” That’s the way you cut a piece of round stock in the lathe, separating it from the main raw material. In this case, I ended up not quite happy with the butt end, so I parted it off and re-machined it. A thin cutting tool is pressed into the work by the cross-feed, eventually parting the stock. It can be very precise and handy but can also be a disaster. Like knurling, some people are intimidated by the process, but watch some videos online, and you’ll soon figure out how to do it.
I also used the parting tool to cut a series of light round cuts along the main body of the scribe. It’s for looks and also gives you some purchase when holding it at different points along the body.

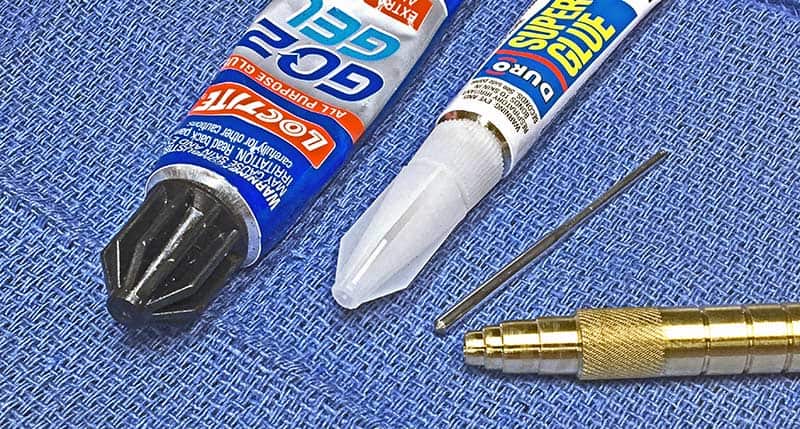
Just about any glue like those from the Loctite brand or Super
Glue will hold the scribe needle just fine. It can be removed by
applying torch heat if you need to make a change.

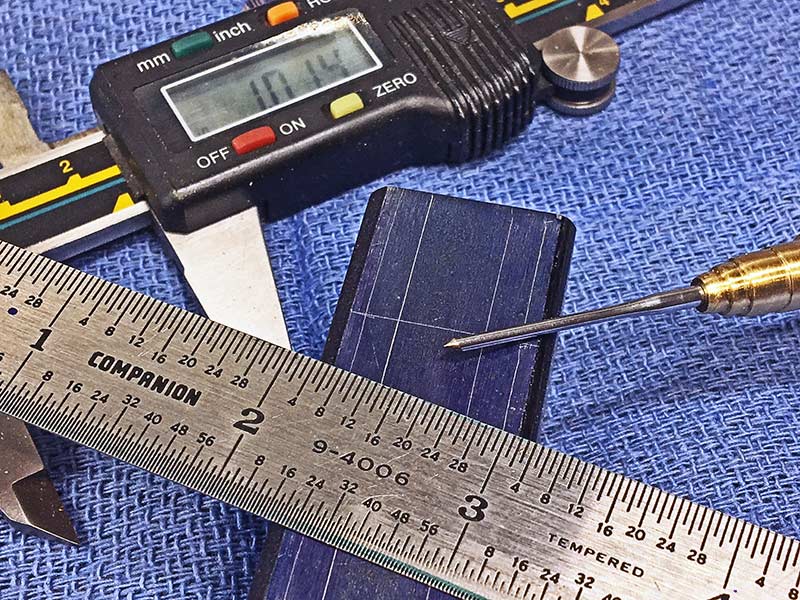
Some simple tools and raw materials can soon turn into a handy shop-made scribe for your bench. Note the circular rings on the scribe body for a non-slip grip.
Here Roy used his scribe to start layout on a small shop-made
hammer he’s going to mill. Note the Dykem layout fluid and
clear lines made by the scribe.
Final Steps
If you’re using sewing machine needles, the pointed end will have a small hole for the thread. I like to cut it off using a cut-off wheel in a Dremel. You can then use the side of the cut-off wheel to dress the point or use a belt sander, stone wheel or anything handy. I’ve also used a diamond hone bench stone.
Cutting off the end also allows you to custom-tailor the length of the scribe. At first, I thought a shorter, stubbier scribe length would be best, but soon found a longer one reaches into screw holes to pick out debris, can reach along taller stock, and you can even use it for a rough measure of the depth of holes you drill. So the longer option is best.
Once you ensure the pin body fits into the drilled hole, you can secure it. I’ve found any of the various Loc-tite-type products or Super Glues work fine. No need to solder it and the glue method allows fast and easy removal. The thinner glues will “wick” into the hole nicely, too.
When the part is in the lathe would be the time to do any polishing. I generally use various grits of wet-or-dry paper, stopping around the 320 grit. It leaves a sort of handsome matte finish. But you could certainly shine things up to a mirror gloss if you want. Keep in mind the brass will tarnish, which I think is cool as it makes your tool look like you actually use it.
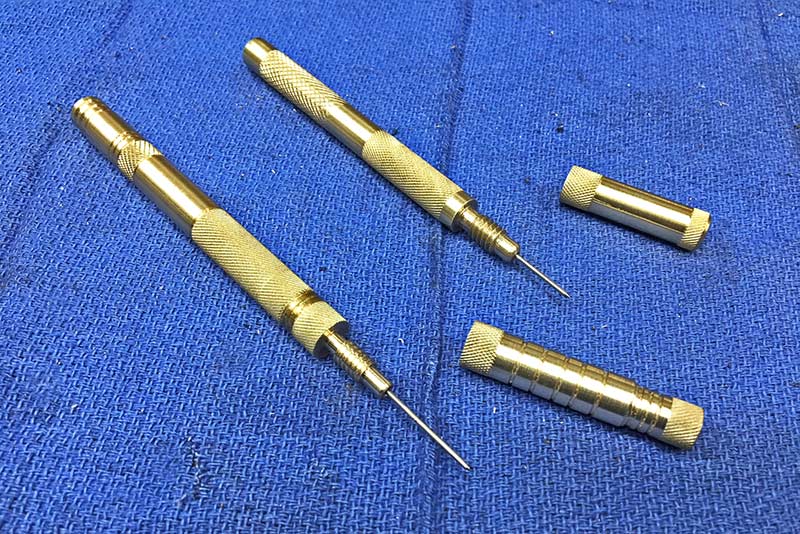
You can have some fun with your scribe designs too. Here's a couple
Roy made with caps to protect the scribe point. He sometimes puts
ballpoint pocket clips on them so they can be carried in an apron pocket.
You Can Do It
Once the glue sets, you can put your new scribe to work. It resides right at my hand on my workbench. I use it for scribing metal after laying Dykem layout fluid down, probing the unknown in a wooden rifle stock, picking out splinters, poking gunk out of an empty case’s primer hole and a hundred other jobs. When I showed my wife Suzi the first one I had made, she smiled, saying, “Why, thank you. I’m sure I can use this for all sorts of things.”
This is a great first lathe project and helps you to build skills you can put to use down the road, making firing pins, gun parts and other needed tools like assembly pins, etc. There’s a distinct sense of satisfaction when someone is visiting, and they comment, “Hey, that’s a sweet scribe. Where’d you buy it?”
“Why, I made it on my lathe,” you can say off-handedly. Just be prepared for a rush of “Can you make me one too!” pleadings. And use caution on who you show that first one to. Just sayin’.