Upgrade Your Polymer Pistol Barrel
Make Your Off-The-Rack Service Pistol A Tack Driver
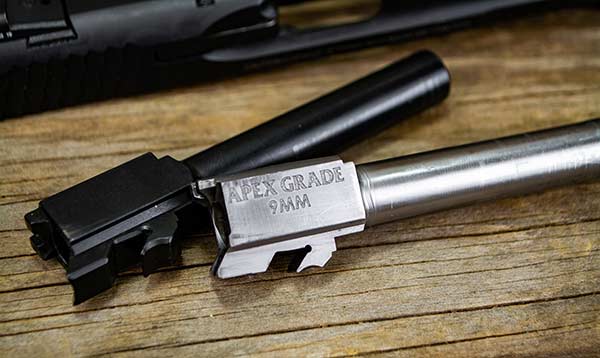
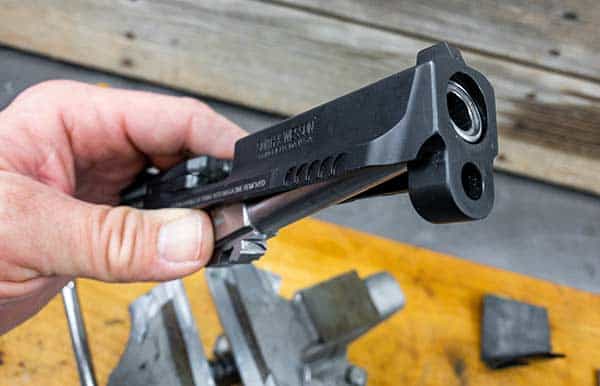
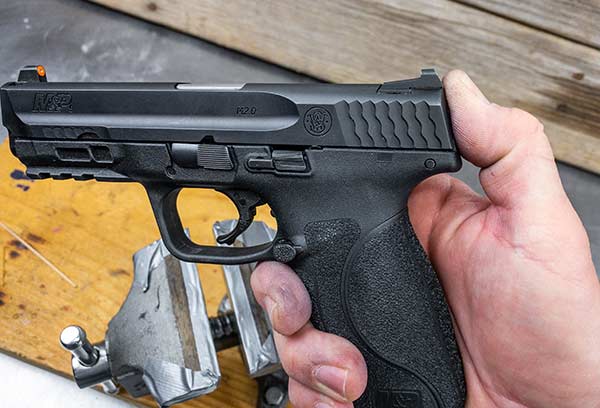
The S&W M&P 2.0 9mm was fine out of the box. Utterly reliable and more
accurate than most can shoot. The Apex Semi-Drop-In Barrel upgrade
makes it a tack driver.
Today’s production pistols are an amazing value when you think about it. With rare exception, for several hundred bucks you’ll get a handgun guaranteed to be reliable and accurate. Modern computer-controlled machinery produces parts with tight tolerances we could only dream of just a few decades ago.
However, even with all the engineering marvels, companies still have to engineer a little bit of “slop” into parts specifications. Assembly teams must reach into a bin of barrels, pull one out and be sure it’ll work with any given frame and slide. To ensure parts interoperability and compatibility with a near-infinite variety of ammunition, there’s always got to be wiggle room.
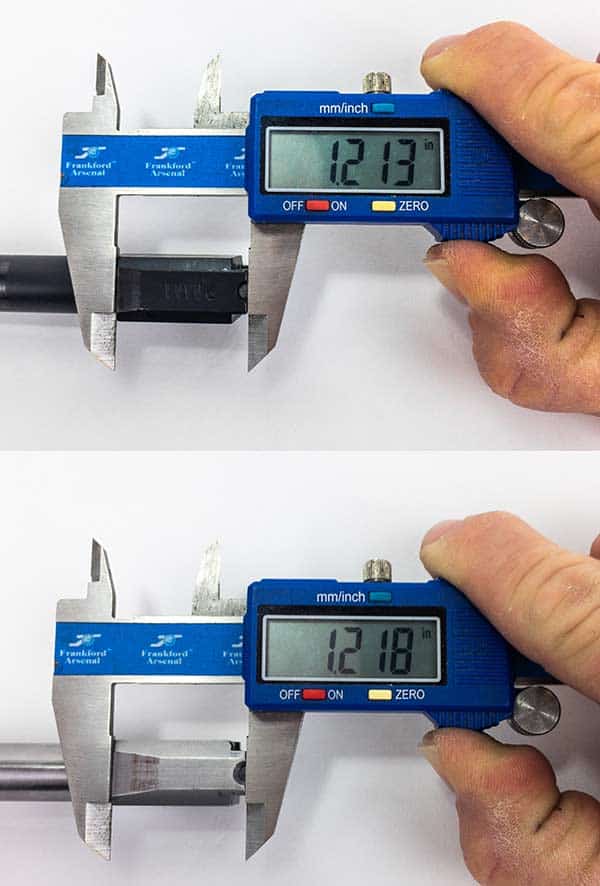
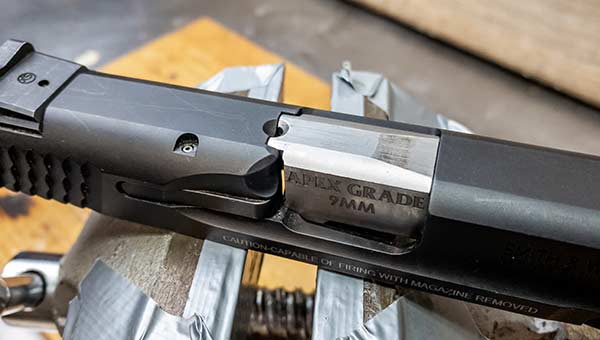
Note the difference in the length of the before and after barrel hoods.
That’s because you can fit the upgrade barrel to your slide precisely.
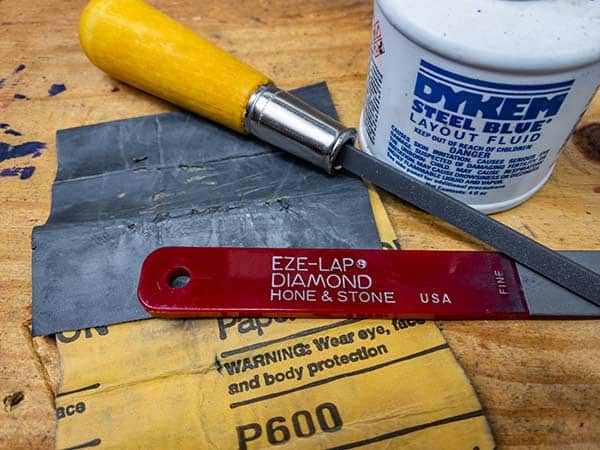
For tools, this is all you really need. A pillar file, diamond hone,
emery cloth and either Dykem marking fluid or a Sharpie pen.
Before: Out-Of-The-Box Performance
If you want to improve the mechanical accuracy of a production pistol, the best thing you can do is fit an upgraded barrel. Doing this allows you to define the precise fit between barrel and slide. The more precise the fit, the more likely those two parts will return to the exact same positions from shot to shot. Ipso facto e. pluribus unum, you’ll get better accuracy results.
The Smith & Wesson M&P 2.0 shown here is a solid production gun. It’s flawless in terms of reliability and shoots more accurately than most users can hold. With a wide variety of factory ammo, the 25-yard, 5-shot groups ranged between 1.79″ and 3.80″. The overall average of 19 different groups with seven brands of ammo worked out to 2.86″.
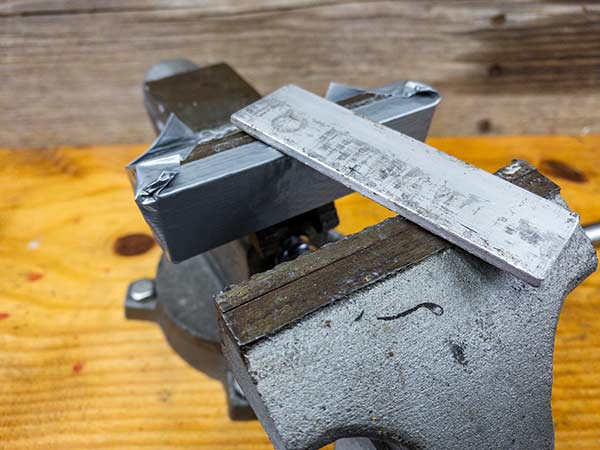
Make your garage vise gun-friendly by taping strips of aluminum
(or other soft metal) to those rough jaws.
While hard to see, there is movement between the barrel and slide.
As any part pulled from the barrel bin has to work with any slide,
there is a bit of forgiveness built into both.
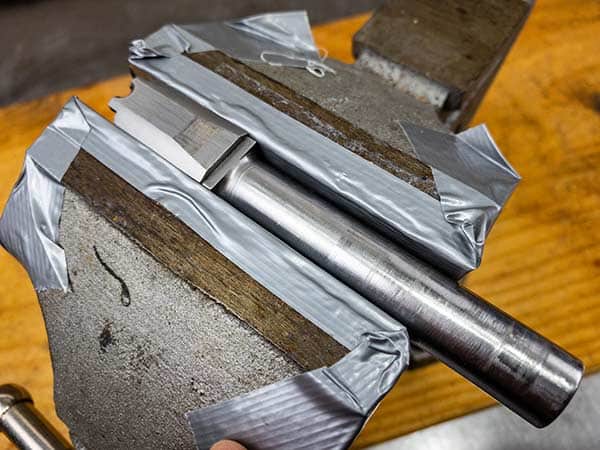
The vise modification allows you to hold steel parts
stable without mucking up the finish.
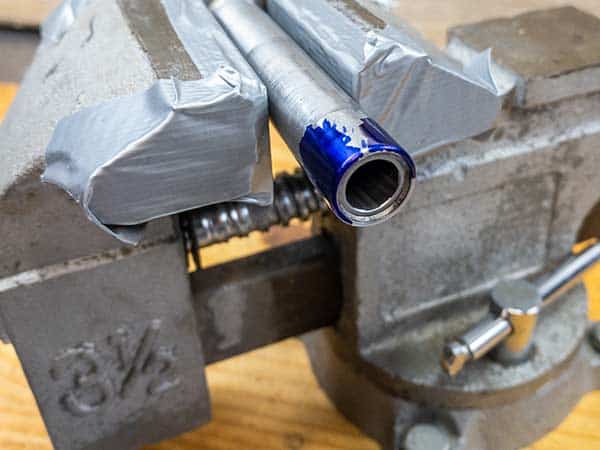
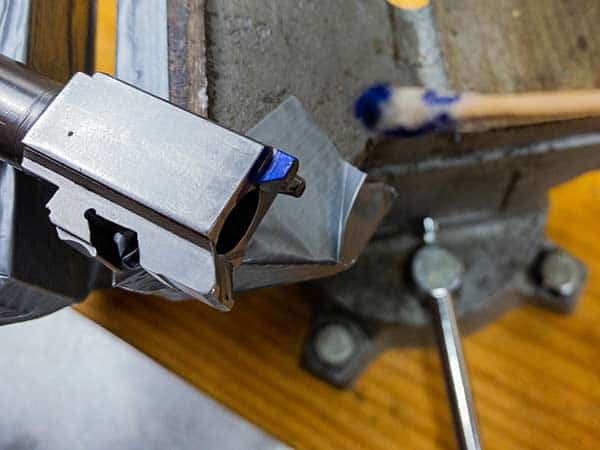
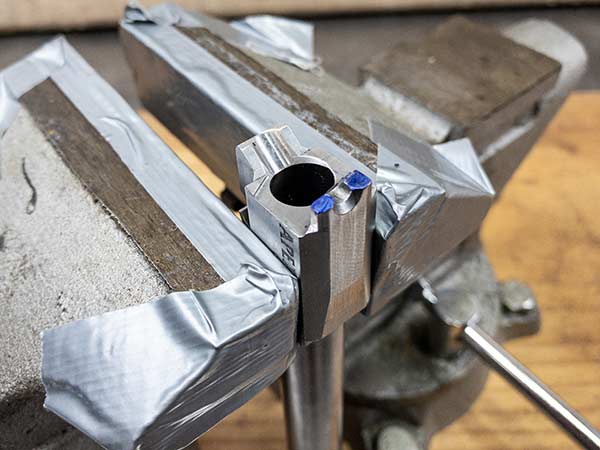
The muzzle end of Apex barrels are larger (on purpose) at the 10 and
2 o’clock positions. This allows you to remove just enough material to
ensure a tight lockup with the muzzle end of the slide. The Dykem
allows you to see exactly where steel is being removed.
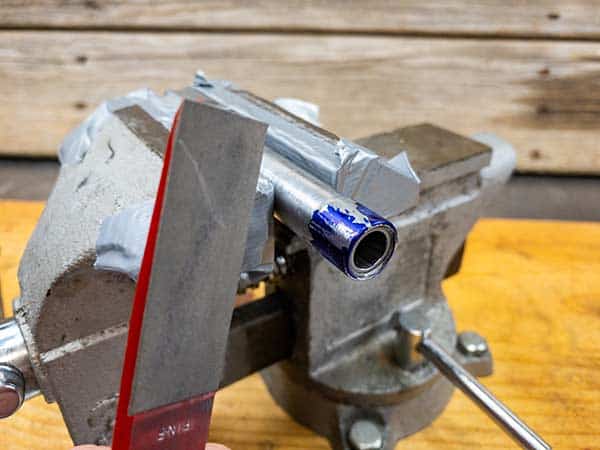
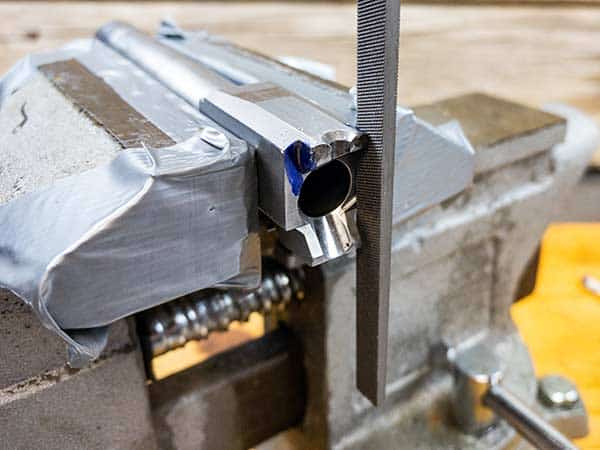
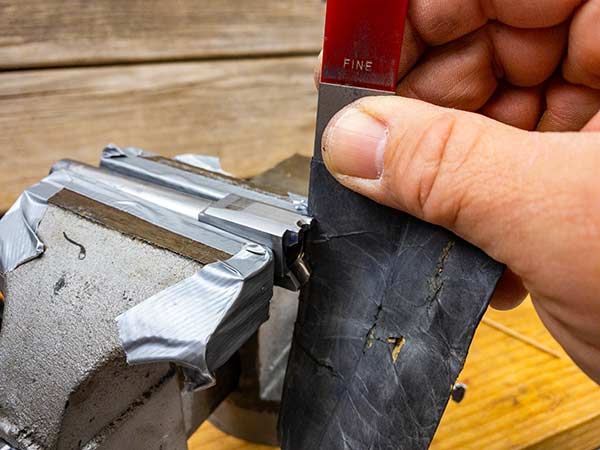
Tom used this wide EZE-Lap Fine Diamond Hone and Stone in a
rocking motion around the 10 and 2 o’clock areas to fit the muzzle.
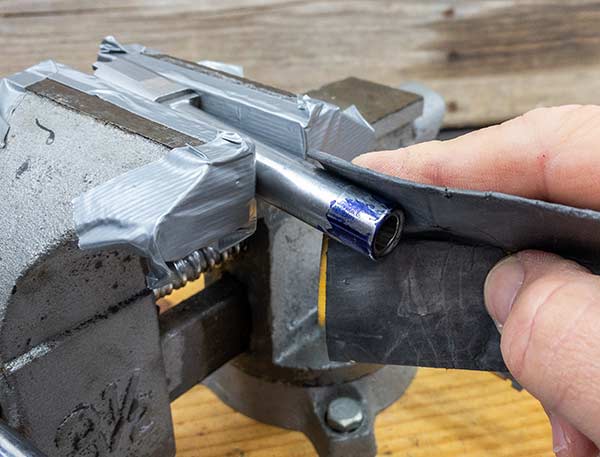
A quick touchup with fifine-grit emery cloth smooths
out your work and removes any traces of Dykem.
Get Ready To Rumble
The good news is this DIY job is beginner-friendly. All you need are a few inexpensive hand tools, some of which you might already have. A bench vise makes the job much easier and more precise. If you don’t have a fancy-schmancy gunsmith vise, no worries. Just tape two strips of aluminum to the inside of your regular vise. Being softer than steel, they won’t butch-up your parts. The tape holding the aluminum in place offers an extra degree of scratch protection.
You’ll also want some Dykem layout fluid, but if you don’t have any or don’t want to buy it, a Sharpie will do just as well. You’ll want two items from a gunsmith-savvy store like Brownells: a narrow pillar hand file and an EZE-Lap Fine Diamond Hone and Stone. Last but not least, some 600-grit emery cloth will help you smooth everything out at the end. Oh, don’t forget a spoonful of patience. As they say, it’s easy to remove metal but hard to add it back.
After clearing all ammunition from the premises, field strip your pistol and degrease the new barrel and the slide.
After wiping dust, continuously check the fit with the slide.
Stop when you can barely install the barrel. It may not go into
battery at this stage, and that’s okay.
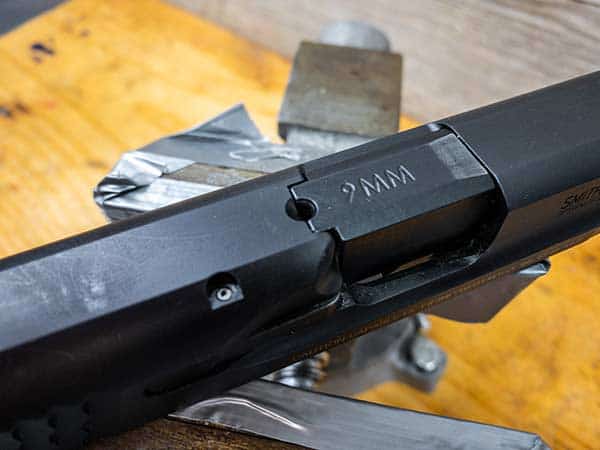
The barrel hood extension might be too wide to fit into its notch on the slide.
Using Dykem or a Sharpie, carefully mark the edges. Then use a Pillar file to
remove small amounts of metal from each side. Check fit frequently and stop
when the extension is just narrow enough to guide the hood into the slide.
When checking fit you can reapply some fresh Dykem to identify trouble spots.
Move the barrel in and out of position to identify oversized areas.

Here the barrel hood extension is just right. Be aware the extension might
still be too long at this point. Don’t worry, that’s the next step.
It’s important to use the pillar file since the edges are smooth and won’t remove
metal from the hood itself. Keep the file vertical and work slowly on the width of the
hood extension.
Once the width of the hood extension is right, move to the length.
Again, use some Dykem to mark your work area.
Smooth out your work with emery cloth. Tom wrapped it around the
diamond hone for support.
Put A Muzzle On It!
The Apex Semi Drop-in Barrel is manufactured to be “too big” in a couple of key places. The muzzle area of the barrel has excess metal around the 10 and 2 o’clock positions. You’ll probably need to hone it down to achieve tight lockup at the muzzle end of the slide. Our goal is to remove metal (if necessary) until the barrel just barely fits into the slide. Depending on the tolerances of the fiery-end hole in the front of your slide, the replacement barrel may work as-is, so check before breaking out the diamond hone.
Apply some layout fluid around the barrel and lock it into position in your vise. Using the EZE-Lap hone, gently remove a bit of material from the 10 and 2 areas using a rocking motion so you don’t create flat spots. The Dykem will guide your work, so reapply as needed. Go slow and check often. Like the subsequent steps, this fitting process is a balancing act between “just barely” fitting into place and “loose enough” to guarantee reliability.
Be aware the barrel hood may prevent full lockup at this point. We’ll deal with that in a minute. For now, we’re making sure the barrel can fit into the muzzle hole of the slide and get close to a locked-up position. Remember, the looser the fit, the more reliable, but at the expense of accuracy. Once the barrel fits into the slide, stop! You can always remove more later if the function check fails, but it’s really hard to put those shavings back!

Filing the barrel hood extension length is the money step in this project.
Go very slow, focus on perfect angles and check fit constantly. You want
to stop when the barrel hood barely goes into lockup. You can always
remove a bit more later if needed.
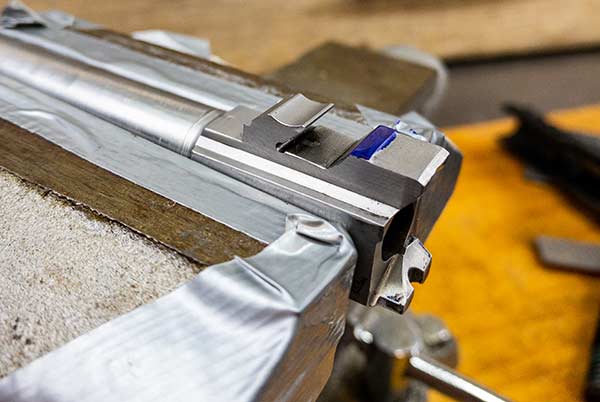
Voila! Fit is ready for function testing.
The Apex barrel also has a fitting pad on the bottom to control vertical play.
Tom didn’t have to adjust this, but if your slide won’t close properly, you
might have to remove some material from this area.
Lock It Up
Next you can work on the barrel hood-to-slide fit. The first step is to check and adjust the fit of the barrel hood extension into the guide slot in the top of the slide. This fit isn’t critical to accuracy, but it does help guide the barrel into the desired lockup position.
Using a Q-tip, apply a touch of layout fluid to each side of the barrel hood extension, install the barrel into the slide and move it in and out of the lockup position. If you feel any binding on the side edges, the layout fluid will show you precisely where the extension is contacting the notch in the slide. If needed, perform a bit of judicious honing on the edge areas until the fit is right. Be sure to mount the barrel in your bench vise and maintain a strict vertical profile on anything you file or hone. For this step use either the EZE-Lap or pillar file.
In the previous step you might have found you couldn’t get the barrel to go fully into battery because the barrel hood wouldn’t move up into the side cutout. With the Apex Tactical barrel, this is by design. The hood is too long, so you can file it down to the exact length required for your particular slide. What we’re trying to achieve here is a near-exact fit with no excess back-and-forth play between the barrel and slide when in lockup. In the pistol shown here, I measured about 9/1,000ths of an inch of slop with the factory barrel.
As you might have guessed, it’s time to break out the Dykem again. Apply a bit to the rear surfaces of the barrel hood. When you try to lock up the barrel, move it up and down against the slide and you’ll see where there is excess contact. I find it easier to mount the barrel vertically in the vise for this filing operation.
Using the narrow pillar file, gently stroke across the high areas identified by the layout fluid. Take extra care to maintain a level stroke. It’s also a good idea to reverse the barrel after each couple of passes. This is where patience is important. Less is more, so remove the barrel and check fit frequently, after each couple of light file passes.
When you can insert the barrel into full lockup position with only light finger pressure, you’re done — at least for now. There should also be no front-to-back play. If we did things right, we eliminated that movement.

The goal of all this fit fine tuning is to make sure the barrel locks up
to the slide tightly at the breech and muzzle ends.
To test final fit, reassemble the pistol with the recoil spring in place and
without the magazine. Allow the slide to ease forward with light pressure.
If you can press it into battery with light-to-moderate thumb pressure,
you’re ready for range testing. Remember, in normal operation the recoil
motion will slam the slide closed, so it’s okay if it requires a bit of pressure.
The finished product ready for the range.
Final Fitting
The Apex Semi Drop-In Barrel includes one more fitting area. There is a fitting pad on the bottom of the barrel lug which is used to adjust vertical play. In most cases, you won’t have to adjust this. To check, apply a bit of layout fluid to the lug and check the vertical fit by assembling the frame, recoil spring, barrel and slide. Be sure to wipe down all parts to remove metal shavings and grit. If everything goes back together normally, it’s time for final fit testing.
With the pistol fully assembled, except magazine and ammo, of course, slowly allow the slide to close. To get the pistol into battery, you should only have to apply light pressure with your thumb on the back of the slide. When you’re shooting, there will be plenty of recoil spring force driving the barrel and slide into battery, so a little resistance is okay.
Last but not least, it’s time to test on the range. Remember, this process is a fine balancing act between tight tolerances and reliable function, so don’t be discouraged if you experience some failures to go into battery at the range. If you’re having trouble figuring out exactly which area is too tight, just apply a bit of layout fluid or use a Sharpie on relevant barrel hood and lug areas before you shoot. If needed, you can always take a bit more metal from the high spots.
When you get fit and function nailed, do a little smoothing work on the filed areas with 600-grit (or higher) sandpaper or emery cloth to polish any rough spots.
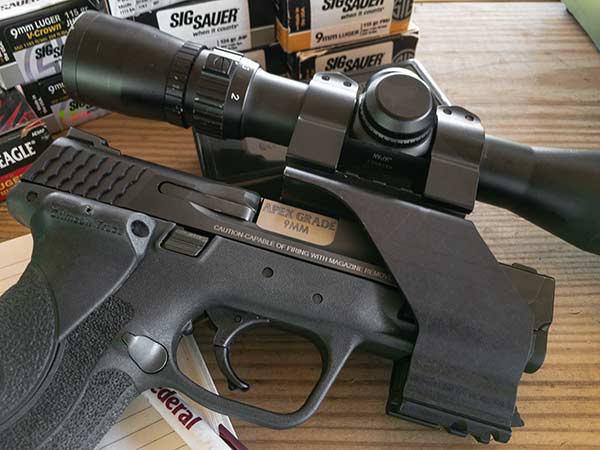
Tom prefers to accuracy test using a handgun scope mounted with this
UM Tactical adapter. It allows error-free sighting and removes human
eyesight completely from the equation.

The results speak for themselves. This is a 5-shot group from 25 yards
using SIG SAUER 124-gr. V-Crown ammunition.
My Results
That’s it! Job well done! Now head back to the range and check your accuracy improvement. I suspect you’ll be pleasantly surprised. I was when I performed this gem of an upgrade. After fitting the Apex Tactical Semi Drop-in Barrel, 25-yard, 5-shot groups shrank to a range of 0.74″ to 2.41″. That “big” group was an outlier. Every other group was well under 2″, with the average falling below 1.5″. I’ll take it.
For more info: www.apextactical.com