Upgrade Your Trigger
Installing The Apex Tactical Flat-Faced
Forward Set Sear & Trigger Kit

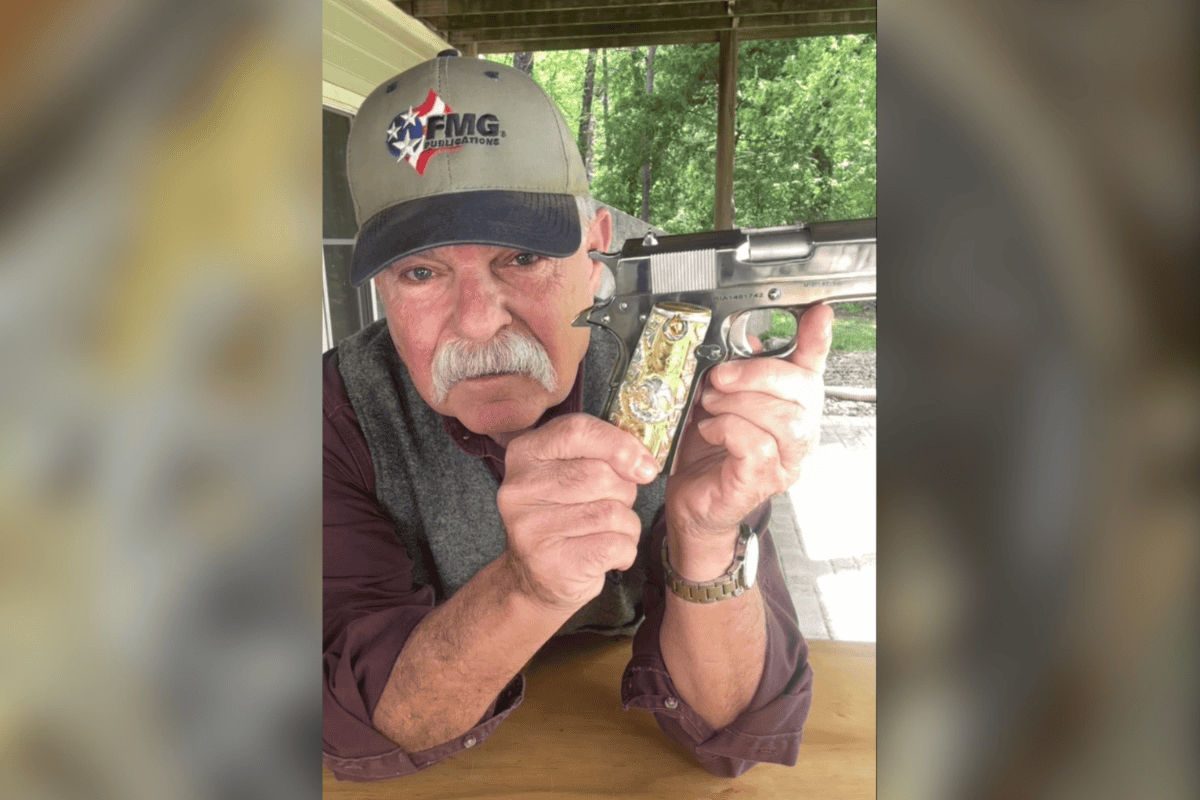
David installed the Apex Tactical Forward Set Trigger Kit in this Smith & Wesson VTAC M&P.
Several years ago, I installed an Apex Tactical Duty/Carry Action Enhancement Kit in my Smith & Wesson Viking Tactical M&P. The kit reduces over-travel, smoothes trigger pull and keeps a safe 5- to 5.5-lb. trigger pull weight. An added benefit of the installation was the elimination of a characteristic slight sideways movement in the M&P’s muzzle as the trigger breaks.
If you have an M&P and are unaware of this little quirk, make sure your gun is unloaded, then cock it by racking the slide. Put the bottom of the muzzle flat on the top of a table so the front of the trigger guard is up against the table edge. Now, watch the muzzle carefully as you pull the trigger. Chances are you’ll see the tiniest little wiggle of the muzzle as the trigger breaks. At least I did, and the Apex trigger kit fixed it.

David used a RangeMaxx pistol cleaning mat with magnetic strip for a cleaning mat
with magnetic strip for a work surface. The magnetic strip helps keep small parts together.
Apex Tactical Flat-Faced Forward Set Sear & Trigger Kit
Pleased with the results of that first Apex installation, I was eager to try a newer kit offered by Apex Tactical — the Flat-Faced Forward Set Sear & Trigger Kit for the M&P. Although I have several M&Ps the Viking Tactical is my favorite with its Flat Dark Earth color scheme. I figured the red-trigger kit would enhance its appearance and performance. The kit is available in other colors if you prefer something different.
Designed to work in any Smith & Wesson M&P model pistol in a centerfire caliber, the Apex Flat-Faced Forward Set Trigger Kit mimics a 1911 trigger. It reduces trigger pre-travel and over-travel and lowers pull weight to between 3 and 4 lbs. depending on the trigger spring used. Although the trigger feels like a 1911 trigger when you’re shooting, it has a center-mounted pivoting safety.
The Flat-Faced Forward Set Sear & Trigger Kit comes with two little bags of small parts in addition to the trigger. The spring kit includes both 3- and 4-lb. trigger-return springs, a sear spring and a reset-assist mechanism spring that is not applicable to my model of the M&P.

Installation of the kit involves removing the trigger and
sear groups from the frame — easy to do with a simple punch.

Removal of the trigger group and block is the first step with the frame.

Easy Installation?
Apex suggests installation of this kit might be something you would want a competent gunsmith to do. I’m not a gunsmith, but I took a gunsmithing course a few years back and have practical experience. I’ve also got a great reference library and a son who is mechanically inclined, has great dexterity and can usually bail me out if I get in trouble. With these confidence builders, I dove in. As it turns out, Apex Tactical’s instructional videos made the job easy, but it involves practically every action component in the gun.

The kit includes this tool to hole the striker block spring and cap when reinstalling the rear sight.
Do You Have What It Takes?
If you have a non-marring hammer, a punch set and a pair of needle-nose pliers, that’s all you really need. I used a Range Maxx pistol cleaning mat for the installation because it has a soft, textured surface to protect the gun’s finish and a magnetic strip along the side for keeping small parts together.
The Apex kit I got included the red-anodized, flat-faced forward set trigger, a forward set sear, an ultimate striker block kit and a forward set spring kit. Two tools were included in the kit — a yellow polymer slave pin to help with aligning the trigger pivot pin when installing the trigger group and a Talon Tactical Tool for holding the striker block and spring in place during rear sight reinstallation.
Watching the videos walked me right through the process, but I want to give you an overview to help you decide if this is something you want to do to your M&P. My goal is to tell you what’s involved in the process, but you’ll want to use Apex’s video tutorials to learn how to do it.

The Apex flat trigger is almost vertical and although hinged, feels like a 1911 trigger when shooting.

David used a Lyman Trigger Pull gauge to check the pull
with both the light spring and duty spring that came with the kit
Striker Block Replacement
Let’s start with the striker block replacement. To get to it, you’ll need to remove the slide from the gun and then remove the rear sight. There’s a set screw holding the rear sight in place you must loosen before removing the sight. With the set screw removed, drive the sight out of its groove from left to right. You’ll need a non-mar-ring punch and hammer to encourage it to start moving.
Underneath the sight on the right side, there’s a cover plate under which is a spring and the striker block safety. Apex provides a slightly modified striker block safety, so you remove the original safety and spring and replace them with the one supplied by Apex. A nifty little tool is provided that fits in the groove and covers the plate holding it all together while you slide the sight back in, line it up and tighten it down. That’s it for the slide.

The light spring created a trigger pull weight of just over 3 lbs.

Because he sometimes carries this M&P for personal protection, David elected to install the 4-lb. trigger spring.
Strip To The Frame
As I mentioned, everything will be removed from the frame. There are two groups of parts — the trigger group and the sear housing block assembly. To remove both groups, you’ll drive out roll pins. Once the groups are removed from the frame, you’ll disassemble the components of each group and reassemble them with the new components from the kit. Starting with the trigger group, replace the trigger and the trigger-return spring, reconnect the trigger bar and reinstall the trigger group, which includes the slide locking mechanisms and the locking block that holds the trigger group in place.
Then, it’s time to remove the sear block so you can replace the sear and sear spring to match the shorter stroke of the trigger. The sear housing block assembly will vary in configuration depending on whether there is an external safety on the gun. Regardless, what you will be doing is removing and replacing the sear and the sear spring before reinstalling the sear housing block in the gun.
None of these actions is particularly difficult, but they do require some manual dexterity. The magnetic strip on the Range Maxx pad helped me keep up with the small parts. If you don’t have one of these, I recommend some method of preventing the tiny parts and springs from falling on the floor because they tend to jump around a bit.
Replacing the trigger group and the sear housing block requires holding your tongue on the right side of your mouth and squinting your left eye. Failure to get these two facial configurations correct will result in undue frustration in properly inserting the tight-fitting components while keeping various pins from sliding this way or that.

David tested the newly installed trigger with several of his favorite defensive ammo types.
Video Learning
When you’ve followed the Apex video instructions, you’ll have a working gun. If by some slight chance you don’t, call them for help. As you put the various parts back together, function check them along the way.
Function checking is easy, but I couldn’t wait to get to the range for some real testing. First, I installed the 3-lb. spring and used my Lyman trigger pull gauge to verify the trigger pull. Before going to the range, I swapped it with the 4-lb. spring since I’ll likely be carrying this gun from time to time as my PDW.
Frankly, my fingers, which probably haven’t been calibrated in several years, can’t tell the difference between 3 and 4 lbs. The take-up is 1/4″ or less, and you can hardly feel the break. It’s so easy. As advertised, it feels like a good 1911 trigger. The pivoting trigger safety is so light you hardly notice its operation.
With everything back together and a few dry-fire tests for operation, I was anxious for some live-fire testing. Since I had removed and reinstalled the rear sight, I used a Firefield Universal Boresight with Red Laser to verify the rear-sight alignment before going to the range.
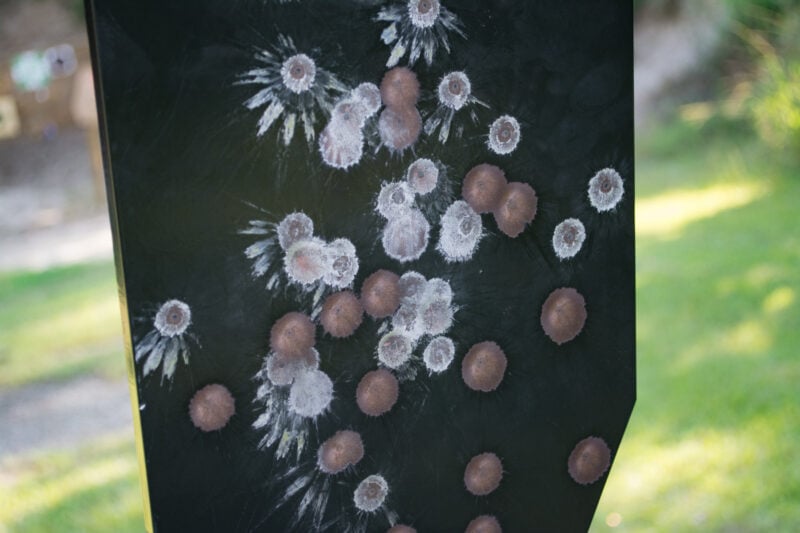
Hornady recently sent me two new 9mm loads for testing — a 124-grain Custom XTP load and a 147-grain Sub-sonic XTP load. I also included two of my favorite 9mm defensive loads — Inceptor 9mm +P 65-grain ARX and Speer 124-grain Gold Dot Personal Protection. With the targets at 10 yards, I fired 5-shot groups using each of these loads. The tightest groups came from the Speer Gold Dot ammo, with the Hornady Subsonic 147-grain load close behind. All four loads provided decent defensive accuracy, and operation of the M&P was delightful. I shoot 1911s a lot, and the Apex Forward Set Trigger mimics the 1911 trigger as advertised.
While writing this article, the VTAC M&P with its new Apex Tactical was on the desk beside me. I kept looking at it and feeling quite a bit of satisfaction knowing the red trigger, which is obviously not stock, and several other performance-enhancing parts were installed by me. This gun not only works but is uniquely mine.

The best grouping at 10 yards came from the perennial favorite Speer Gold Dot 124-gr. load.

Hornady’s new 147-gr. Subsonic load produced several groupings like this one at 10 yards.
Should You Try It?
One advantage of doing one of these upgrades is when you get through you will thoroughly understand your pistol’s mechanical operation. That should make you a better shooter, though it won’t replace the fundamentals of stance, grip, breathing, aiming, trigger control and follow-through. Apex Tactical has kits for all the M&P models as well as action enhancement and trigger kits for GLOCKs, SIGs, FN and CZ products. I recently learned their GLOCK Gen 5 Forward Set Trigger Kit also works on the .22-caliber G44. That might be a project I’ll try someday. The typical cost for one of these kits is in the $125–$175 range.
For more info: www.apextactical.com