What Goes Around
Building a Long-Neglected S&W 681 .357 Magnum
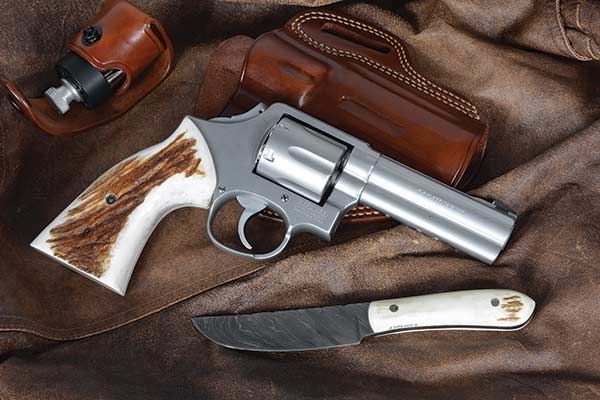
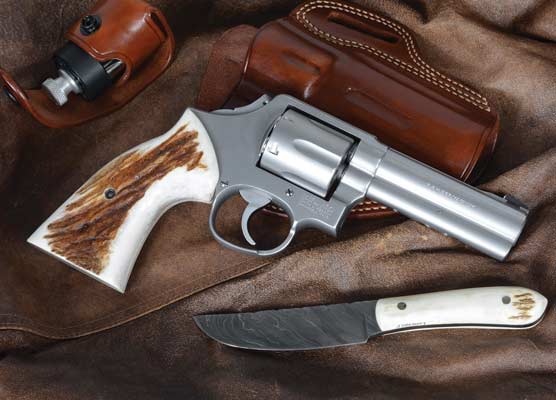
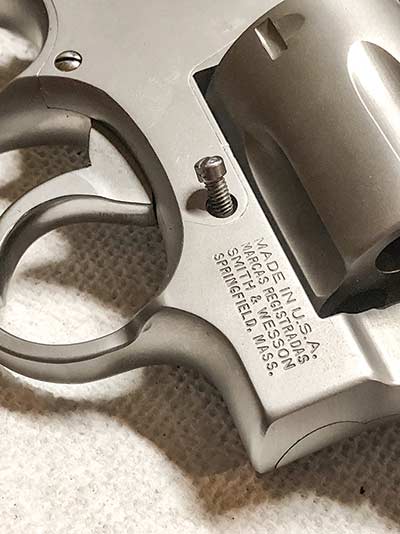
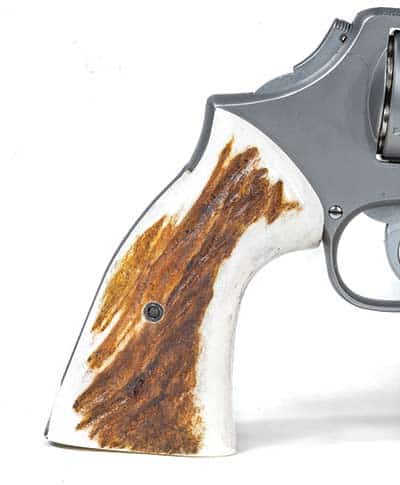
The S&W 681 after a series of modifications intended to improve its
handling and looks. The stag grips are from Tyler Gun Works, the holster
is from Galco and the custom Damascus knife is from J.A. Lone Wolf.
Never underestimate the S&W .357. For those of us who came of age in a world where gun shops were awash in police trade-in revolvers, they were inexpensive, dead reliable and shockingly accurate — not to mention the Magnum has lost none of its vaunted stopping power in the near-90 years since its introduction. The 686, also known as the Distinguished Combat Magnum, is one of the greats, a fully underlugged stainless sixgun built on the L-Frame to give shooters an option between the heavy .44-sized N-Frame and the K-Frame that can be downright unpleasant to shoot
with Magnums.
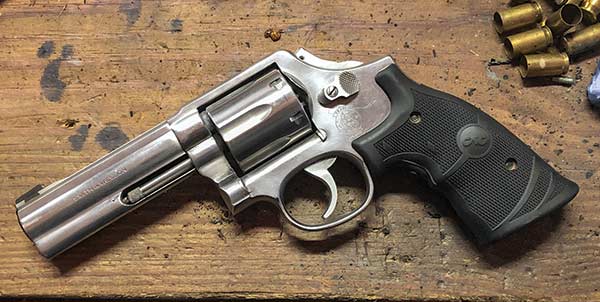
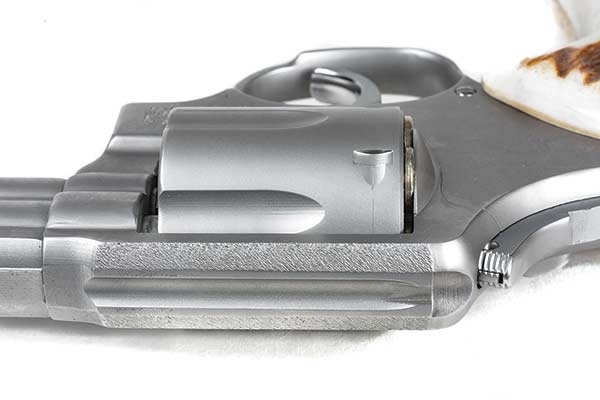
The starting point: A very accurate S&W 681 .357 with Crimson Trace grips,
a Novak tritium front night sight, bobbed hammer and recoil lug modified to accept
a light rail. It is a very useful pistol, but there are ways to make it handle better.
Lesser-Known Sibling
Lesser known is the 681, a fixed-sight version introduced in 1981 and only made for about a decade. Unlike the adjustable-sighted 686, the 681 only came with a 4″ barrel, typically without a target trigger or hammer. While its specifications make it clear it’s a defensive gun, there are ways to make it fill this role even better.
I first met this one around 15 years ago at Adventure Outdoors, probably the best-stocked gun store in Atlanta, and picked it up for a cool $150 or so, which was about right for the time. Even then, I had opinions about what a working revolver should look like, and they didn’t include a spur hammer or silver-colored front sight that disappears in the light.
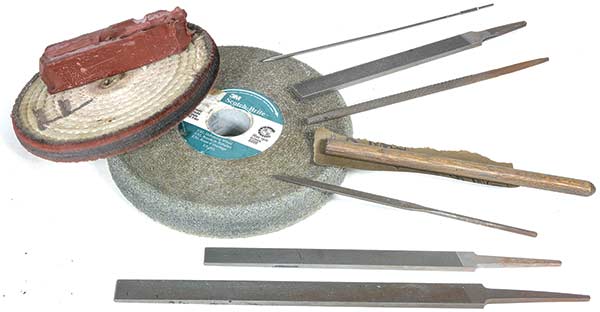
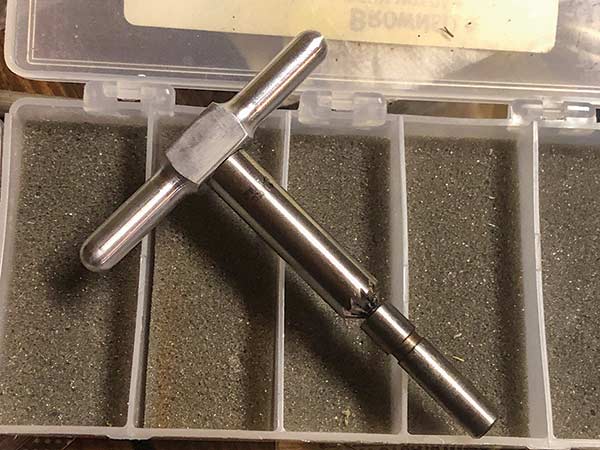
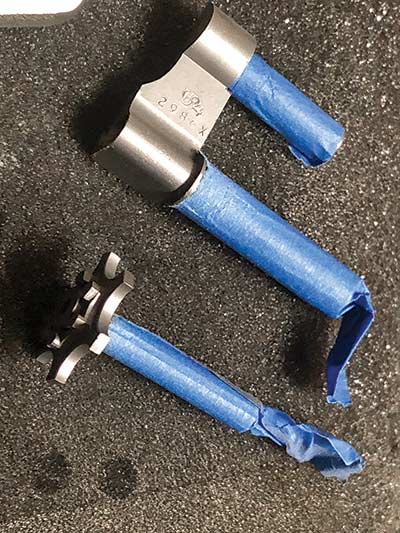
Most of the tools used in this build: A variety of files, including Swiss
pillar files (front) and a 25 LPI checkering file all from Brownells, a
buffing wheel and 3M Scotchbrite wheel. Not shown is a magnifying
visor, which is mandatory for fine work.
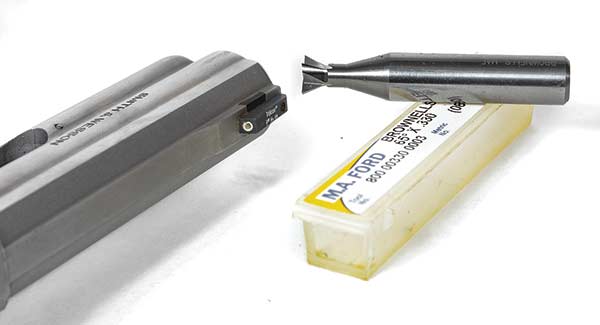
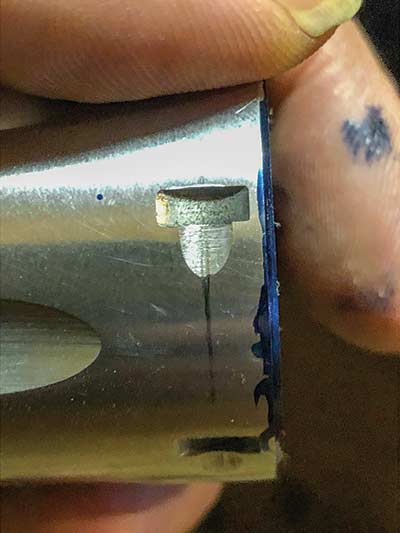
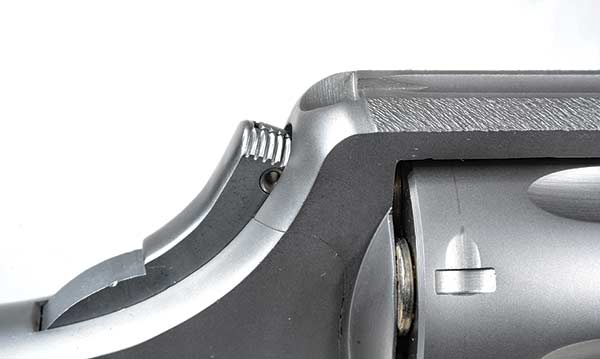
The stainless front sight on the 681 is just too easy to lose in bright light.
After measuring the front sight for correct height, Jeremy machined it away
and cut a dovetail for this narrowed tritium night sight from Novak’s.
Working-Revolver Mods
I took a Dremel cutoff wheel to the hammer and then deposited the remains of the spur in the little Altoids tin holding the other spurs I’ve cut off revolver hammers. Next, I clamped the gun in a milling machine to remove the front sight and cut a front dovetail for a Novak night sight. Since it has a top rib, that part was easy: Measure the factory sight to get the correct height and narrow the sight’s dovetail base to the width of the rib. The Pachmayrs that came on the gun went away, replaced with a pair of lasergrips from Crimson Trace. It went into the Ransom Rest, where it averaged in the mid-1″ range at 25 yards. Like I said, never underestimate them.
For a brief flashing moment, revolvers with lights were supposed to be the hot thing for shield drivers on SWAT teams since the gun could be held closely against the shield without the risk of a slide hitting it and causing the gun to malfunction. Persuaded by the reasoning, I duly machined matching flats on a length of rail and the bottom of the barrel underlug and drilled and tapped the holes to screw it in place. My initial urge to modify having been satisfied thus, the gun stayed, loaded, for a decade and a half
Mods, Part Deux
Having spent some quality time since then with a custom 65 and a particularly good 1917, I couldn’t take it anymore, and this year the files came back out. With the sights already addressed, my goal was primarily to make the gun handle better so I could use that inherent accuracy.
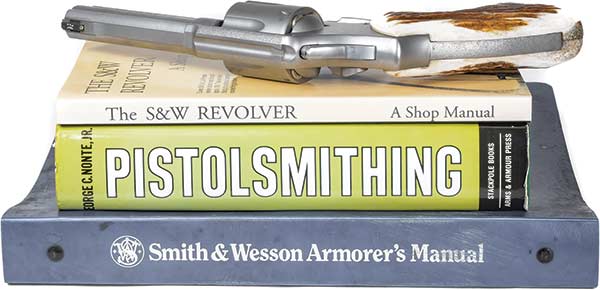
Homework first. The Kuhnhausen manuals are excellent, and while it’s older,
Nonte’s book contains a wealth of information and provides a window into a time
when there was a lot more creativity required for tasks we now consider mundane.
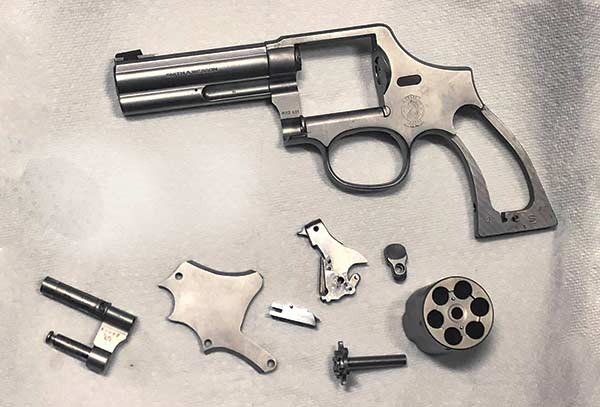
Where it all begins: Removing the forwardmost screw in the sideplate
will free the crane to be removed from the front. The cylinder will come
loose simultaneously, so make sure you keep it from falling out.
Cylinder Removal
We’ll take it from the outside in. Once the grips are off, the cylinder can be removed by unscrewing the forwardmost sideplate screw on the right side of the gun. The screw protrudes into a recess at the base of the cylinder crane, and once it’s out, the crane can be pulled forward to remove the cylinder. Since the cylinder slides on and off the crane freely, you’ll want to hang on to it when you pull it out. Once removed from the crane, the cylinder’s reverse-threaded ejector rod can be unscrewed from the ejector star by clamping it in a padded vise and turning the cylinder clockwise. Keep track of the springs involved: There are two inside.
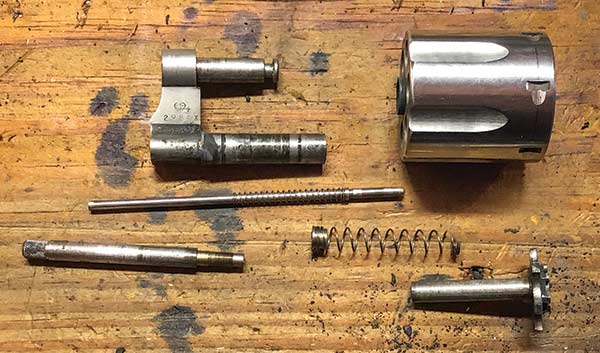
Pay close attention to the various cylinder components and remember
the ejector rod is reverse-threaded. The rod and springs were polished
on the buffing wheel for smoother function.

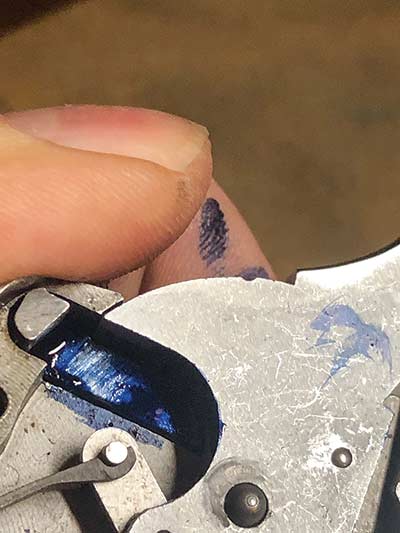
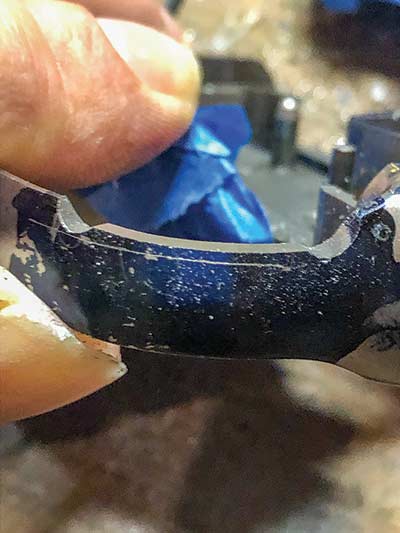
The ejector star should only get the lightest of touches, but the charge
holes were chamfered with a Brownells chamfering tool to make for faster
reloads. The blue Dykem shows where material is being removed, making it
easier to keep track of your work.
Carry Melting
Taking off sharp edges is Carry Gun 101, so I used a file to bevel the front of the cylinder. Unlike the factory bevels on the front of the frame, which appear to have been gnawed in place by a particularly methodical gerbil, such things should look like the gun grew that way. So after filing, I softened the lines of the new bevels with a Scotchbrite wheel. For those who choke at the $60 or so for the 3M wheel, sandpaper backed by a file will remove the fine striations left by the file, but the Scotchbrite does leave an excellent finish. I also took the sharp corners off the front of the barrel, the cylinder latch, the frame and anywhere else I could find them.
The Brownells chamfering tool comes with a pilot, cutter and handle.
You could do the same thing with a fine-cut file, but the tool is much
faster and will provide more consistent results. Jeremy still finished
the cuts with sandpaper backed by a hardwood dowel.
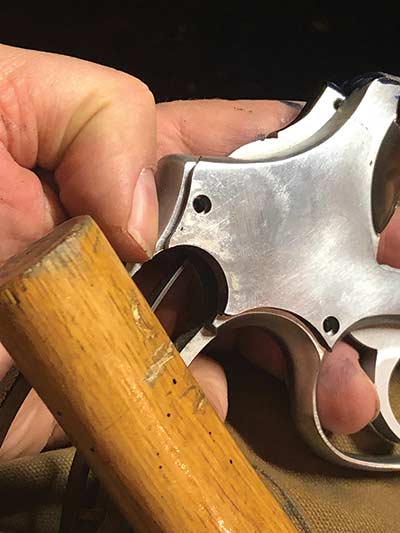
To remove the sideplate, take the screws out and tap the frame with a
wooden handle. The sideplate will slowly move upward from the frame.
Do not pry the sideplate: There’s a mounting tab on the upper right corner
that is not visible with the plate installed and is often damaged by careless disassembly.
Chamfering
Chamfering the charge holes in the cylinder is an excellent way to speed reloads. Over-chamfering the ejector star is a great way to have failures to eject. With this in mind, I very gently broke the corners on the ejector star using a chamfering tool from Brownells and removed the star before cutting a deeper bevel on each chamber. To track how much I was cutting, I applied Dykem marking fluid to the chamber mouths before cutting.
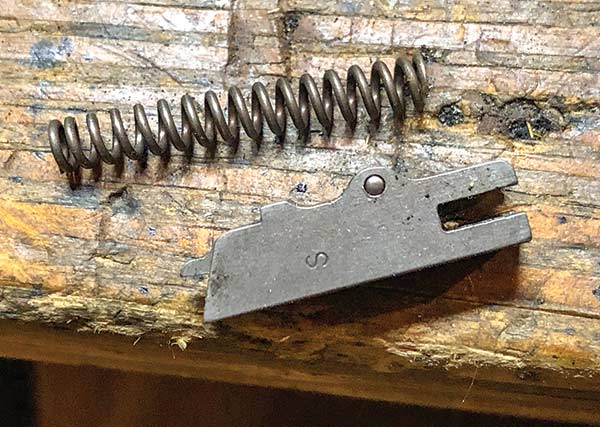
The rebound slide and its spring can benefit from very light polishing to
help them slide more smoothly. Jeremy lightly dressed the sharp corners
with a file, then used fine sandpaper back with a file to smooth the sides
and bottom and rolled it up to polish the inside where the spring rides.
The spring took a trip to the buffing wheel so it would slide smoothly in its hole.
Internals
Now it’s time to get inside. After removing the remaining two sideplate screws, tap the frame with the wooden handle — not the head — of a mallet or handle. After a couple of whacks, the sideplate will start to lift off the frame. Do not pry the sideplate. It has a tab at the upper right that fits into the frame, and it is really easy to bugger it up. With the sideplate off, you enter the world where angels fear to tread.
Every gun benefits from having a good trigger. The long double-action pull of revolvers can make them particularly hard to shoot, making it even more important on a sixgun. Unfortunately, there are significant risks in attempting revolver action work. Reducing spring tension by cutting coils off springs or backing off the strain screw that compresses the mainspring can result in light firing pin hits. The hammer and trigger in Smith revolvers are case-hardened, which hardens the surface only, and if you stone those parts as you would on a 1911 trigger job, you can cut through to the softer metal beneath and get a trigger pull that quickly becomes unsafe. Not to mention, parts interactions and timing in a revolver are very complex, and you can easily damage things beyond repair. All I did inside the mechanism was minor work that reduced friction to make the pull somewhat smoother. If you want a revolver trigger job, take it to a professional.
Action work on this gun consisted solely of reducing friction. Adding
Dykem to the cylinder latch revealed the hammer was rubbing on
its uneven surface.
Some 600-grit sandpaper wrapped around a round file helped remove
these tool marks from the recess cuts that lead to the cylinder notches.
Cooling Hot Spots
The first hot spot I found was the inside of the cylinder release. By applying Dykem and cycling the action several times, I found inconsistent rub marks that showed where the hammer was rubbing on the rough surface inside the latch. Using increasingly finer sandpaper (I stopped with 2,000 grit) backed by a file, followed by a brief trip to the buffing wheel, I was able to remove the roughness. Similarly, I broke the sharp corners of the rebound slide with a fine file and used backed sandpaper to polish the sides and spring channel inside of the slide, then polished the spring itself against the buffing wheel. On both parts, rather than going for the sort of flawless mirror finish you’d want on the outside of the gun, which would have required removal of enough material to change the parts’ dimensions, I focused on having a smooth bearing surface.
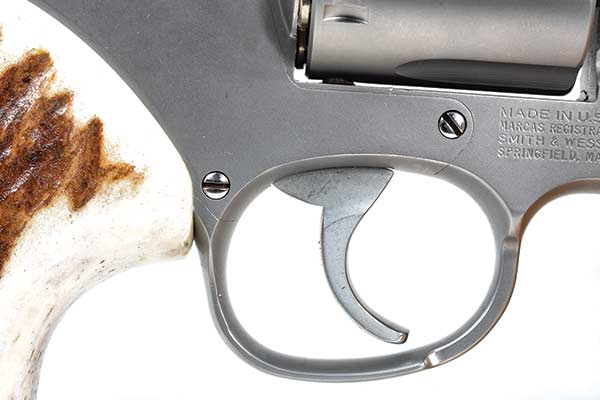
I also lightly polished the recess leading into each notch on the cylinder and the cylinder stop. The face of the trigger, however, got the complete polish treatment, helping it slide more easily across the trigger finger, and I took the sharp corners off the bottom as well.
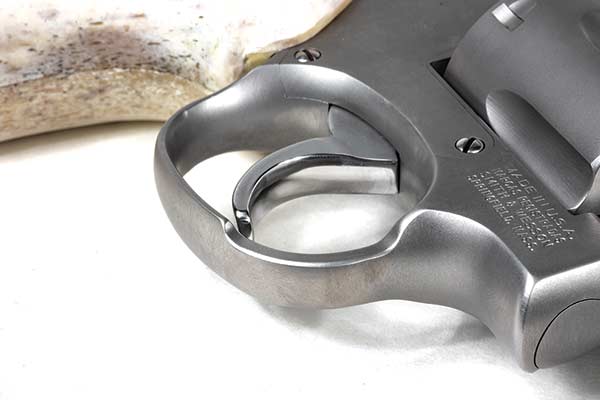
The narrowed trigger guard after bead blasting and reassembly. Also,
note the polished trigger face, from which the sharp lower corners were removed.
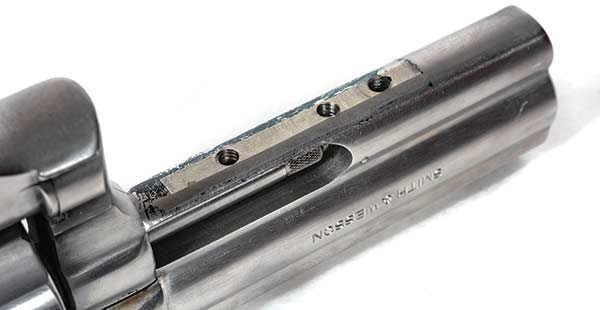
An old-school gunfighter's trick is narrowing trigger guards to get faster
access to the trigger. It can be done several different ways, but Nonte’s
Pistolsmithing suggests using a round file to cut both ends of the recess
and then removing the material between them. Jeremy marked the area to
be cut by measuring the amount to be removed with a dial caliper and then
scribing that dimension through a coat of Dykem.
Once the recess had been cut, Jeremy removed the file marks
with backed sandpaper and beveled the newly square edges.
Trigger Guard Profiling
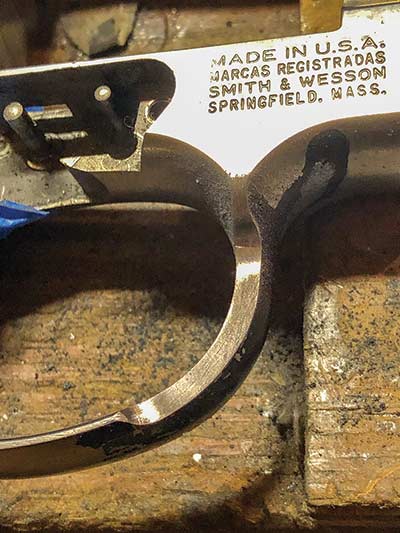
Cutting off trigger guards is an old-school gunfighter modification that goes back to the Old West and has been done on single actions, 1911s and DA revolvers like the famous Fitz Specials. It’s also incredibly dangerous, and there’s a risk an impact can bend the remaining stem of the guard behind the trigger, locking the gun completely. However, narrowing the guard, either on both or one side, is a safer way to give slightly faster access to the trigger. It appears on ASP and Devel autopistols and in the writing of many of the famous sixgunners. While I’ve done it on other guns with either a Dremel or a milling machine, on the 681, I followed the instructions in Nonte’s Pistolsmithing book. After applying Dykem and using a dial caliper to scribe the line I wanted to cut to, I used a round file (think a coarse version of a chainsaw file) to cut a deep scallop at either end of the cut and removed the material between them with a sharp Swiss pillar file. Once done, I smoothed the new flat with sandpaper, wrapping it around an oak dowel to cut into the curved ends of the new flat and beveled the sharp corners I’d just created.
The stag grips were made and fit at Tyler Gun Works. The smooth
grooves found in antler grips give added purchase on the gun without
the sharp checkering, which can be rough on the hands and any
part of the body it’s worn against.
Selective polish is a subtle, attractive way to increase a pistol’s aesthetics.
eremy used a fine file to take any burrs off the screw heads and then
clamped them in the drill chuck. Spinning the heads against 600-grit
sandpaper, followed by 2,000 grit and the buffing wheel, made quick work of things.
After bead blasting, it’s critical to get all the media out of whatever
parts you’ve blasted. Jeremy used compressed air to blow off the parts,
paying close attention to holes and recesses, then ran them through
the solvent tank and let them dry overnight.
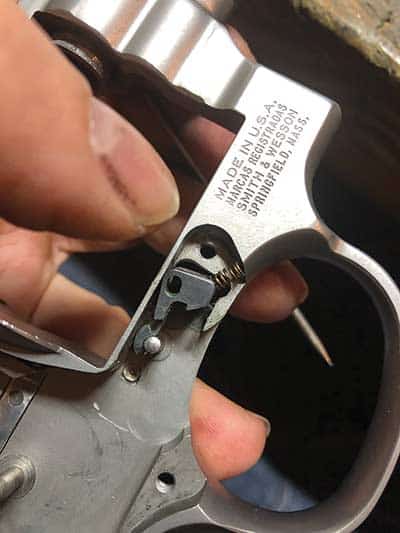
Hammer Spur Work
I had already removed the hammer spur to make the gun more snag-free and eliminate the dangerous temptation to cock it in a defensive situation. There are times on the range, however, when it’s helpful to be able to shoot single action, so I decided to add serrations across the top to make it a little easier to cock the remaining stub. Even a sharp file skitters right off the unyielding case-hardening, so it was very difficult to make headway with the 25 LPI checkering file I used to lay out the lines. Since the teeth barely scratched the surface, it was difficult to create a cut so I could index the next set of lines. When checkering, you normally make a pass, then another, getting the lines deeper and then “step” the file teeth over a row or two to start the next lines. Instead, once I had something approaching a groove cut, I used a coarser triangle file to cut through the case-hardening and bring the serrations to depth, going back over them with the checkering file to get a consistent depth. Neither side is flawless, and one is better than the other, but it did create enough texture to make cocking the hammer possible but still not tempting.
The gun was bead blasted and parts of each component that did
not need to be refinished were masked with painter’s tape before
going into the blast cabinet.
The serrated and bobber hammer makes it possible to cock the gun,
but not tempting.
The cylinder stop is one of the first parts to go back in. As with all the
other parts, Jeremy used a light application of grease rather than oil to
lubricate it since grease doesn’t run out the way oil does.

Hard to get out and harder to get in, the rebound slide needs to be
installed, so the frame-mounted pin holds the spring inside the slide.
The spring has to be compressed while the slide is pivoted inward,
and that’s the hard part.
Brownells sells a tool for assembling the rebound slide, and it’s on
Jeremy’s list after this project. In the moment, he made do by grinding
the side of a cleaning rod to create enough clearance for the frame-mounted
pin to capture the spring while the unmodified part of the rod compressed it.
Note the matted frame top for aesthetics. With a hand-applied texturing
process, matting produces an attractive textured finish without being abrasive.
Final Steps
I matted the backstrap for texture and the top of the receiver for purely cosmetic purposes. A hand-applied texturing process, matting is frequently seen on Armand Swenson’s custom 1911s. Swenson taught the technique to Wayne Novak — whose 1911s and Hi-Powers it frequently appears on — who taught me.
Once all the hand work was done, I chose to bead blast the gun to get an even satin finish and shipped the frame and sideplate to Tyler Gun Works for grip fitting. I thought they’d be a good fit when I saw Tyler’s new stag grips on an N-Frame during a recent trip to Gunsite. They provide a classic touch on a sixgun with a bit of gunfighter flair; the “bark” on antler grips gives added purchase over smooth grips without the abrasion of sharp checkering, which can be painful in recoil or when worn closely against the skin.