Dusty's 1911
Can A Novice Build A 1911 From
Nighthawk Custom Parts?
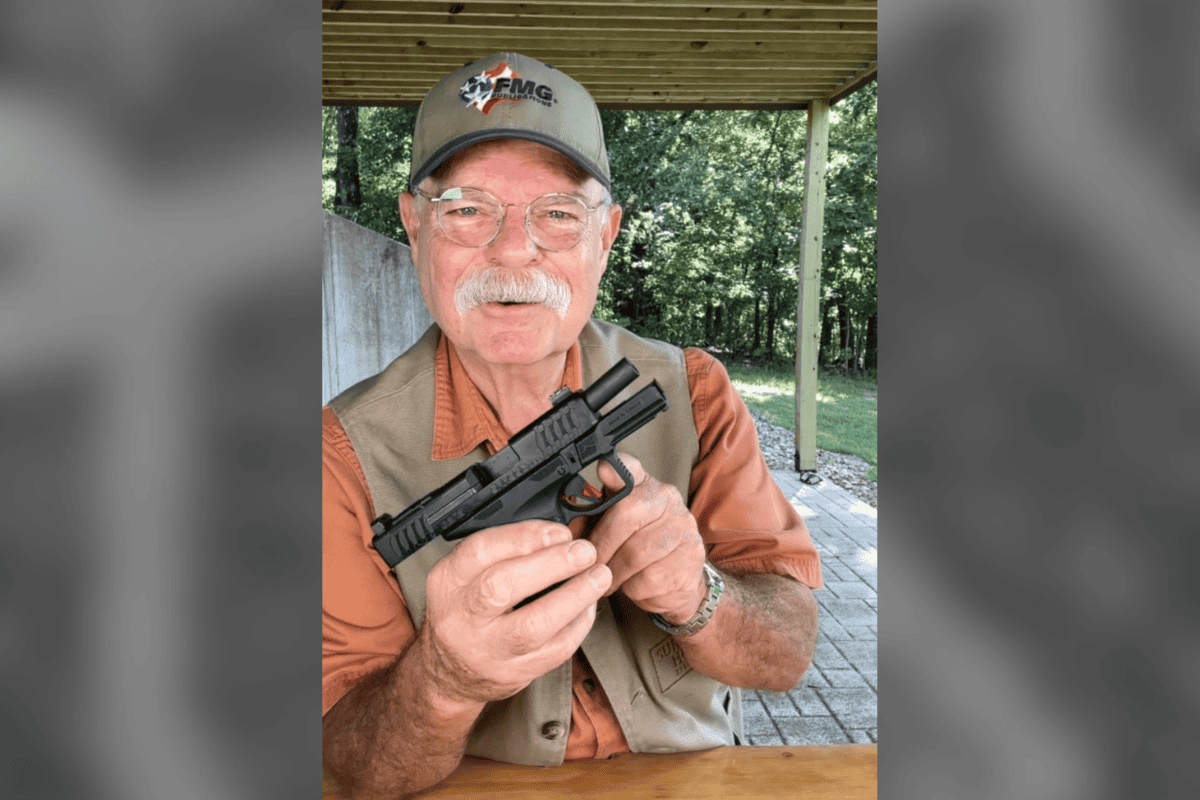
Test fire day and Dusty is all smiles. This is a pretty typical 25-yard group that day, about 1" — if we
don’t count the flyer! At this point, Dusty tweaked a few things like the trigger pull and sights, then
sent the gun off to Nighthawk for the application of their Black Nitride finish.
I think you’re there, Dusty. I think you can do it.” I was talking to my dear friend, Dustin Housel, “Dusty” to everyone, about a year ago. We were talking about trying to build a “really nice 1911” as he described it, not just a shooter. I had been mentoring him some — with plenty of help from “real” pistolsmiths — helping him build his gunsmithing skills, concentrating on 1911 work. At the time, he had a couple of heavily supervised builds under his belt, starting with boxes of un-fitted parts, and had caught on fast — and he has great tool skills.
A two-tour of duty vet (both sand boxes) and in his very early 30’s, Dusty is a seasoned electrician-supervisor and used to both working hard, and using tools. I had met Dusty almost eight years prior when he spotted me at a Joplin gunshow.
“Excuse me, sir,” he said. “Are you the editor of American Handgunner?”
I had only been in Joplin a short time, and was surprised as I looked up at the tall young fellow. “Sure,” I said, putting my hand out.
“I thought it was you,” he said smiling. “I read your magazine all the time and was hoping I’d bump into you some day after I saw in the magazine you had moved here,” he said. We exchanged a few pleasantries, and that was that.
Two or three years later I was having some electrical work done in my shop and the fellow doing the work brought Dusty along one day to help with a sticky bit of wiring. Dusty saw me and said, “Hey, remember me from the gun show?” He was smiling broadly as he shook my hand.
I did indeed remember him and our friendship quickly flourished. Dusty is “one of us” and, simply put, is a “gun-guy” at every level and a sponge when it comes to learning. I soon had him over to the dark side, shooting revolvers, and learned he had a strong interest in learning how to fix and modify guns. I helped him through some basic “fix my broken .22” jobs for friends, and, well — one thing led to another as generally happens in such cases.
1911 Classes
I’d been hosting 1911 build classes at my house for a few years. Bill Laughridge of the Cylinder & Slide shop would come over and for a solid week he’d teach, while six or seven “students” would build guns from un-fitted parts kits on temporary benches in my garage. During the last couple of those classes (which I took too) I invited Dusty over to sort of sit at my elbow, observe — and get his hands dirty.
To say he took to it is one of the great understatements I’ve heard. He pummeled me with questions, and I saw the glint in his eye. I helped him scrape together enough parts to start his own first builds. Soon, most of my 1911 tools were living in Dusty’s tiny basement shop. His questions got more sophisticated, his work more polished and I soon found his knowledge met mine, then raced past it. I found myself struggling to even understand what he was asking me, much less give him an answer! In all honesty, I enjoyed it immensely, and to watch him surpass me and continue to grow has been a great pleasure.
After those first builds, I saw he could think on his own and figure out the nuances of a complicated, careful build. It’s so much more than just filing, polishing and whacking away with a dead-blow hammer while lapping compound splats all over the place. Dusty’s questions and comments about the complexities of the fire-control group, slide-to-frame fitting, trigger issues, fitting grip safeties and more, showed me, like anyone learning a new skill, he appreciated the concept of the more you know, the more you realize you don’t know.
He was anxious to fill in those blanks.
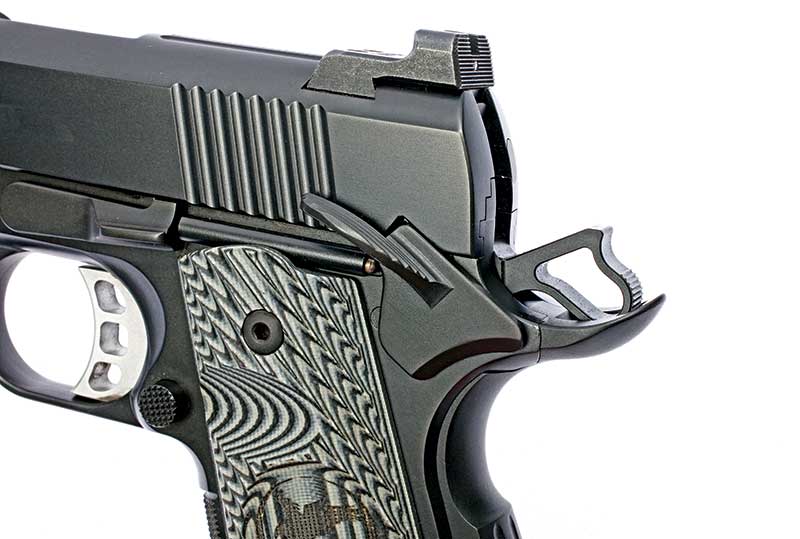
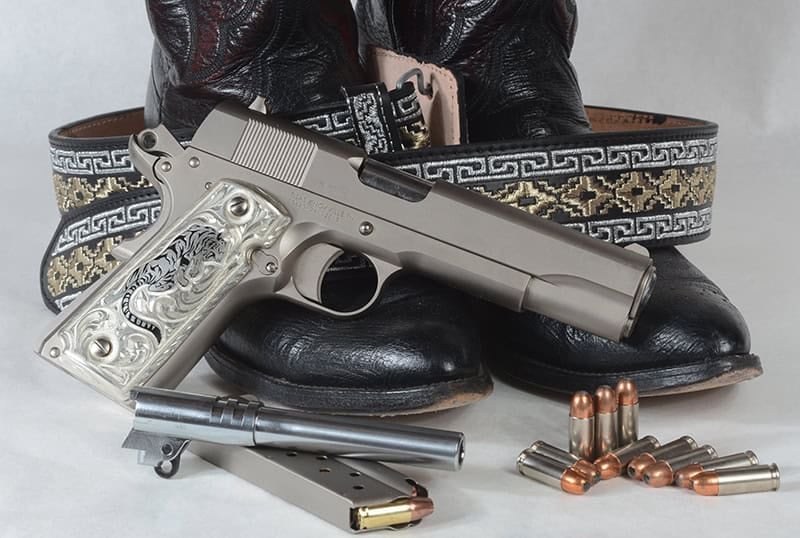
It’s a far cry from the tool-marked, unfitted parts he was first confronted with, but Dusty’s
hand-work and fast learning curve helped him to create a personal-best for him. Everything
looks as if it belongs where it is, and the fit, finish — Nighthawk’s Black Nitride — and final
function is spot-on.
Nighthawk Custom
Travis, sales and marketing and PR guru for Nighthawk Custom, got aboard immediately when I pitched him my idea.
“My friend Dusty, who I’ve told you about, wants to build a really nice 1911, wants to really stretch his knowledge and skills,” I told Travis. “I thought it would be interesting to have him do it with 100 percent Nighthawk parts. This way he’s not doing the ‘build a gun from bits and pieces from all over’ thing, and we could explore just how important this might be.”
Plus, Nighthawk is just South of us in N/W Arkansas so we could stop by and visit, see the place and open the door, putting faces to names for Dusty. When I told Dusty my idea, he was beside himself. To him, Nighthawk was simply unapproachable to a “regular” guy like him. I told him we’d see if we could crack the door open.
Travis chatted with Mark Stone, Nighthawk’s owner, and we got the go-ahead. I told Dusty — and he just kept grinning. Things moved fast then and Dusty and I paid a visit to Nighthawk, got hooked up with Bob Reeves, one of the senior pistolsmiths there at that time just in case Dusty had any questions. Bob has since moved to a position in charge of special projects, parts and is NHC’s forum rep too.
We left with a box of parts on Dusty’s lap, the grin on his face and the drive back to Joplin in front of us. The frame was shipped to Brandon’s Gun Trading Company here in Joplin for transfer to Dusty, and soon, all the bits were sitting anxiously on Dusty’s workbench.
The game was afoot, as Sherlock Holmes used say to Watson before the start of an adventure.
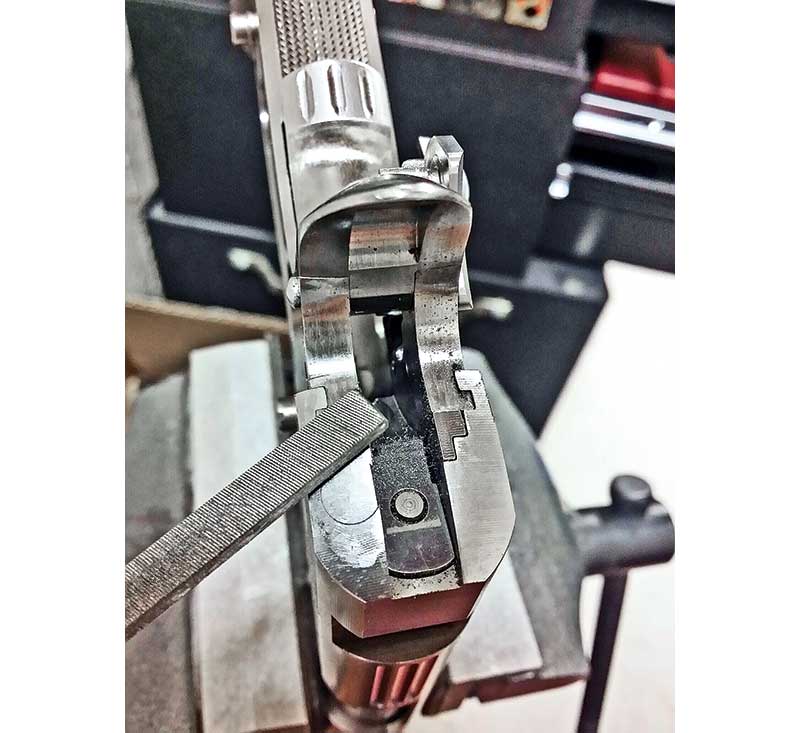
Here, Dusty is using a series of files, then various grit
papers and finally a Dremel polishing wheel to blend,
contour and fit the slide/frame and grip safety.
The Process
Dusty wanted a gun mirroring a “genuine” Nighthawk Falcon, so he used it as a role model. The slide and frame Dusty was working with were unfitted, and so were the various parts. While this isn’t a “how-to” story, Dusty wanted to make sure people realize a build like this isn’t just something you snick-together, like a Lego building block kit.
Virtually nothing fits correctly in the beginning, and every part needs to be examined, measured and fitted in a particular order. All the while you need to keep in mind as you fit one part (say, the grip safety) how it operates will affect other parts, so often as the gun goes together, you need to back-up a step (or two or three!) to re-tune the fit of things so they begin to mesh as a cohesive unit.
There are some “kits” available advertised as almost “drop-in” kits. You buy the gun essentially in a completely disassembled state, then with, as they might say, “minor fitting” you “build” the gun. This is not a gun build, it’s putting together a gun someone else built and you’re just putting some finishing touches on it. There’s nothing wrong with this, and it’s a good way to get your feet wet and build some skills.
But, as Dusty said, “I could never have attempted this Nighthawk project a year ago, I simply didn’t have an adequate grasp of how each part worked with the others, and my tool skills weren’t up to snuff yet. And I definitely could never have done this without Bob Reeves being there for my many text messages and calls, Roy’s advice — and ‘talking me off the ledge’ at times — Nighthawk owner Mark Stone’s willingness to allow this experiment, Travis Noteboom’s open-mindedness, the knowledge I picked up from Bill Laughridge and his ace gunsmith, Jon Tank, Terry Tussey of Tussey Custom and a host of others who were always ready to let me bend their ears when I got stuck.”
A Learning Curve
I was involved in the process from the beginning and I kept hearing Dusty say things like, “These parts are amazing. They’re consistent and I can see why people like to use high quality parts — especially the forged steel ones — during a build.” Dusty would often compare a poor quality part in one hand (a gun show score, maybe) with a forged part in the other, going over them point by point with me. Seeing them made him understand even more why quality-in, means quality-out.
“My experience with my early builds,” said Dusty, “where I used entry-level, price-point parts many times, often had me frustrated as sometimes nothing I did could make them work. It helped my learning curve though as I tried to figure things out! But I often realized the original part was simply not to spec and I had wasted hours trying to fit something which would likely never be made to work perfectly. I spent plenty of time TIG-welding parts to try again!”
This was also Dusty’s first “solo” frame and slide fitting. He used the Everglade’s Ammo Slide Measuring Tool to help determine what needed to be fit. Using a worksheet from Brownells helped him insert measurements and learn what needed to be removed, and from where. Then, according to Dusty, it was “File a bit, stone, test, measure, then file, stone, test again and again until they slipped together. An amazing moment, I have to tell you! And I didn’t use any lapping compound on it at all.”
He moved through the steps, fitting action parts, thumb safety, grip safety, firing pin and firing pin stop, extractor, ejector, trigger, sights (Heinie Ledge Straight 8 model as offered by Nighthawk), barrel and bushing. Even the grip screw bushings needed to be fit, the plunger tube staked on, main spring housing fit, main spring and plunger, magazine release and related parts fit and the slide release fitted and tuned.
Virtually each of these parts work in concert so each needs to not only fit their particular “slot” on the gun, but needs to be tuned to work as a symphony might, so the gun can “play” a tune on-key and in-time as it fires and cycles. Dusty was learning terms like “dwell time” and “off-set” and a host of others.

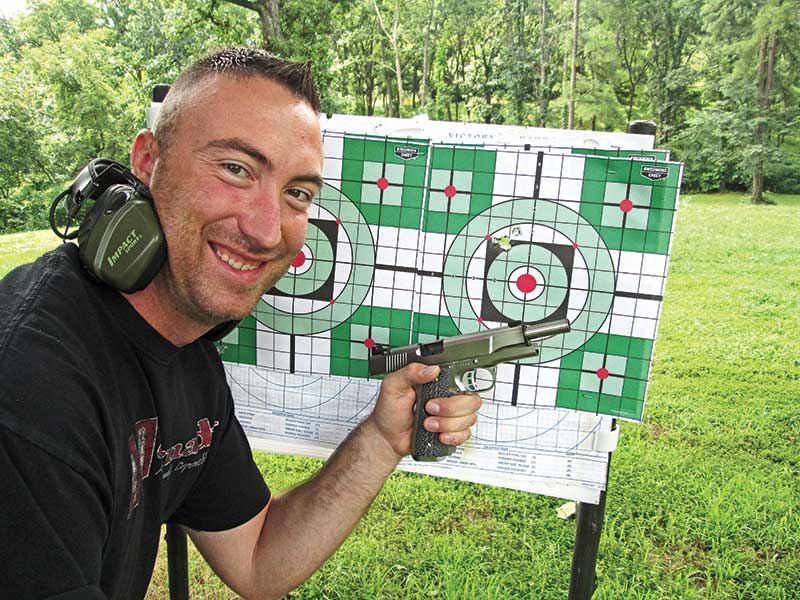
From a box of un-fitted Nighthawk Custom parts, amateur builder Dusty Housel created
this custom 1911 — with a little help from his friends! Read on to see how he did it.
Initial Shooting
A few weeks passed with much back-and-forth between us. Once the gun was mechanically sound, the day came when Dusty came over for the first test-fire. Loading the magazine with one round, he touched it off carefully — the gun fired and the slide locked back on the empty mag. Just like it was supposed to do.
All was good so far.
Next up was two rounds. Things ran fine. The reason you ease into it is in case something is amiss. If the gun goes “full auto” the first time, you’re not risking trying to control a full magazine.
More shooting that day revealed the gun ran fine and shot very well. At 25 yards, groups hovered between 1.75″ down to the magical 1″ number at times. Dusty was pleased, I was pleased, and certainly the Nighthawk Custom crew was pleased. They had been an instrumental part of the process.
Often, a build like this needs some final tweaking once things settle in, and this one was no different. Dusty wanted to work on the trigger a bit, and used a Harrison Design jig to cut it perfectly and finish-fit things a bit more. He also tuned the extractor a tad and re-shaped the inside of the slide release to make it easier to put back into the gun. He also filed the front sight to the correct height for his point of aim.
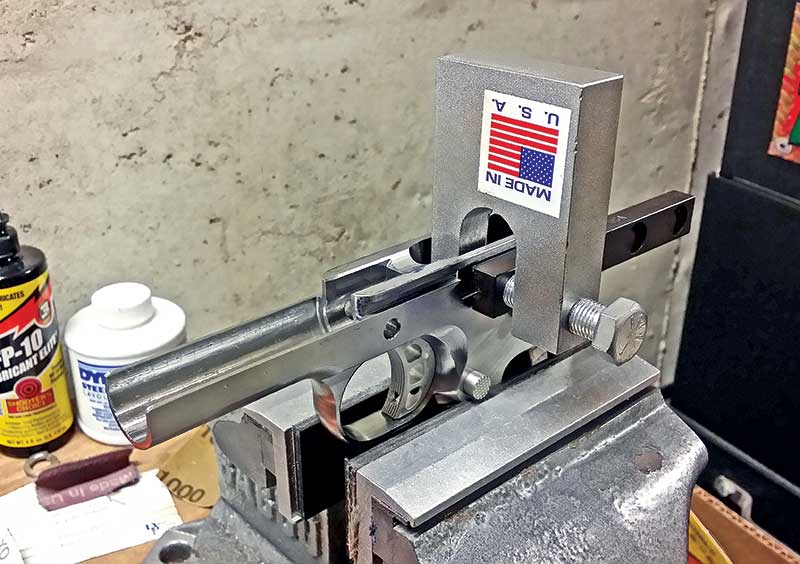
There are various ways to stake the plunger tube to the frame and Dusty used the Gun-Runners
Staking Tool. The plunger tube holds the spring and plunger-tips help to control the thumb safety
and slide lock operation.
The Final Bits
Dusty readily admits the cosmetics took a remarkable amount of time. Fitting the barrel to the slide and the assembly to the frame will often cause the frame to not align perfectly with the rear of the slide. Believe it or not, it’s then time to take a series of files to the area, blending them together — but only once everything is fitted, timed and working correctly.
Now is also the time to break sharp edges, bevel places needing beveled, carefully polish out tool marks using stones, various grits of wet-or-dry papers and even the careful application of a Dremel Tool is in order sometimes. But done carefully, lest you end up with a gouged track running across a frame curve! Don’t ask how Dusty knows this.
Overall, he felt he had over 50+ hours in the build at this point, often stealing an hour here or there since he’s a full-time dad too. He then sent it off for the final finish, Nighthawk’s “Black Nitride” coating, and to get Bob’s final stamp of approval on things. Bob said Dusty had done well and it was obvious he was attentive to detail and had understood the advice given during the build.
You might find it of note a good pistolsmith, experienced in building a custom 1911, can pretty much have a gun shooting — from a box of parts — in eight hours or even less. This doesn’t count final tweaking, cosmetics, final finishing and testing, but it does show how talent and experience definitely pays dividends in a faster build. In all honesty, it’s the only way to be profitable as a custom 1911 builder. A hobbyist or amateur can take weeks on a project, but a “for-profit” builder needs to get guns out the door to stay in business.
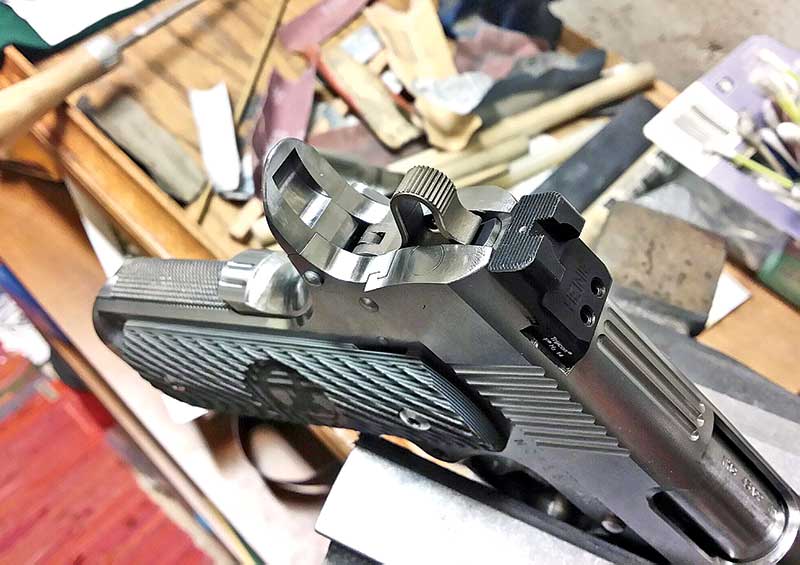
Almost there now — compare it with the “before” photo. Dusty has blended and fitted the lines,
smoothed the surfaces and it’s now ready for the final polishing. This is near the very end of
the build and is done after the huge job of the initial build process. Now you can see why
custom guns can get spendy!
What’d We Learn?
“Lots,” laughed Dusty, when I asked him to sum things up. “Having the quality parts from a single source does wonders since they make sure the parts fit and should play nice together with minor fitting. If you buy parts from a variety of sources — a bit like grocery shopping at six different stores for one basketful — it’s possible to get spec parts, but fitting at each end of the specification chart. So if a sear is at the ‘minimum’ end of spec measurement, and a hammer at the minimum end too, they simply may not be able to make it work correctly.”
Using a “family” of parts from one maker — whoever this might be — often helps to assure, from the beginning, things will work out. They’ve checked them already. Many custom ’smiths experiment with different brands, eventually finding “this” sear and “this” hammer and “this” trigger, etc. will work together. But it can get expensive to go through this process and you can end up with a drawer full of parts you can’t use. Sort of like the box of holsters we all have hiding in the closet.
If you have a hankering to build your own 1911, you need to get help from people who have done it themselves — and not just what you see on forums. Vetted, experienced people are the key here. You need hands-on help, someone who can walk you through the process, showing you how to fit parts, problem-solving with you (problems do crop up during builds), showing you how to use special tools and finally, helping to determine if your gun is safe once it’s completed.
But the end result is confidence building and a real source of pride.
“I did that?” you say in surprise. Yes you did.
After seeing many classes at my home end on Fridays with the smiling faces of the people who had built “their” guns posing as I took photos; believe me, it’s well worth the investment in time, energy and money.
But only if you have the passion to do it — and a willingness to learn.
The only downside I can see? All your friends will now want you to work on their 1911’s and say “Fix ’em up some, would you Dusty? Aw, please?”