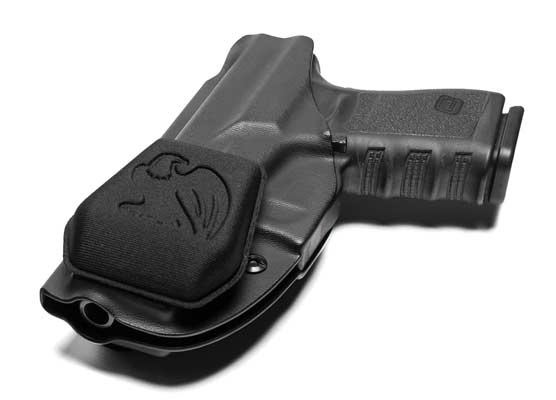
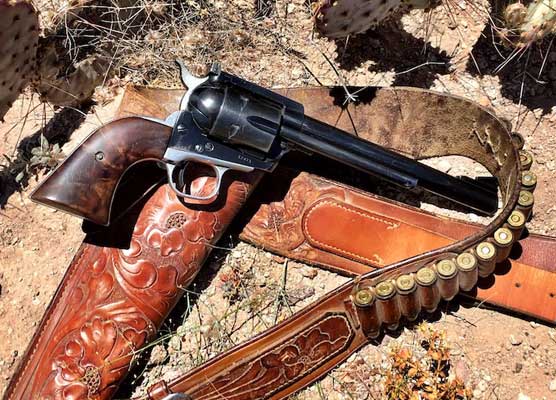
Front Sight Magic?
Replacing The Goop
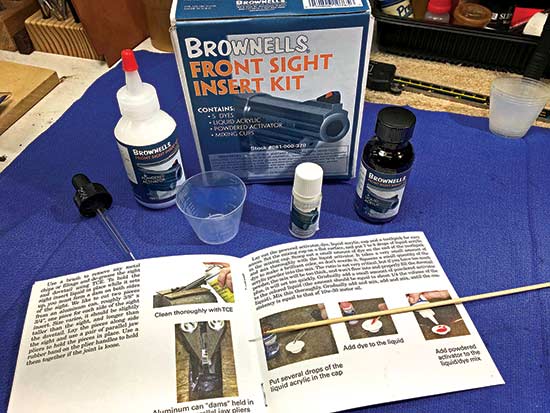
The Brownells Front Sight Insert kit has good instructions and comes with everything you need.
“Uh, hey Roy, can you help me with my gun?” It always starts like that, doesn’t it? “Been there, done that,” you say?
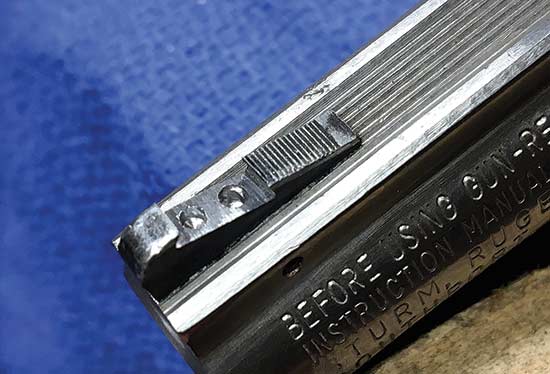
My friend is a seasoned shooter and as such “Kaint’ see that front sight anymore!” He showed me his well-shot Ruger Security Six displaying the Wite-Out correction fluid he’d painted on the front sight.
“Problem is, it’s messy and gets dirty every time I shoot it. ’Sides, the bottle of goop is drying out and I can’t find it anymore.”
Can’t find Wite-Out? Say it’s not so!
I offered to help since I can’t say no to those sorts of fellows. Besides, with the slow extinction of Wite-Out on office store shelves, what’s he to do?
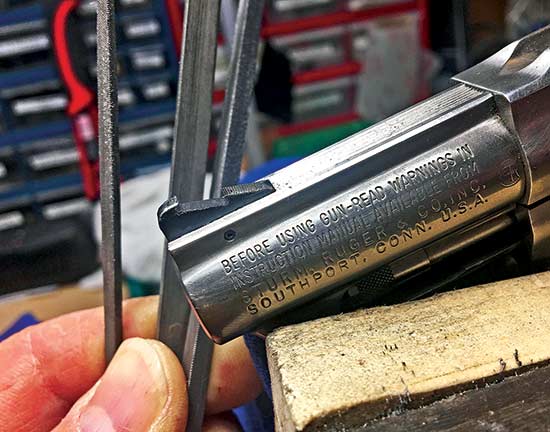
The first step to a “new world of front sight inserts” is to file a dovetail
cut into your front sight. Take your time and do a good job!
Brownells To The Rescue
If you’re thinking of a similar sight change, Brownells — that mecca of all-things for guns — has their kit called, interestingly enough: “Brownells Front Sight Insert Kit.” Which is exactly what I ordered.
It’s simple enough, but like many things having to do with putting files and tools to guns, it’s also easy to mess up. So mind your own tool skills, experience, and derring-do before you tackle a job like this. In a nutshell, you file a sort of dovetail cut into whatever front sight is on your gun. A ramped front is the best, but I suppose you could also do an abbreviated insert on a post sight too just by being creative. The key to the kit is a three part mix of products (and coloring) which ends up hardening in the dovetail you cut.
After cutting the under-cuts in the sides, drill a couple of tiny holes so the
epoxy can grow some roots and hang on. The instructions outline all this.
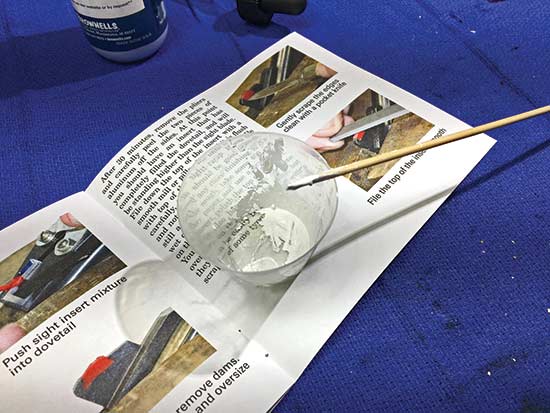
Use the mixing cup supplied and you’ll end up with a motor-oil consistency epoxy.
You add the color you want at this time — I used the white.
It Goes Like This …
Lock your gun-victim in a vise. Get your “really good” sharp small files and cut the dovetail into the sight. Directions in the kit explain it all in detail. Make sure you use a dovetail file or a triangle file to undercut the edges so the epoxy resin stuff can fill the void to help hold it in. You also need to drill two small holes right into the sight cut-out to give the insert a place to sink roots into. I used a good old fashioned hand drill and it worked fine.
Brownells says to use pieces of aluminum can to make tiny dams on either side of the cut to hold the sight material. I used a plastic clamp and an old surgical clamp to hold things together. Keep the set-up level in the vise too, so the liquid epoxy doesn’t run out. Mixing is easy and you should end up with a motor oil thick slurry which you then daub into the cut-out. I used the end of a fat toothpick and a tiny flat blade screwdriver to scoop and press. Allow the mix to build up higher than the top of the sight cut. Admire the mess you’ve made.
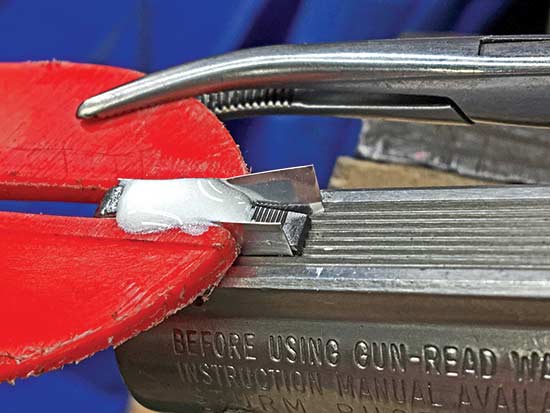
I used aluminum from an old can to build a dam on either side. I found a plastic
clamp I had from model making to hold the dam and an old surgical clamp to hold
things in place. I’m thinking painter’s tape might work for this too. Then build up the
insert into the sight cut, taking care to put plenty in.
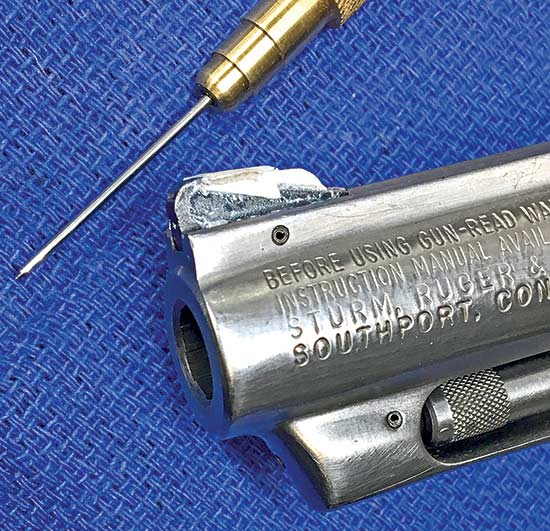
Ta-Da! Once the dam is off you’ll see how the sight material hopefully built up too
high and even spilled out the sides a bit. Use a sharp razor blade to trim things up some,
then a very fine file to square and shape the insert to blend with the sight metal.

Not quite done here but close. Roy serrated the top to better blend with
the sight and so it didn’t glare in full sun. A final clean-up, and a touch of
light oil finished things up nicely. Presto!
Then What?
They say it “kicks” or hardens in 30 minutes or so but I think since my shop was cold it was taking its time. At one hour, I still wasn’t convinced it was time to take things apart so left it overnight. The next day, I removed the dam and ended up with a messy glob showing. That’s actually perfect though, the more the merrier. Some careful work with fine files and a razor blade — to trim it to rough size first — and I ended up with a semi-decent white front sight insert. I put some grooves into it so it didn’t reflect too much sunlight, cold blued the metal bits of the sight I had hit with the file and called it a done deal.
Shep, my friend, pronounced it “A well done job, Roy” as he peered at it, squinting, which doesn’t mean much since he can’t see hardly anything, anyway. “Um’ officially retiring my bottle o’ Wite-Out.”
Hey,” he said, pausing, just as he was going to toss it into my trash can, “you want it, being you’re a writer and all?” I took it, telling him it rendered him paid in full.
The Brownells kit has multiple dyes — white, red, green, yellow, blue and orange — you can add to the basic mix, and you can buy more chemicals as needed. I’d call this an “easy” job if you can run a file. Feel free to practice that cut on another piece of metal first to warm up your skills. With most removable front sights, even if you mess up it’s not an expensive fix, just a pain. There’s plenty in the kit for lots of friends’ guns too, so share the costs. You could use regular two-part epoxy and something to add for color, but this kit makes it easy since it’s all there.
When I first started doing this sort of thing about 45 years ago, we’d find a toothbrush handle in our chosen color, then carefully file a piece of the plastic to fit the sight cut and epoxy it into place. It was lots more work, but I still have a red insert on a Model 29 I did that way in about 1975. Who says old school doesn’t work, eh? For more info: https://americanhandgunner.com/company/brownells-inc//