Sear Spring Savvy
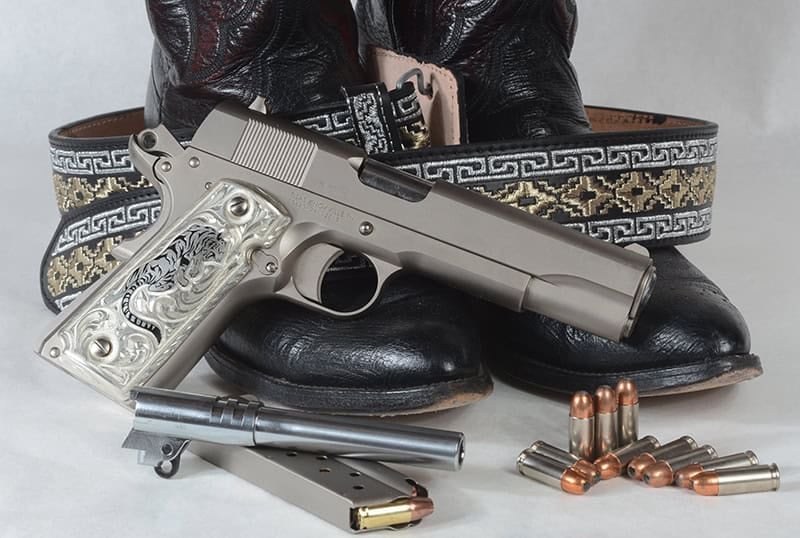
Demystifying The 1911

The main spring housing (hammer spring) captures the sear spring.
Here you can see how the grip safety tine faces rearward.
Gunsmithing content in the magazines always generates some good questions from you all. I recently covered disconnector operation in a 1911 (Insider, M/A 2021) and almost immediately someone asked me to explain the “funny three-tined spring thingy” in the 1911 grip. That’s the sear spring, so hang onto your seat and here we go.
That rascal John Browning was a stickler for making parts that have more than one job to do if possible. The sear spring in a 1911 is a classic example. If you look at it as it’s mounted in the grip, the left tine puts pressure on the sear to keep it engaged with the hammer until it’s “pushed off” by trigger pressure. The center tine applies pressure on the bottom of the disconnector, keeping upward pressure on it. It also forces the trigger bow forward, assuring the trigger returns after being pressed. The right tine is bent “backwards” (toward you) forcing the grip safety outward, dropping the arm of the grip safety, blocking rearward travel of the trigger until the grip safety is pushed in. Presto, that’s four jobs with one spring. Smart guy, eh?
As it is with most things with the 1911, original, high quality stock factory parts work fine. A “Colt” branded spring will likely never give you any trouble. Ditto for other name-brand models from the likes of Cylinder & Slide, Clarks, Wilson, Nighthawk Custom, etc. I’d stay away from the “gun show junk box” springs as you just never know how they were made — old rusty steel beer cans maybe? I’ve “fixed” lots of guns having been “worked on to improve them” and tossed out poorly made sear springs. They often have rough edges, mis-shaped tips and bend angles looking more like a drunken spider’s web than the delicate curves of an original.
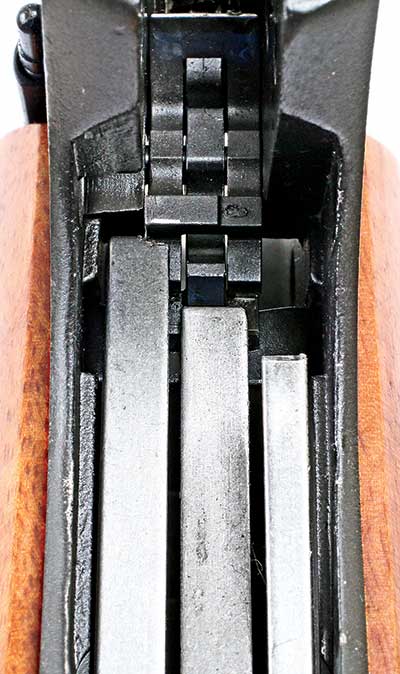
Sear Spring: Left tine handles pressure on the sear, center double double duty
controlling the disconnector and trigger return pressure and the right keeps the
grip safety “out” at rest.
How It Works
It’s pretty straightforward actually. Properly installed it’s held in place by pressure from the mainspring (hammer spring) housing. As the housing slides up into the frame the sear spring flattens some, pressing the tips of the tines against where they belong.
The spring itself should be clean, the edges even and the tips bearing against the gun parts should be smooth, even polished so they move easily. A dab of light grease, or oil, makes sense there.
The left tine handles sear duties. The correct pressure assures solid engagement of the sear and hammer notch, helping to prevent the hammer following the slide down. Too little and the sear may not “catch” the hammer notch and you might find yourself experiencing some “uncontrolled firing” as they say!
The center tine (riding against the disconnector foot and trigger bow) assures the trigger returns after being pressed and also contributes to the weight of the trigger pull. It’s a delicate balance of being heavy enough to assure the trigger returns and “too” heavy causing an excessive trigger pull weight.
The third tine on the right side keeps that grip safety behaving, but a mis-adjusted one can also allow the grip safety to rattle when out. Gently bending the tine’s curve back a bit will usually fix that little quirk neatly. Gently please!
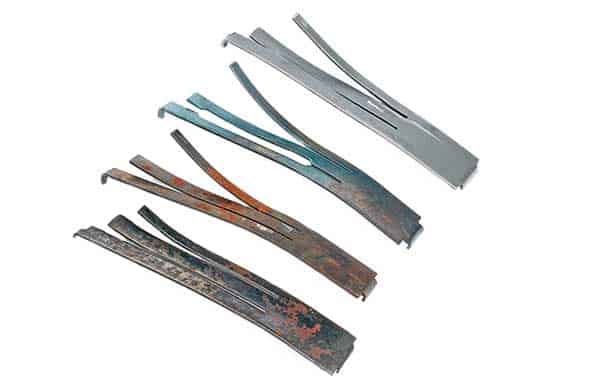
Actual sear springs Roy has taken out of in-use 1911s. Top one is shaped about right.
All seemed to run fine but you can see the differences in tine bends and even designs.
Note rust on a couple — yikes.
Adjustments?
There are actually ways to measure the “weight” of the spring pressure using a trigger pull gauge but it’s a job best left to, as they say, “experienced gunsmiths.” Let’s go over it though so you can wrap your brain around it.
Install the sear spring, trigger, mag catch, disconnector, disconnector/sear pin and mainspring housing. Now you can see the whole shebang looking at it from the rear. Put a trigger pull gauge on the trigger and test the pull. Don’t pull it too far or you’ll start to engage the sear spring tine too. What you’re measuring here is the center (sear/disconnector) tine. it should be around 12 to 14 oz. or so on the gauge so use an accurate one. I like digital ones.
Now add the sear to the parts you’ve installed. Use your trigger pull gauge, pulling enough you engage the left (sear) tine too this time. The combined weight of both tines should be around 26-28 oz. If it isn’t you need to carefully adjust the bend angles of both the center and left tine together or one will be out of sync and might be too hard or too soft to work the part it’s handling. Overbending the springs (like any spring) can break them or worsen things so tiny bends and checking frequently is the trick here.
Clark makes a four-leg sear spring. The center tine has two “fingers” at the top. This way you can adjust pressure on the disconnector and trigger return separately and would have impressed Mr. Browning I suspect.
If you did any of this — and you really shouldn’t have unless you knew what you were up to — do a safety check at the bench. Then when you fire it, just load two or three rounds for a few mags on the odd chance you have one of those exciting “uncontrolled firing” events. If everything works out, then you’ve adjusted the sear spring correctly and safely. If not, you’re likely someone who doesn’t listen to advice and never should have tried to “fix” it to begin with, eh? You know who you are. I’m sure.
If you’d like to see us cover something else (revolvers or autos) let us know at [email protected] and we’ll do our best.
For more info: ClarkCustomGuns.com; Brownells.com, Cylinder-Slide.com; WilsonCombat.com; NighthawkCustom.com