Demystifying The Disconnector
What Is That Dang Thing?
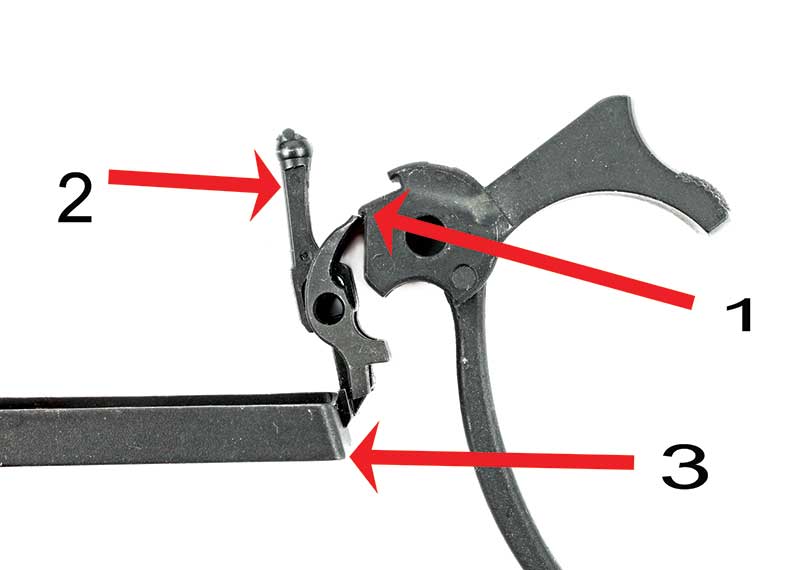
1: Hammer/sear engagement, 2: Disconnector, 3: Trigger bow. The foot of the
disconnector bridges the gap between the trigger bow and the bottom of the sear.
When the trigger is pressed, the movement pushes the sear bottom back, releasing
the top from the hammer sear notch. Boom.
A disconnector in a 1911 is a vertical bit of magic connected to the fire control system (hammer, sear, spring, etc.), moving up and down depending upon what’s going on. The whole idea behind it is to make sure your 1911 only fires one shot with each trigger pull. And no … if you remove the disconnector you don’t get a “machine gun” 1911. The gun won’t fire, as a matter of fact. How’s that again, you say?
Yup. The disconnector, as Mr. Browning called it, is actually more of a “connector” in it bridges the gap between the rear of the trigger bow and the foot of the sear. Without it lurking there, the back of the trigger bow wouldn’t be able to move the sear when you pressed the trigger, allowing the hammer to fall. Confused? Don’t be alarmed. It is confusing — but let’s un-confuse things a bit. Make sure to make liberal use of the photos and go to the link at the end to see a very cool computer animated video of the workings of all this.
If you ask someone, “How do you start a car?” they might say, “Oh, I insert the key and turn it, then the engine starts.” But if you ask them to explain how the engine starts, the mumbling and stuttering likely begins. “Um, uh … well … um, you know … the electricity goes to the engine and it turns something and then the pistons go, and, um … uh, it runs.”
Right.
A 1911 is a bit like that. “How do you fire a 1911?” Easy peasy — load the gun, point it at the target and press the trigger — it fires. But why? But how? Aye — that’s the rub.

After firing the disconnector is pushed down (by a cam on the underside of the slide),
allowing the trigger bow to clear the bottom of the sear. This frees it to snap back and
engage the hammer sear notch as the hammer is cocked by the slide during cycling.
This “disconnect” prevents the gun from firing more than once per trigger press. Note gap at “A.”
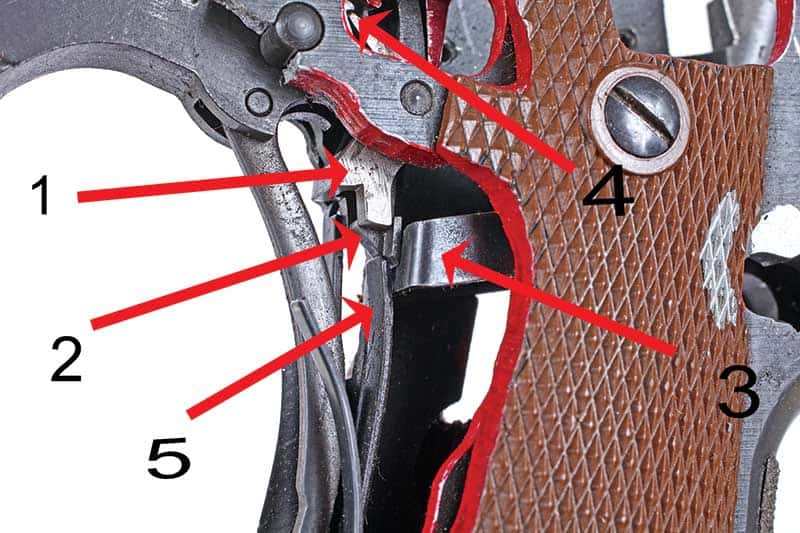
1: Sear, 2: Disconnector, 3: Trigger bow, 4: Sear in hammer sear notch and
5: Center sear spring “finger” applying force to disconnector and trigger bow.
You can see here how pressing the trigger will push the foot of the sear back,
allowing the top to come free of the hammer sear notch. Ta-Da!
Springs & Safeties
We won’t get into too much here, but touching on some basics helps to build the foundation. Let’s say we’ve got a 1911 with a loaded chamber, hammer cocked, and thumb safety on. To make it go bang, you need to move the thumb safety down. That action moves a cam on the safety out of the way allowing the sear to move when the trigger is pressed. Gripping the gun moves a lever attached to the inside/front of the grip safety out of the way of the back of the trigger bow, allowing that bow to move back when the trigger is pressed. So far, so good.
At this point the top of the sear is engaged in a notch on the front of the hammer. To fire the gun, we need to get the sear to move forward out of that notch, allowing the hammer to fall thanks to the hammer spring in the lower grip area. As the trigger is pressed, the very back of the “bow” presses against the lower “foot” of the disconnector (which is sitting neatly between the bottom of the sear and the bow). The disconnector is under spring pressure from the middle finger of the sear spring, pushing it up.
As the trigger is pressed, the disconnector foot pushes against the sear, moving it backward causing it to rotate on a pin, moving the top of the sear out (forward) and out of the hammer “sear” notch. At some point the hammer falls. A “gritty” trigger is often the movement of the sear grinding its way out of that notch under pressure from the hammer spring.
The gun fires and as the slide moves back under recoil, it cams the disconnector down (the top “nub” of the disconnector protrudes from the frame top), moving its “foot” from in-between the bottom of the sear and the trigger bow.
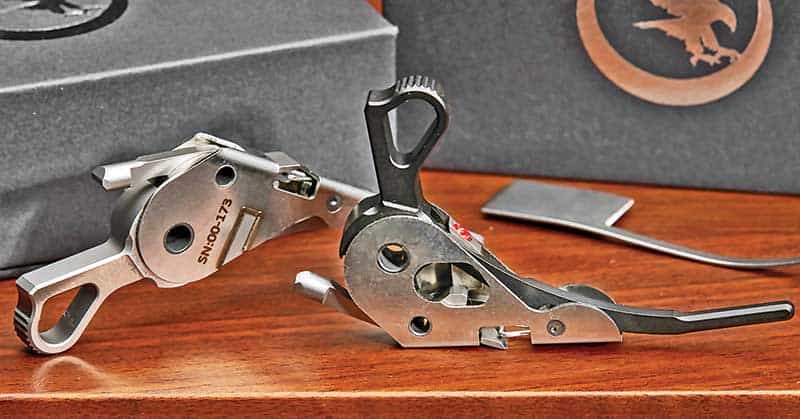
All of this can be greatly simplified by using a drop-in sear/hammer/disconnector/spring
from Nighthawk Custom. It’s supplied with a single finger sear spring to manage running
the grip safety. This set-up keeps everything perfectly aligned and works great.
A Fun Test
Take your 1911 apart and when you put it back together, don’t put the thumb safety in. Install the hammer spring, sear spring, etc. and you can sort of hold the grip safety in place if you like to watch things. Now you can actually see the trigger bow, disconnector and sear bottom as they move. Just re-read all these 10 times and look at the pics, watch the animation video and look at your own gun and you’ll get it eventually.
Take the slide off your fully assembled frame and cock the hammer. Now press the trigger normally (helping the hammer down slowly with your other thumb). Then, keeping the trigger back, try to cock the hammer. Ha! It won’t, right? Now press the disconnector top (the nub sticking out of the top of the frame) using a plastic or punch or tool of some sort and you’ll hear things go “click.” That’s the disconnector moving down, getting out of the way of the bottom of the sear — “disconnecting” — allowing it to snap forward so the top can engage the hammer notch. Now cock the hammer and presto, the sear engages.
If the slide were on, the little cut-out on the underside allows the top nub of the disconnector to be “up” so you can move the sear with the trigger when the slide is closed. As the slide moves back, it pushes the nub down — just like you did — moving the bottom of the disconnector so the sear can engage. That pesky Browning fellow was pretty smart, unlike we mere mortals.
Since you’re asking, yes, there are a couple of quick safety checks you should do too. Unload your gun, cock the hammer and put the thumb safety on. Now press the trigger normally. Now, hold the hammer area close to your best ear and slowly “cock” the hammer spur again. If you hear a small “click” that means the sear had moved slightly when you pressed the trigger even though the safety was on. The click is the sear re-setting in the hammer notch. That’s a bad thing and you need your safety looked at. You can also do the same test but after pulling the trigger, click the safety off. If the hammer falls that’s even worse! The cam on the safety needs careful fitting and will wear so perform this test.
The other one is just as simple. Unload gun, cock the hammer, thumb safety off, then, without pressing the grip safety in, try to press the trigger. The hammer should not fall, meaning the grip safety is doing its job. If you can press the trigger and the hammer will fall, get it looked at pronto.
Well, enough for now. This was a bit technical, I know, but it’s also fun to better understand what’s going on inside the guts. If there’s a particular thing you’d like to learn more about, write us here at [email protected] and I’ll get right on it!
For more info: NighthawkCustom.com.Go here to see the simple gif showing the sear/disconnector at work: m1911.org/images/searanim.gif
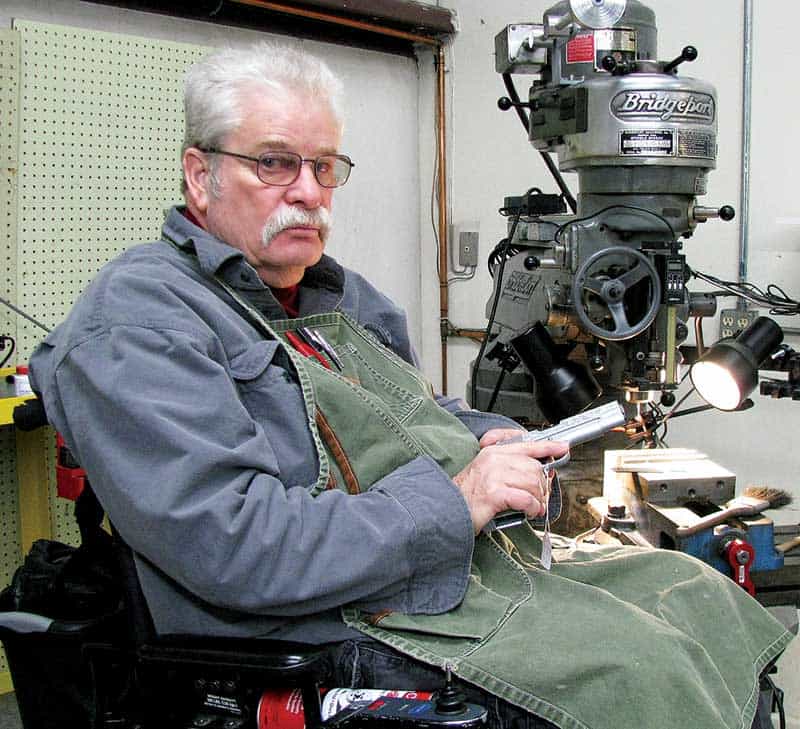
Terry Tussey Passes
In November of 2020, I lost a dear friend of almost 40 years when Terry Tussey of Tussey Custom passed away. Terry was a robust, fit, outgoing man’s-man for most of our friendship, but about 15 years ago he suffered a mountain biking accident leaving him wheelchair bound. Since he had the use of his arms and hands, Terry dove right back to work customizing 1911s, Hi-Powers and revolvers of all sorts. Terry was a source of constant innovation and ideas during his gunsmithing career and many factory guns today wear his ideas. I’m proud to say he appeared in our pages many times over the years and each time brought reader mail asking for more. Among his firsts, Terry built the first Damascus slide 1911, and his “Carry Comp” broke new ground decades ago. His customization of the Officer’s ACP and Mustangs from Colt built a huge following and I still carry one of the very first he did for anyone — my first real “project” with him.
Terry used to call me and, with a voice like a long-suffering mother, would say, “You know, Your Editorship (sigh) — and I use that term loosely — (sigh) if you had any sense at all, you’d have known what you wrote about that gun in your last issue was completely wrong. Let me explain …” Then I’d get a life-lesson in how guns worked, what needed doing to them, what Browning was thinking when he designed it that way … and so much more.