Timing Is Everything
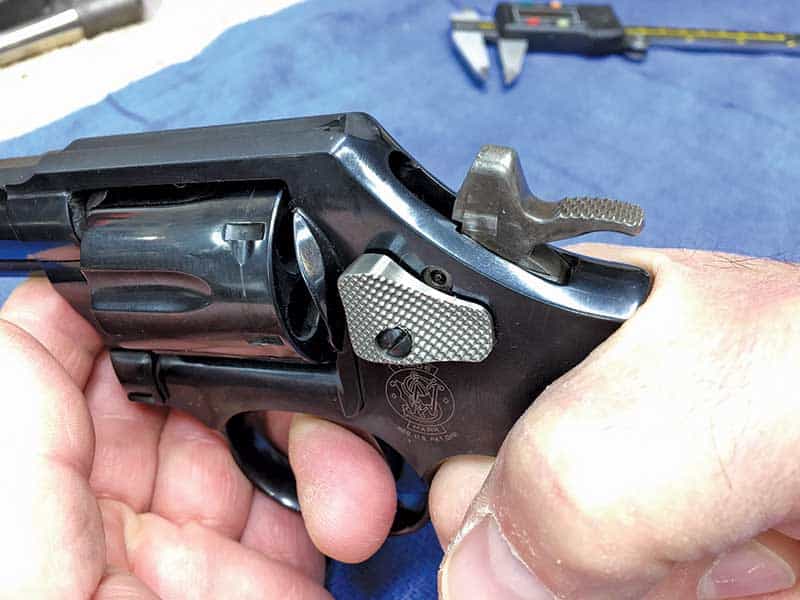
Once the gun is clear and safe, a slow DA trigger pull will help you to see if a gun
is out of time, or, as S&W calls it, failing to “Carry Up.”
Reader Alex Vrenios sent us a note asking to explain revolver “timing,” as he recently had a problem with one of his revolvers having to do with that very topic. He said looking at the diagrams didn’t explain how a revolver “times” or how to identify an issue and then repair it. You’re in luck, Alex, as I just did some repair work for two out-of-time revolvers, a 120 year old S&W Hand Ejector and a modern S&W Model 10.
“Timing” is a general term for the process occurring when you cock the hammer or pull the trigger in double action mode on a revolver. Many things have to happen at just the right micro-instant in order for this quite complicated series of events to poke along smoothly. A S&W K-Frame has about 58 parts, give or take a few depending on the model, including all the pins and small bits like springs and such. Of those, about 20 or so are directly involved with making sure the cylinder lines up correctly with the forcing cone when the gun fires. Or, in other words, they’re involved in “timing” the revolver.
In DA mode, you start the trigger pull which — due to a minor miracle of cams, springs and “timing” — starts to move the “cylinder stop” out of the notch on the cylinder, preparing it to be able to rotate. During this trigger movement, it presses on the DA sear — a spring-activated lever on the hammer front — which begins to cock the hammer. As the trigger is pressed further, the “hand” or “pawl” — attached to the rear of the trigger — moves upward and forward (due to spring pressure) beginning to poke through a “window” in the frame on the breech face.
At the rear of the cylinder there is the extractor (the star-like thing you use to kick the empties out by hitting the ejector rod). The extractor does double duty. It not only lifts the empty cases out, but on the face is a very complicated “ratchet” set. As the hand is pressed further out and up through that window by the trigger pull, the very tip (on the left side, looking forward toward the muzzle) pushes against a cog on that ratchet. As the trigger is pulled further the hand rotates the cylinder counter-clockwise (in a S&W). In the meantime the cylinder stop has slipped off the cam on the front of the trigger and is now pressed against the cylinder by spring pressure, waiting anxiously to drop into the locking notch on the next chamber. That’s why you get a fine “drag” line on many cylinders.
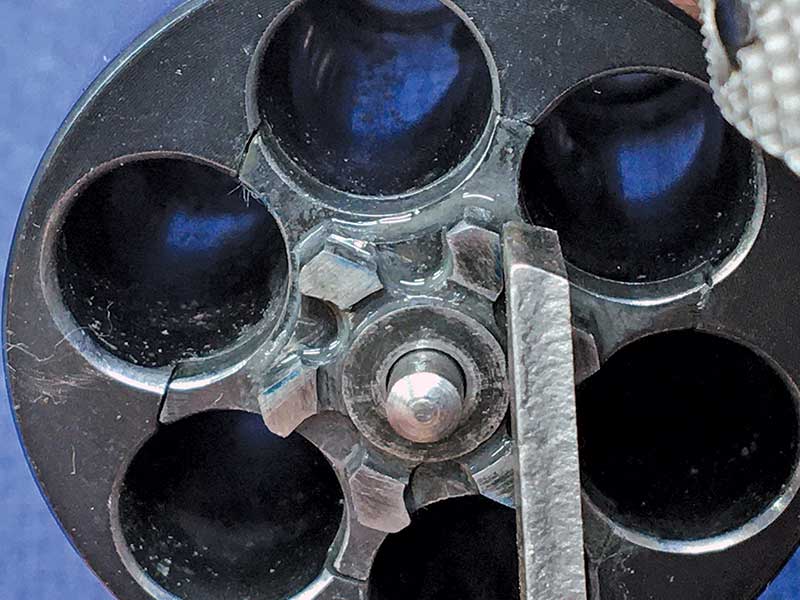
The “hand” (vertical metal piece) turns the cylinder by pushing on the ratchet cogs, finally
bearing against the side of one cog. By then, the cylinder “stop” will have snicked into the
proper notch in the cylinder, locking things in place.
Things Get Exciting
nd of the press, the hand extends further and the left side bears on the right side of one of those cogs on the ratchet. This is all “timed” to have just nudged the next chamber in line with the forcing cone (where the bullet enters the barrel). A micro-second prior to this, the cylinder stop has clicked into the next notch, locking things in place. The forcing cone is just that, a cone which sort of channels a bullet into the rifled portion of the barrel. It’s perfectly natural for a S&W cylinder to have a bit of “slop” (rotational play) at this lock-up. If it was 100 percent rigid it would soon wear and would be difficult to keep in “time.”
Colts use essentially the same process but as the trigger is pulled all the way it also forces the hand up hard, pressing against that cog and “forcing” the cylinder to hold still. Theoretically this makes a 100 percent solid lock-up (indeed, a well-timed Colt cylinder doesn’t turn when locked like that), but alas … it also requires a huge amount of careful hand work and delicate part alignment to do it. And that all wears out. S&W sort of fudges a bit on that fit, but it’s been proven it’s not critical to accuracy so I’m perfectly happy with the slight play in a S&W cylinder at lock-up.
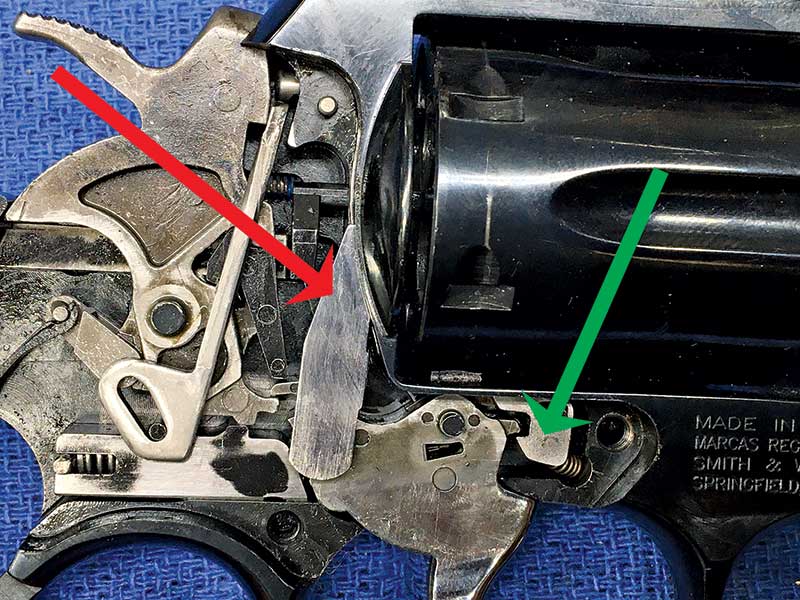
The “Hand” or “pawl” (red arrow) and the cylinder “stop” (green arrow) work together to
move and lock the cylinder in place correcting “timing” so they both work together. When
these wear, things can get “out of time.” Gun is a modern S&W Model 10.
Things Can Go Wrong
When timing gets out of whack the fit of the parts changes. As the ratchet cogs wear — or the hand or the trigger or the cylinder stop and other things — that delicate set of events can get out of “time.” The cylinder might start to turn before the stop gets withdrawn. Or the hand will push the cylinder to align the next chamber but the “stop” won’t snick into the right bolt notch in the cylinder. Maybe the hand is too thin (means it can’t push the ratchet around enough) so the chamber isn’t quite aligned and the cylinder hasn’t turned far enough to allow the cylinder stop to snick into the notch. Oopsie.
If you clear your revolver then very slowly and carefully pull the trigger in DA mode, you can hear two distinct clicks (or at least you should). The first is the cylinder stop clicking against the cylinder as it’s released by the sear cam on the trigger as the cylinder turns. The second is the “click” as the stop slips back home into the next notch on the cylinder. That should occur just before the DA sear releases the hammer to fire. If your gun is “out of time” you’ll likely hear that second click — but the stop hasn’t seated into the next notch. If you then gently rotate the cylinder counter-clockwise, you may get it to turn a tiny bit and you’ll hear the stop “click” home. The hand hasn’t pushed the cylinder far enough “around” to align the next notch with the stop. S&W calls this “Carry Up” but most of us call it “timing.”
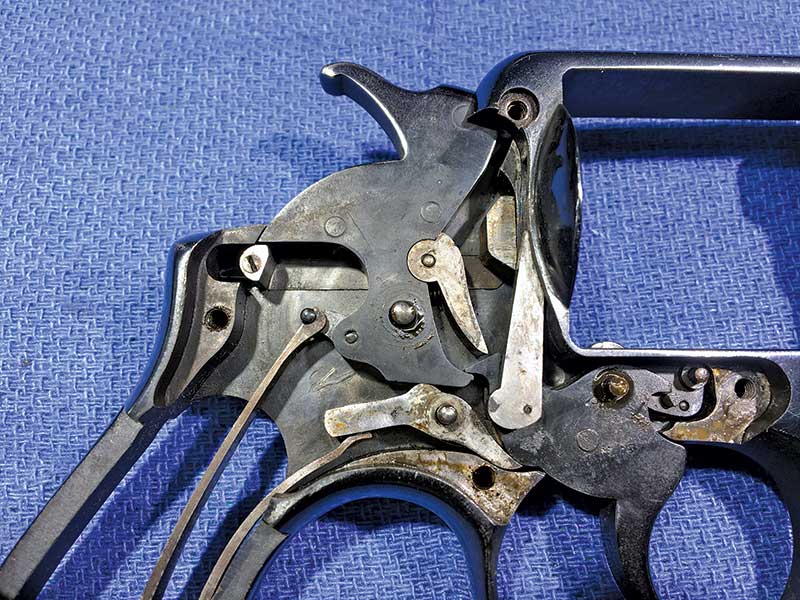
This 120 year old S&W Hand Ejector uses a “hand” and “stop” too, but the mechanics then
were considerably different from a modern revolver. Roy was able to get this one “back in time”
with some creative gunsmithing since there are no parts available.
Fix It?
It takes a bit of talent to fix timing, and almost always a new “hand.” A thicker hand will push the ratchet cog further around. Some people peen the cog which is coming up short, pushing metal toward the hand. But that takes real talent, trust me. If a revolver is only slightly out of time, shooting it normally in DA mode will allow the cylinder mass to “Carry Up” correctly, turning that last few thousandths using inertia. But it will continue to wear, so getting it fixed is best. If you cock the hammer the same series of events occur and indeed, things should time correctly both ways if the gun is timed right.
Sure, there’s YouTube videos on how to fix “Carry Up” but remember there’s also some rubes out there who are advising you to do wrong things. Midway has a great series of gunsmithing videos on YouTube and there’s one on replacing a worn S&W hand with a few one and fitting it. But don’t just grab your wrench, files and grinder and go to work. This is something done in “thousandths” of an inch so unless you’re comfy there, let a pro do it.
Chances are good, too, if you’ve read this far, you’d enjoy our DIY Guns special edition book. It’s chock full of “how-to” gunsmithing tips and tricks. Find it online at fmgpublications.com or on Amazon.com. I promise you’ll enjoy it.
If you’d like me to write more on this sort of thing, drop us a note at [email protected].