Pistolsmithing:
Carry Revolver Revival
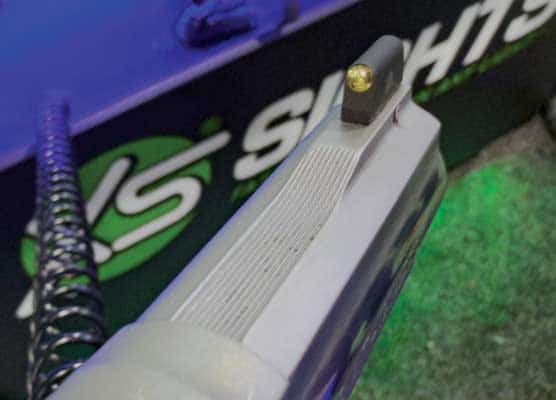
The S&W Model 60 is finished in matte hard chrome with Turkish walnut grips
by KSD and nitre blue accents. The XS sight is large and easy to see, plus the
shape makes for a smooth draw from the pocket or holster.
With difficult times come difficult choices. Many gun owners who might never have carried a gun are turning to everyday carry for self-protection. This has resulted in a resurgence of the small revolver. Revolvers are the perfect carry gun for those who want a small and easy-to-use firearm, particularly for people not experienced with semi-autos. Revolvers are simple and reliable. Some custom gunsmithing can make them even more user-friendly and comfortable.
It’s a good idea to photograph all the parts going out for plating.
It provides the gunsmith and the coating service an inventory.
J-Frame Carry-izing
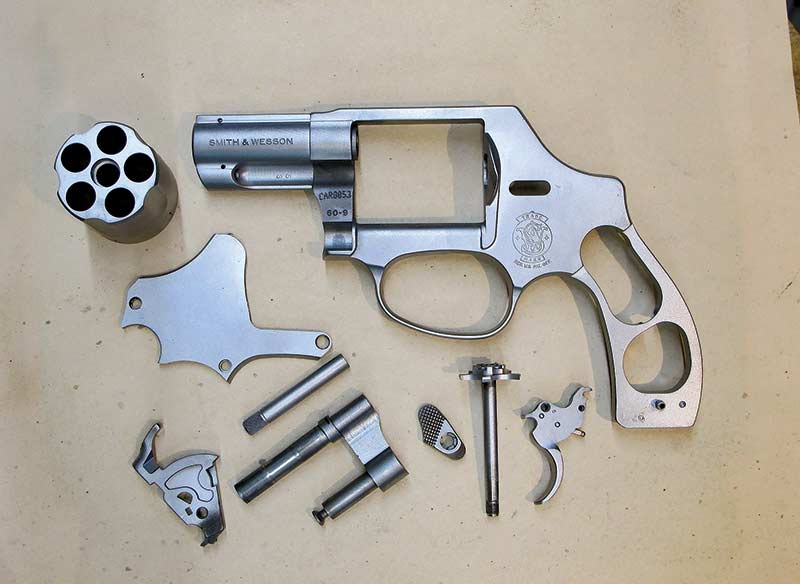
Small and light S&W J-Frames are perfect for everyday carry. Frames come in both steel and aluminum, exposed and hammerless versions. Recently I started to customize a pair of S&W Model 60s. Both are 2″ versions with fixed trench-style rear sights. The exposed hammers make it easy to thumb cock but offer a snagging point if carried in your pocket, so they will be modified and dehorned.
My job was to smooth out both for pocket carry and add a little bit of character. Both are stainless steel, which the clients wanted to keep. I think of carry guns as both a tool and a fashion statement. Even though the owner may be the only one to see it, it can still be attractive to look at and a piece he is proud to wear.
Inspection and disassembly are the first steps. Both guns are relatively new or hardly used, so there were no structural defects or wear. Disassembly of the mechanicals was straightforward for both. I used a Brownells action wrench to remove the barrels. The wrench, which has various inserts for many guns, allows you to remove the barrel without damaging the frame or yoke area.
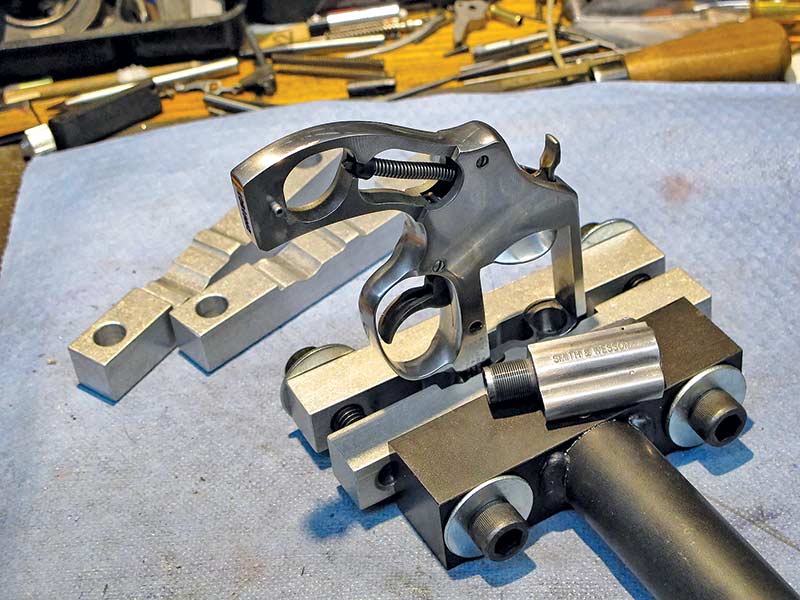
The Brownells’ large action wrench supports the frame so the barrel can be removed.
They don’t make an S&W J-Frame jig, but the K-Frame works as a substitute.
Shop Work
The machine work involved recessing the barrel crowns and contouring the front of the barrels with large chamfers to reduce sharp corners. The cylinders will be beveled on the front end and chamber chamfers for easy reloading on the rear end of the cylinders.
New larger sights will make it easier for the owners to get on target. I bobbed the hammers, removing about a quarter inch from the spur with a bench grinder rounding the cut end on the grinder with a Scotch Brite wheel. One of the pair will be converted to hammerless.
For the barrel crowns, I chucked them in my lathe with a “spider” fixture. The spider is a tube with four brass tipped bolts at the 12, 3, 6 and 9 o’clock positions front and rear for a total of eight points. This allows me to spin the barrel concentrically to the bore for a perfectly centered crown. I cut the crown deep at 35 degrees; this will protect the barrel rifling from any dings or dents. I also cut the nose of the barrel lug, taking it from square to about 45 degrees to reduce sharp corners. The front of the cylinder from the factory was square; that edge was broken in the lathe to a snag point.
Next up was the front sight. I prefer a large, easy-to-see front sight. “Follow the front sight” is all you should think about in a critical moment. XS Sights makes some huge white dot sights with a tritium option if needed. The sights come with a no cross-pin hole, so a #53 hole, not 1/16th, was drilled through the new sight. I reused the factory cross pin. The action work was pretty standard, smoothing out the internals and polishing a few parts. S&W triggers are very good right out of the box.

The top barrel has been deep crowned in a lathe to 35 degrees.
Final Touches
I’m not a stainless fan. That’s not to say I don’t like silver tones. In my shop, silver guns are hard chromed. I prefer hard chrome for two reasons. First, it is very durable and resistant to scratching. Second, stainless does oxidize, so some parts oxidize to different shades, making some guns look unsightly. I know it’s a little thing, but I want all the parts to look related. This gun was matte finished with aluminum oxide beads of 120-grit in my blasting cabinet. Next, it was off to plating for hard chrome. To add a little visual interest, I nitre blued the few visible screws and pins. The factory grips were replaced with some checkered Turkish walnut by KSD grips, which I finished in four coats of Minwax tung oil. Ready for carry!
For more info: KSDGripsUSA.com, Brownells.com, XSSights.com, Smith-Wesson.com
Subscribe To American Handgunner

Get More Revolver Content Every Week!
Sign up for the Wheelgun Wednesday newsletter here: