Metal Checkering Made Easy (ER)!
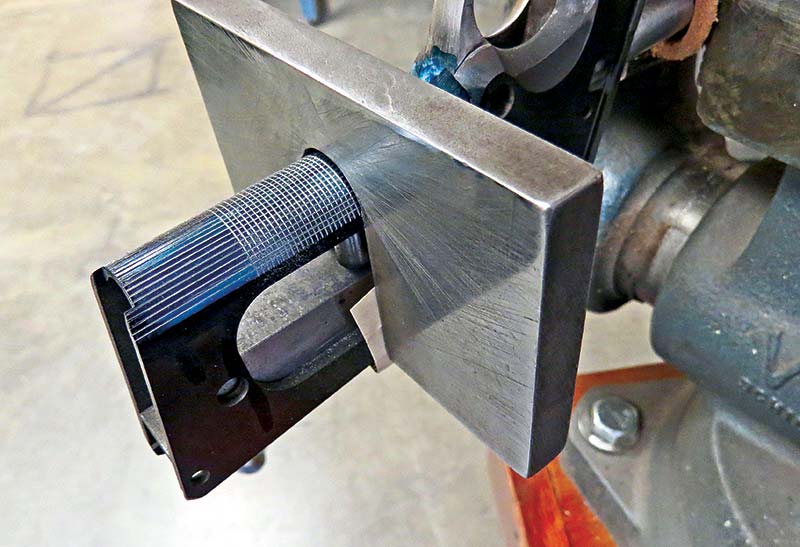
A checkering guide(available from Brownells) keeps things square, but
still takes time to learn and understand how it works. Practice on 3/4" round
stock first!
Lots of things will keep most from trying checkering. But regardless of what you may have heard, it’s not an impossible task. It’s a job I’ve taught quite a few practicing gunsmiths and dedicated hobbyists. Some have excelled, some have done pretty darn well, but no one who follows the “rules” has just plain outright stunk at it. And those rules are fairly simple.
You simply can’t do good work with bad tools. I use Grobet files, sold by Brownell’s. A checkering guide is also mandatory. For the 1911 I like the DC tool, also from Brownells. Every other tool I use can be made easily, or is likely already part of every hobbyists tool set. You’ll also need a half-round file, and a set of needle files for clean-up. A good bench vise, set at the proper height is a must.
Next, find a good place, comfortable and well lit, but not so bright you get glare from your work. Your work should rest at a height equaling the height of your forearm, held parallel to the floor while you are standing.
Do yourself a favor here, and buy a length of 3/4″ steel round to practice technique on before you cut on a gun. You will not regret this.
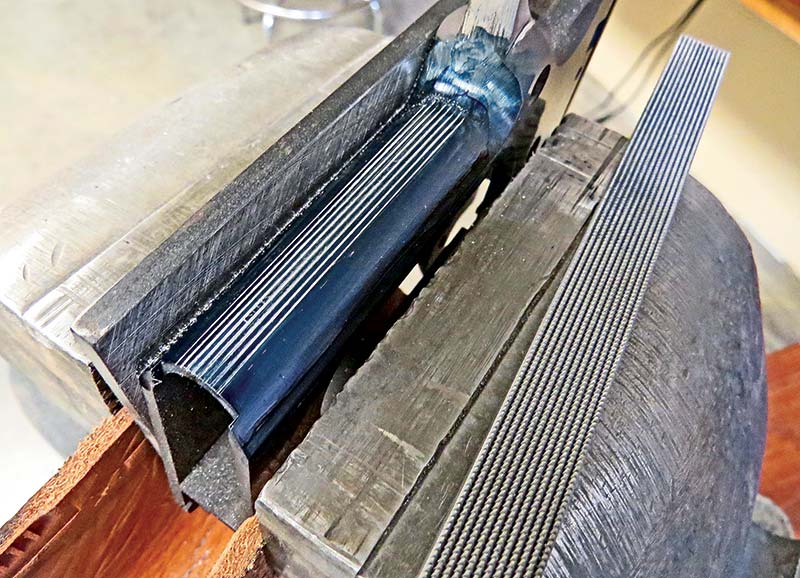
A good checkering file, patience and the right attitude and body stance can open the door to this black-art of the custom pistolsmith.
The Rules
Body mechanics are the most important factor in running a file straight. Your arm should pivot at the shoulder and elbow while your wrist and hand remain straight, in line with the bones in your forearm. You do not need a death grip on the file — it only fatigues your hands. I don’t recommend handles on checkering files because they force you to turn your wrist. Rather, smooth the tang of the file, or better yet slip a piece of 1/4″ aquarium tubing over the tang, leaving about 1/4″ extra on the end. It helps cushion the tang if the file grabs suddenly.
The most ignored part of this rule is you cannot checker while sitting down. It’s about running a file straight, not comfort. When you sit, your arm wants to arc around your body, rather than running in a straight line. Almost every checkering job I’ve ever screwed-up was because I got lazy and sat down.
Rushing a job brings risk — be patient. You try and cut faster if hurrying by putting more pressure on the file. You grip tighter, so your hands fatigue quickly and your file wears faster. You tend to drive the file, rather than just letting it cut while you guide it. This is how lines get crossed. As you use your guide to start your lines, bear in mind you’re going to have to cross those lines with the same file. Best to start with lines deep enough to track reliably with the file, but not so deep crossing them causes the file to chatter or grab. Remember, before removing your guides make sure the file will track in the grooves already cut. It’s nearly impossible to re-install a guide that’s been removed prematurely and have the lines match up perfectly.
Be aware — big picture, small frame sort of thinking here. Be thinking about keeping edges consistent, keeping your advancing overlaps small (usually only one or two lines at a time), and running the file flat so one edge doesn’t cut a deep line. Watching these things carefully as you work will save you from the tedious job of “going back over” everything to try and even things up after all your lines have been cut to full depth. Clean up the area of your high-cut frequently so you’re not trying to push the file through extra material at the top.
Tips And Techniques
The “flatter” your front strap is the easier it is to checker. Level out any low spots before beginning, and you’ll be able to track your lines more easily, and you won’t end up with an area of flat-topped diamonds in the middle of your pattern. Checkering is one activity where you have to run the file backward through the lines you’re cutting. That doesn’t mean you keep full pressure on the file. Just let it glide back with just enough pressure to keep it from hopping out of the groove. I use two fingers of my left hand on the front of the file to maintain pressure.
You may have to dress the edges of your file so you have a complete “V” on a left and right edge. Some files have a partial line on the edge making a clean border impossible.
As a straightedge to protect my checkering when I clean up under the trigger guard, I use a single edge razor blade running in the top groove as a fence to file against. It keeps the top row of diamonds clean and sharp. For final cleanup, I use a strip of emery cloth.