A DIY You Can
Actually Do Yourself
Made Possible By The XS DIY Sight Pusher
I’m serious about DIY endeavors. By that, I mean I like to embark on new do-it-yourself projects, regardless of whether I have the first lick of knowledge about the task at hand. That’s what learning is for. The point is, why be scared of learning a new skill? You. Can. Do. This.
Half the battle of successful DIY is using the right tools. Sure, the experts at hanging drywall, repairing cars, or performing gunsmithing operations have knowledge and experience, but at least part of their seemingly effortless success is due to their use of professional-grade tools optimized for the job. The proper tool not only makes any job easier but also facilitates quality work. As Doc Dabbs would say, the right tool dramatically lowers the risk of “bodging up” expensive guns and parts.
Sight Upgrades
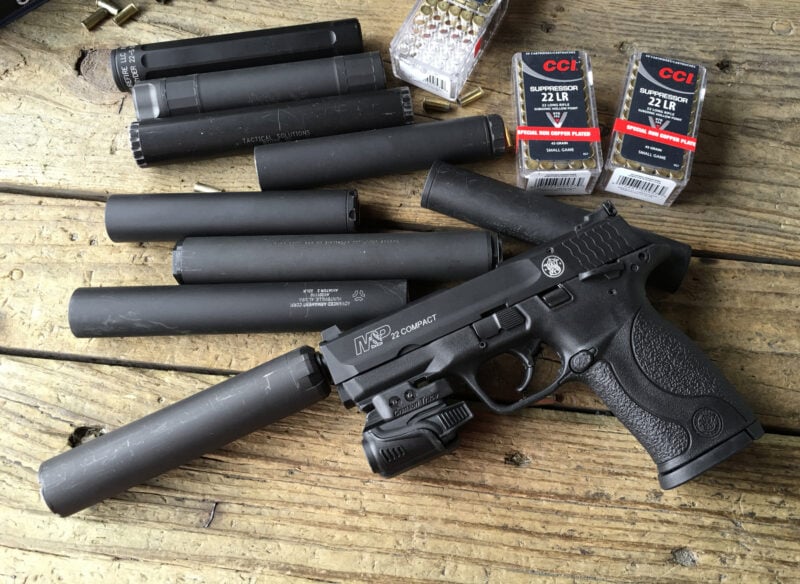
One of the most impactful, yet least risky and intimidating, upgrades you can do to a pistol is replacing the sights. With a little patience and care, you can swap out the often-budget factory sights with top-of-the-line night sights, offering new capabilities and, in the case of plastic factory-supplied sights, improved durability. If you follow the instructions, use the right tools, and take your time, you’re not likely to damage or mar your expensive firearm.
Tom used this aftermarket GLOCK-compatible slide with the DIY Sight Pusher, and it fit just fine.
The infinitely-adjustable wedge handles any variation in exterior slide width.
New from XS Sights
I’ve been a fan of XS Sights for many years. The company has proven its commitment to what I’d call “sight science” by creating innovative designs aimed at helping shooters put shots on target faster. The classic Big Dot is a case in point. If you want to go with the more traditional notch and post approach, the XS R3D sights fit the bill.
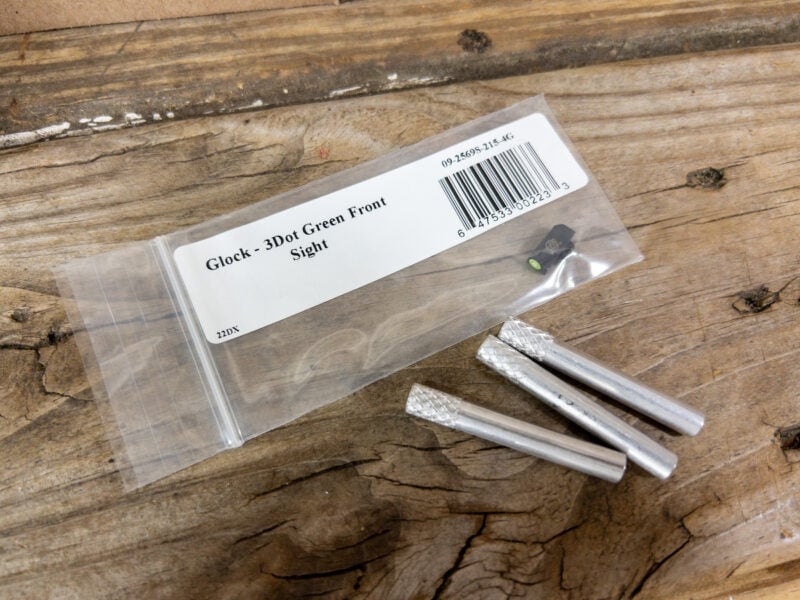
New from XS is the R3D 2.0 line. Boasting even brighter power in the dark thanks to more powerful Tritium lamps, the sights are optimized not only for dark conditions but transitional environments too. Think about walking from daylight into a building or from a lit garage into a darker home. The new R3Ds surround the Tritium vial on the front sight with either orange or green photoluminescent paint that glows from ambient light power. This gives you vital clarity in the “in-between” light and dark environments. They’re also highly visible in bright daylight conditions, so you have all the bases covered.
The rear sight is blacked out for “lighted” condition use, containing serrations to help negate glare. There are Tritium lamps on either side of the generous rear notch to aid sighting in dark conditions.
Speaking of the generous rear notch, that’s just one example of how XS uses “sight science” to make your hand-eye coordination faster. More light on either side of the front post means the eye picks up the sight picture faster. If you look carefully, you’ll also notice the bottom corners of the rear sight “U” notch are rounded. That’s another visual trick to help direct your focus to the top corners of the rear notch, saving time and increasing precision.
Home Installation
The other big change to the R3D line is how they are designed for DIY installation. The dovetail sights include a couple of features designed to make installation easier and less error prone.
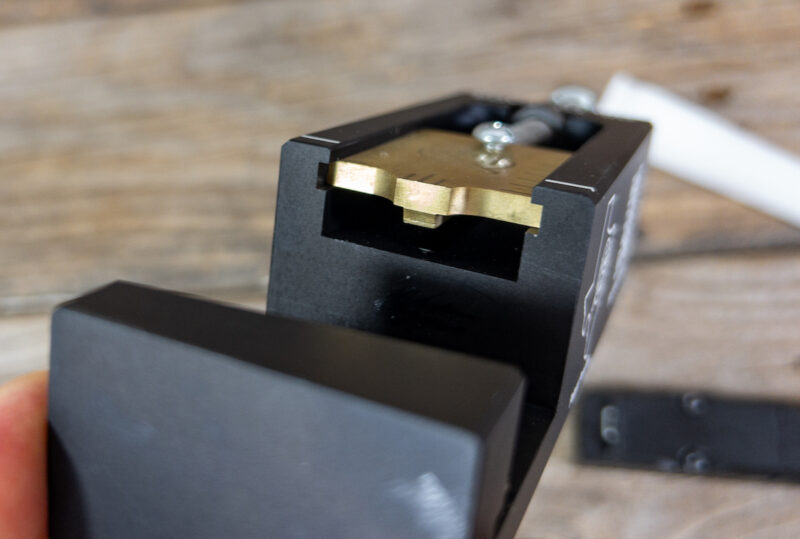
The sight base is machined to help you to insert it about one-third of the way into the slide dovetail before you encounter serious pressure. Once you reach that point, another nifty feature takes over. A crush zone cut is machined into the bottom of the sight itself, so as you apply pressure via sight pusher or punch, the metal is pushed into that crush groove, creating space for the sight to fit into the slide’s dovetail. This same action creates a spring-like effect, so the sight body pushes outward against the slide’s dovetail cut, helping keep the sight in place over the long haul.
The end result of all this clever engineering is that you no longer (or at least rarely) need to file and home the sight base to fit it to your particular pistol’s dovetail cut. That eliminates all the toughest parts of a sight installation job.
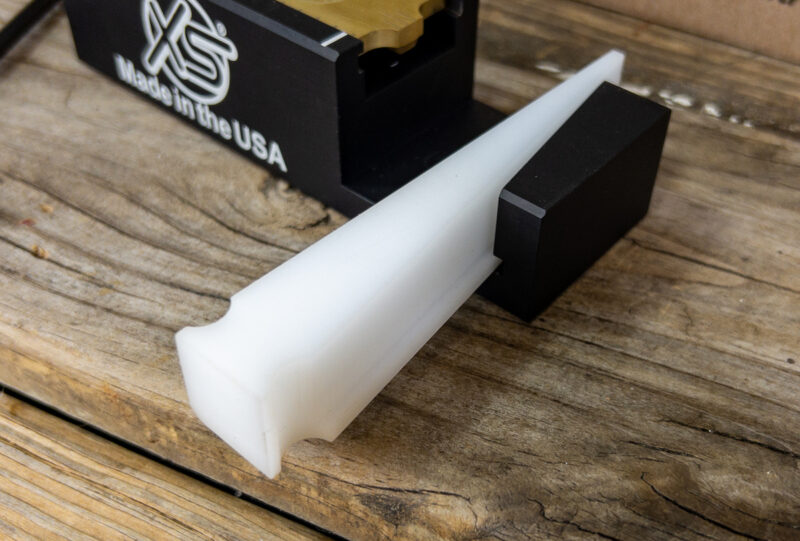
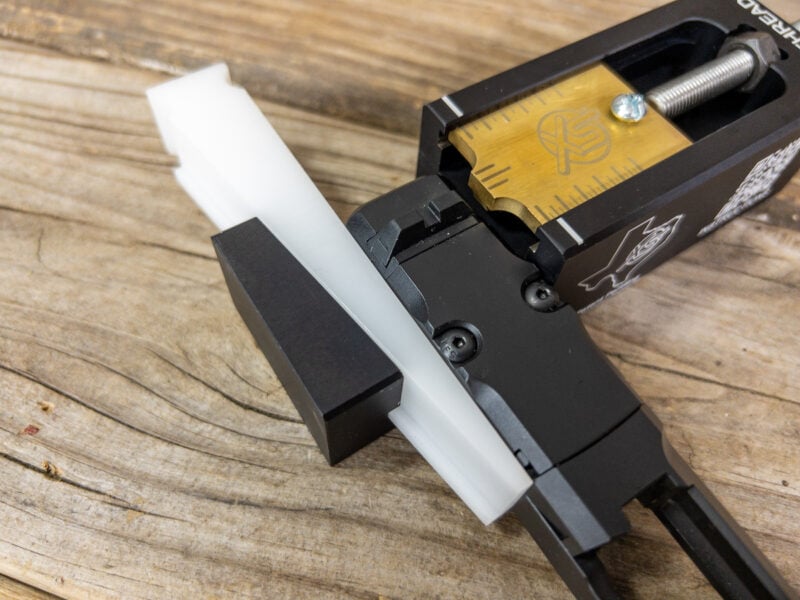
Note the “ledge” at the bottom of the polymer wedge. This keeps everything aligned and stable.
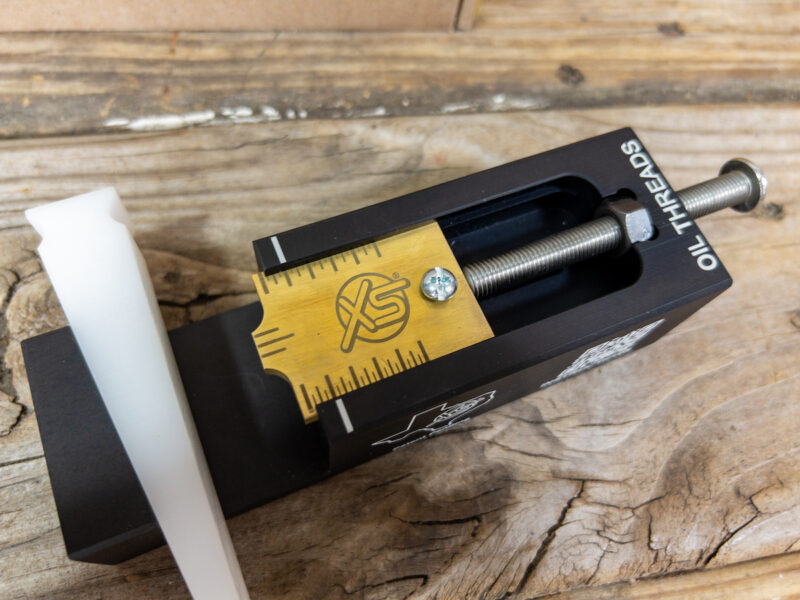
The slide pusher itself is calibrated visually and by documented thread count to make predictable adjustments.
Enter: The Right Tool
Until now, upgrading sights meant breaking out the hammer and punches unless you happen to be equipped with a multi-hundred-dollar sight pusher. Sure, gunsmiths have them, but most of us might do a sight replacement on one or two guns, so buying all that is simply not economical.
The folks at XS have made this easy DIY project more approachable and more affordable by combining upgraded sights with the tools you need to swap out GLOCK sights the right way.
The DIY Series Bundle for GLOCKs contains not only the R3D 2.0 sights you’ll need but the front sight tool and rear sight pusher, all for a very attractive price — about $175.
The DIY kit includes these separate front-sight tools. The GUNSMITH-series includes a heavier-duty steel version.
DIY Series Inline Sight Pusher
This version of the bundled sight pusher (there is a more expensive Gunsmith model, too) is designed and priced for the home DIY user.
For GLOCKs, the pusher is designed to remove the factory rear sight and install the new rear R3D 2.0 front sight, as the front sight on GLOCKs are installed with a small screw. The kit includes the “wrench” to remove and replace the front sight too.
What’s particularly nifty about this tool is how it’s designed for simplicity and risk protection. The system uses a large polymer wedge that performs two functions. As a wedge, it’s infinitely adjustable for width, so the pusher fits any GLOCK slide with no adjustments required. Just set the slide in place and insert the wedge until snug. The wedge is also the “backstop” when applying pressure to the sight with the brass pusher, so protection against scratching is built in.
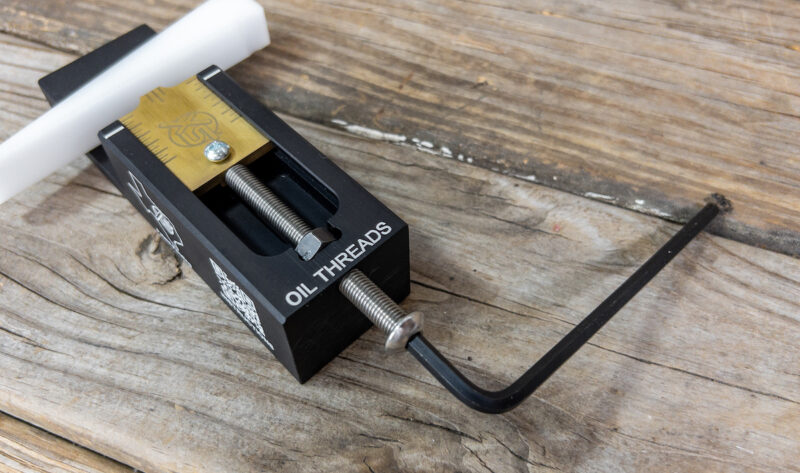
Use the 4" Allen key to apply torque.
The sight pusher body is designed to ride over the slide without touching the side.
The lower ledge contacts the sight base for maximum force.
Once the slide is in place against the wedge, just use the included Allen key to rotate the pusher bolt and the brass surface exerts constant force on the sight base until the sight is positioned. That brass pusher is also visibly calibrated in 1/16″ increments, so you can use some match to help get your zero and point of impact right on the nose. The pusher bolt is also calibrated, so precisely one and a half turns will get you a 1/16″ movement too.
Rounding out the process, once you get your sight centered and zeroed (the pusher is small and easy to take to the range), just apply some of the included thread locker to prevent future movement, and you’re done.
The system couldn’t be easier, and the bundle price point makes it economical too. You’ll likely pay more and have to wait should you elect to hire a gunsmith to do the same job.
For more information on the XS DIY Series Bundle, visit XSSights.com.